African Blackwood Classical Guitar
June 28th 2013
I have not posted in a bit as I have had a hectic schedule having to travel to Beijing to give a talk. But any way in the mean time, I did install the binding and the purflings, not without a few issues. Live and learn ...
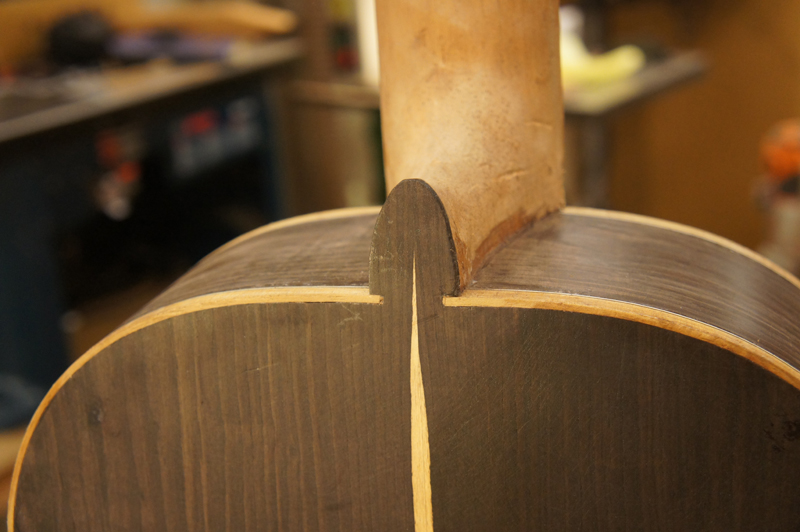
Working with a classical built with a Spanish neck requires that the area around the neck has to be done by hand with knifes and chisels. I did OK, with the sap wood strip up the center of the back I did not want to cut the binding channel where the back wood became the heal cap. Rather I cut it in a bit much like a violin back. To accomplish this I drew out the cut I wanted with a scalpel and treated it a bit like an inlay using a mini mill grinder. The tip on the bit only allowed me to go 1/16 inch or so deep but I was able to get the start on the channels I wanted and used a 2mm chisel for the remainder. Normally I would use a razor saw and just cut across to open the channel. On the top I just used a scalpel and a 2mm chisel to cut the channel under the fret board.
The two real problems I had:
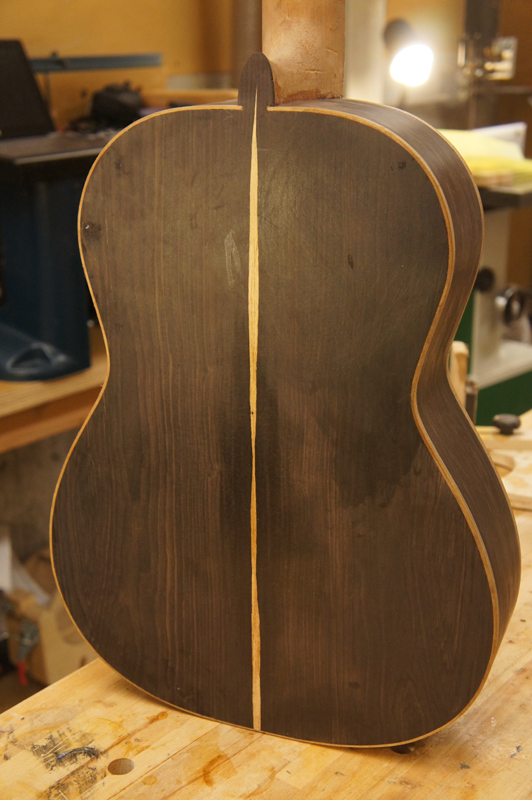
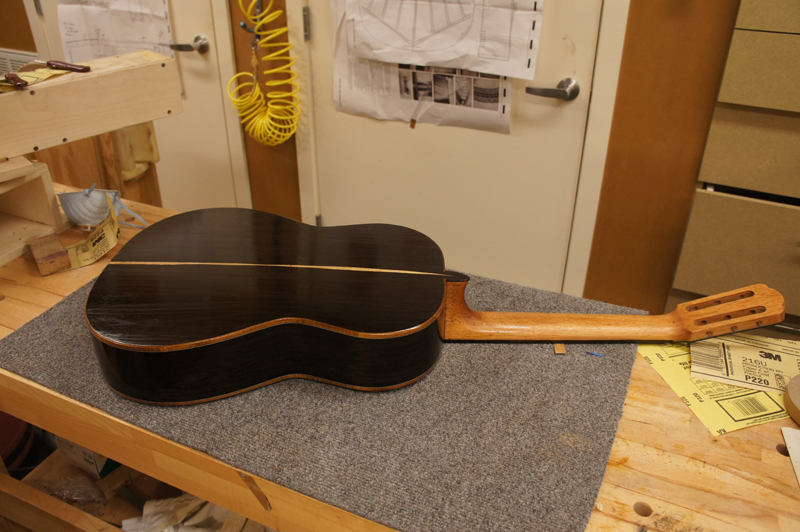
When routing the back I was a little loose where I started a cut and tore out a hunk of back almost to the end of the kerfed linings. I cleaned up the tearout and carved a matching patch from a cutoff that was right next to the tear out ( save those cut offs) See if you can find it. Once you see it, it does not go away, it does not look too bad.
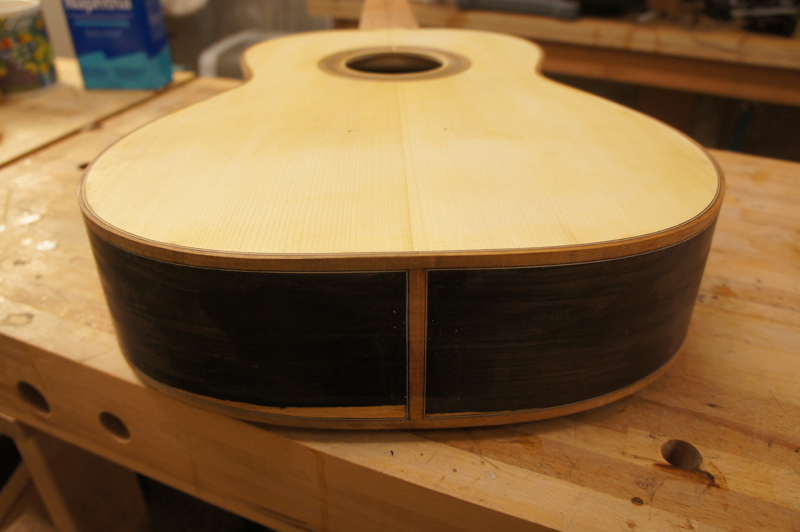
The other is I decided that a lining installed on the back was too dark and not a match for its neighbor. This was the only binding on the guitar so I removed the it. Unfortunately I goofed up the miter on the end strip. I was trying to patch a bit of the purfling when I decided to chisel out more of the binding to make a bigger patch when it dawned on me that it was just as easy to remove the whole binding. I have a 1mm chisel that I made out of a 2mm chisel. After using a scalpel to separate the binding from the rims it was easy to just chisel out the binding cleanly and install a new one.
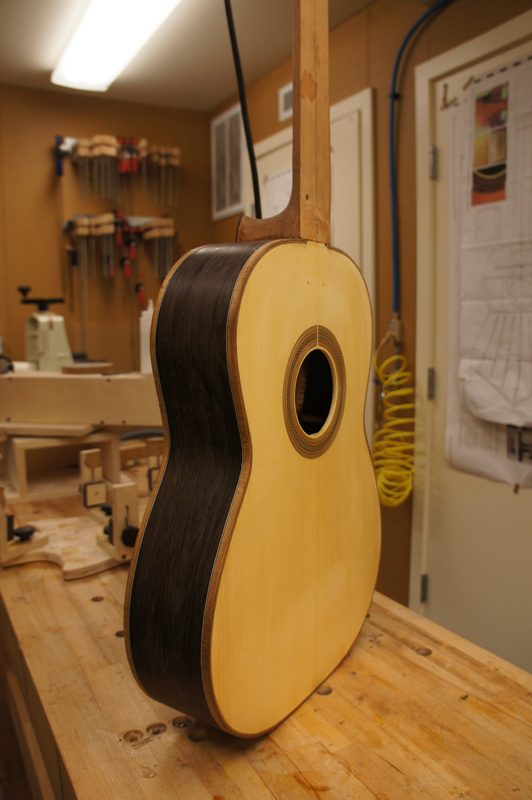
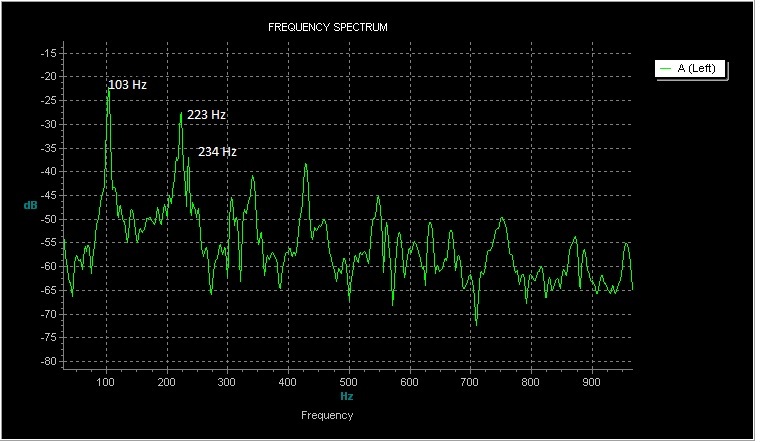
Give that this is a classical I took the time to use a spectrum analyzer to get the resonance frequencies close before I routed the binding. Now they are high but with the bridge glued on the first resonance should drop to about 100 and the main resonance should be about 102 Hz. That is my target anyway. I also have mapped the entire top with a magic-probe.
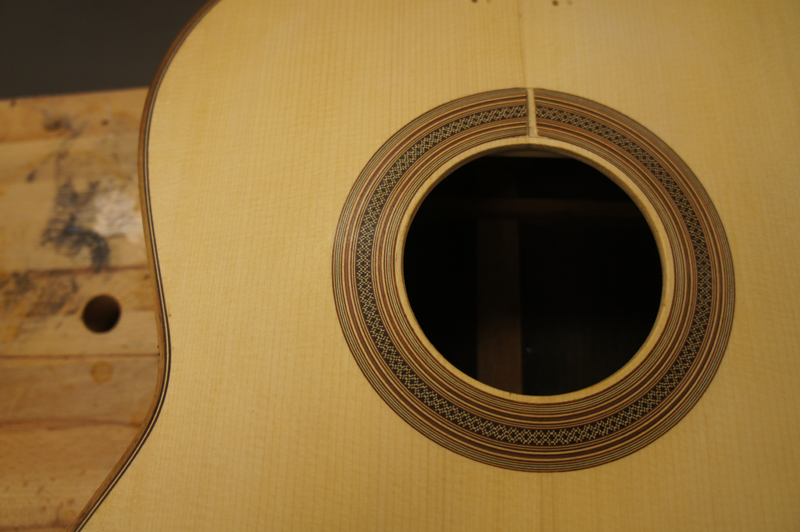
The bindings are Australian Blackwood with bwb side purflings. I have a brown white brown purfling for the top to match the rosette.

On to finishing the neck and fret board!
July 3rd 2013
I am finally in final prep sanding of this classical guitar. This is my 11th instrument; you would think I could glue on a fret board. Yikes! I prepared the fret board for gluing planning it to the correct thickness . This meant planeing my 8mm board to between 6 and 5 mm. I made a caul out of 3/4 plywood and test clamped the fret board all looked great. I put a thin layer of LMI instrument glue and clamped the fret board with a whole lot of cam clamps against a full size caul. I came back 15 minutes later to do clean up and found that the fret board had wrapped so much that the edges were actually lifted a touch against the caul and the clamps. Yikes.
I used a repair heat blanket I have to remove the fret boards. It was very warped. I used the same blanket and caul and clamps to heat and flatten the fret board. I cycled the heat about three times over a couple of days and ended up with a flat fret board again. To avoid warping it again I used structural epoxy to glue on the fret board.
So today I started clean up work. I am crossing my fingers still waiting for the first dent or scratch in the top. I am about at the point where I can cover the top through the zpoxy pore fill.


July 4th 2013
I am getting better fixing things. I get lots of practice.
Here is the first coat of z-poxy. I tried something different this time. Before doing the back and sides I ran a clean line of z-poxy on all of the light would and the side purflings. The rosewood gives off a lot of color.
Next Page
| 