While locked up in social distancing I have been working on a commission. This will be a Martin-style 00, 12 fret, short scale guitar with X-bracing. It has been a while since I’ve built an X-braced guitar, but for the playing style and what this client is looking for, giving him a Martin-sounding guitar is the right choice.
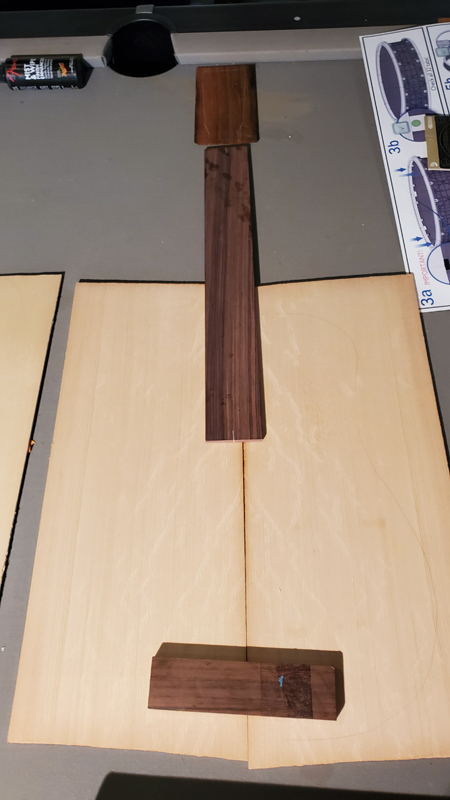
Going back and forth a bit, I assembled a kit from which to build. Some really figured and flamed Hawaiian Koa — I felt guilty about this set, as it was an auction item at the Seattle Luthiers Group auction that went way below cost. I tried to up my own bid. Bear Claw Sitka Spruce for the top.
I found some Amboyna Burl at the woodworking store for the headstock veneer and rosette. The rosette plan is to reflect a bit of what Martin does with three separated rings.
I measured the Young’s modulus of the top and back, and calculated the target thicknesses using the Gore/Gilet methodology. The Koa came in at a nice density and stiffness — should make for an active back.
Just a little more progress. I joined the back and the sides and am ready to start the rosette. My plan is three separated rings reflecting the Martin tradition — the inside and outside rings will be black-white-white-black where the white is maple. The centre ring will be a wood ring with thin black purfling lines on each side.
Sorry it has been a while. I have been distracted with COVID-19 — when I’m on a computer I am obsessed with looking at news stories and I never get to posting. I have made a lot of progress though.
I bent the sides in my Fox-style bender. The cutaway required careful work — the Koa is dense but takes the heat well. I use my side mould to hold everything in shape while the kerfed linings are installed.
I leveled the back kerfed linings in the 15-foot radius dish and spent a bit of time getting the top’s profile correct with a combination of a 32-foot radius dish and a flat dish. I use the radius dish mostly on the lower bout and the flat dish mostly on the upper bout. I want the body to have close to the correct neck angle before gluing on the linings.
To brace the top I made a bunch of 5/16″ brace stock. I wanted it all to start at 5/8″ tall, so I pulled out my new bandsaw guide and ripped a 1mm strip off the brace wood, then cleaned up in the belt sander. I cut the X-brace legs to size and marked out a 30-foot radius on the bottom, then planed them to shape.
The X-brace joint is the heart of the Martin bracing pattern. Getting a tight fit at the intersection is critical — any gap here means the braces aren’t working together.
With the main X in place, the finger braces and tone bars go on. I’m keeping the bracing a bit lighter than a standard Martin — this is a short-scale 00 and I want it responsive.
With the top braced I moved on to the back. Before bracing the back I need to prepare some bracing stock. I rip some brace wood in my bandsaw slightly oversized, sand to size on my thickness sander, then use my router table and a 17.5-degree bevel bit with a guide bearing to put a gabled shape on the top of the braces. I made a special jig just for this operation.
I finished closing the box this morning. The past couple of weeks I have been playing with two aspects. Before gluing on the top I tuned the top braces — with the braces glued on and scalloped, the top was way too stiff. So I trimmed the braces, mostly around scallops, until the top had a pretty good tap tone.
Top Voicing I followed guidelines from a top-voicing class on DVD from Chris Everett. He does a lot by feel and sound. I relied on his suggestions for deflection under load and supplemented with frequency measurements. Still stiff, but not trusting my ears with a free plate, I glued it to the rims and continued tuning — keeping track of the top’s deflection under a 5lb load and the tap frequency with both an open back and with the back taped on.
I have been making a bit of progress, even with all the isolation time I am not killing myself in the shop. I put in the sound port — this step always makes me nervous, but it went well. In the pictures you’ll notice a series of ovals of slightly larger sizes: if I muck up the first I just move on to the second, ending up with a slightly larger sound port. I managed to make it the size I wanted on the first try.
Sound Port Safety NetCutting concentric oval templates in increasing sizes is good insurance. If the router slips or the first cut isn’t clean, you just move to the next size up. Nobody will notice a slightly larger sound port, but everyone will notice a botched one.
The body still needs to be bound but I decided to finish the neck first. Curious about how well I got the neck angle, I double-taped the bridge on and checked — just like downtown! A pretty clean fit. For the bolt-on neck I only use a STI-225 brass self-tapping insert.
I finished tapering the fretboard. I moved away from calipers for laying out the neck — I always ended up 0.25–0.5mm off using two separate measurements. Now I use a centering ruler from StewMac that eliminates cumulative errors.
Before gluing on the fretboard I did another pass at all of the neck angles — it’s a pain to change with the fretboard glued on. The neck angle was great but the neck was tilted just a bit toward the bass side. With a squared-off heel it is really easy to change with a plane on the heel cheeks.
TipWhen planing the heel cheeks, it’s easy to blow out the edge of the tenon. Take light passes and work from the outside in.
I got the bindings and purflings installed. Nothing fancy — Ebano Rocklite bindings with two BWB purfling strips where the white is maple. I bent the normal side in my Fox-style bender and bent the cutaway side by hand on a bending iron. Rocklite bends like butter completely dry with the bending iron at eleven — Nigel would approve.
Peter asked about dealing with a tapered headstock and 3×3 tuners. My headstock is actually flat at 15mm — the lighting in the pictures gives the illusion of a taper. With a tapered headstock, the holes would be square to the back and the posts would exit at a slight angle.
Usually I am OK with visual lines in wood as they reflect wood as a natural product. However, as I was starting to clean up the neck I could not get past a visual flaw in the Spanish Cedar. It looks like a crack but it isn’t — a shaving from that area did not separate. Still, I could not get over it, so I made a new neck out of some really nice flamed Mahogany that I had.
I am in the final construction steps for this guitar. I drilled out the tuner holes, using the pilot holes from my template. I finished shaping the neck and headstock, installed the frets, and started finish prep.
The Bear Claw figure in the Sitka top is really showing now. Bear Claw is caused by indentations in the growing tree — it creates a cross-hatched figure that catches the light beautifully.
Herman commented on how the Koa shines — it really is an especially nice set. I bought it cheap at a luthiers’ auction after most had spent their money. I felt so guilty that I tried to up my own bid.
I have strung up the guitar. I did a good job masking the bridge area. To remove the tape I put the bridge in place with the index pins, scored the finish around the bridge with a scalpel, and lifted the tape from the centre. A touch of clean-up with a chisel, level-sanded the finish around the bridge, and glued it on with my vacuum clamp.
I use my Luthiers Friend thickness sander to take the nut blank to a tight fit, leaving it tight enough that I can clean the bone with some 400-grit sandpaper. For the nut layout I use a jig from GMC Luthiers Tools — it’s really cool, using two templates to first shape the nut for height and then set the slot depths.
It sounds like a guitar! I have it hanging and will fine-tune the setup in a day or two.
Specifications
StyleMartin 00 — 12 Fret, Short Scale, Cutaway
BracingX-Brace (Martin Pattern)
TopBear Claw Sitka Spruce
Back & SidesFigured Hawaiian Koa
NeckFlamed Mahogany — Bolt-On / Bolt-Off
FretboardEbony
BindingsEbano Rocklite
BridgeEbony — Pyramid Style
Headstock VeneerAmboyna Burl
RosetteAmboyna Burl Centre Ring · BWB Purfling
FeaturesSound Port · Cutaway
Build PeriodApril – July 2020