FingerboardFretless Rosewood — black fiber fret lines
PickupLR Baggs Element Active
Build PeriodJanuary – May 2012
January 22nd, 2012
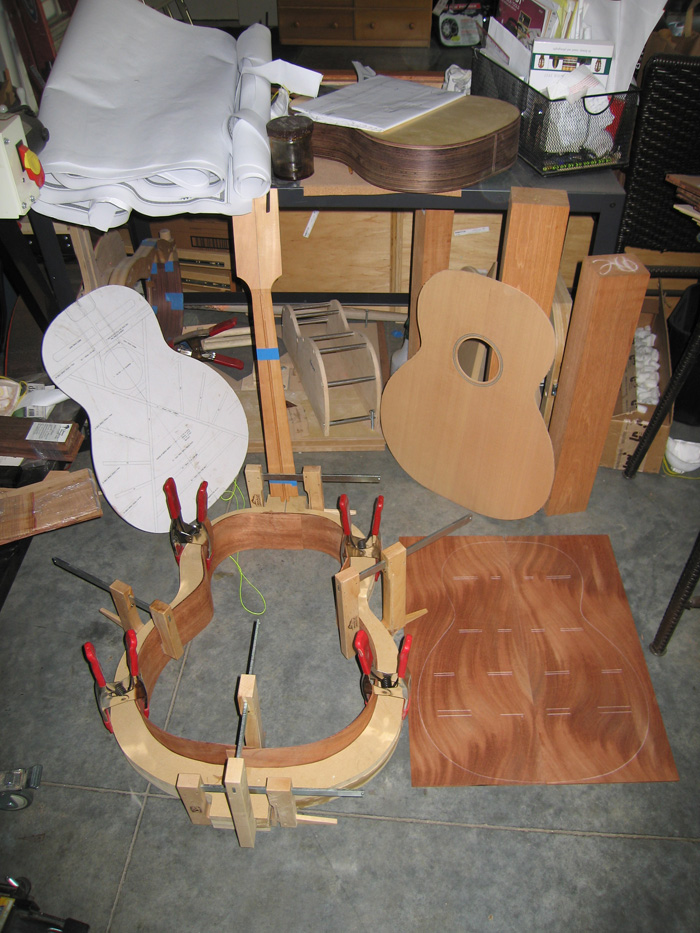
With my brother's parlor guitar going into the finishing room I pulled out my Mark Stanley acoustic bass guitar kit that I bought back in August. I bought a kit because this isn't a size guitar I'll probably build again — and it lets me avoid building a large bending form.
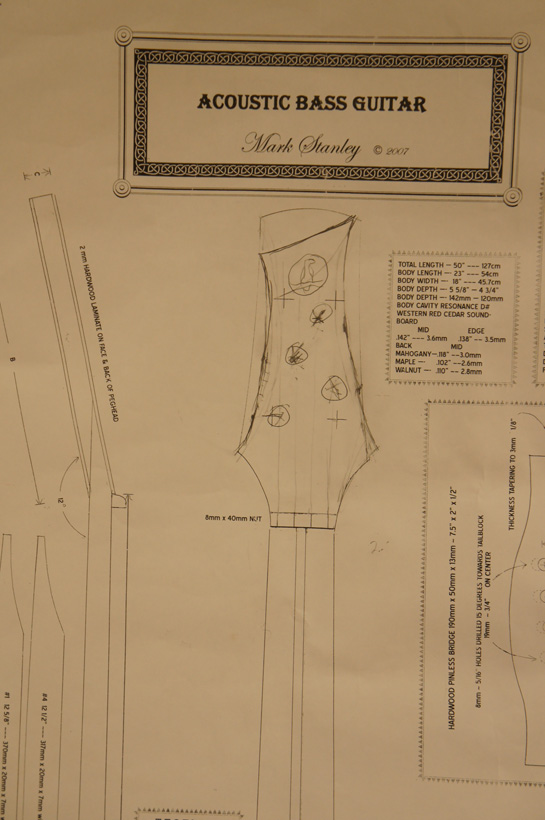
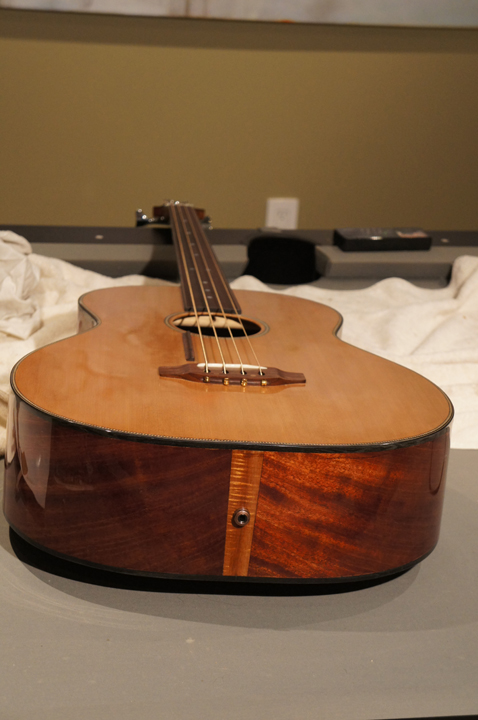
The guitar will have a Red Cedar top, Mahogany back and sides, and a fretless Rosewood fingerboard with black fiber glued into the fret slots of a slotted fingerboard, plus ebony bindings. It will also have some interesting features to work through: this guitar is supposed to have a pretty good unamplified sound, but it's still a bass, so I'll add both an acoustic pickup and an internal microphone plus an internal mixer. I'm going to build an access port next to the end block for a battery mount and electronics access.
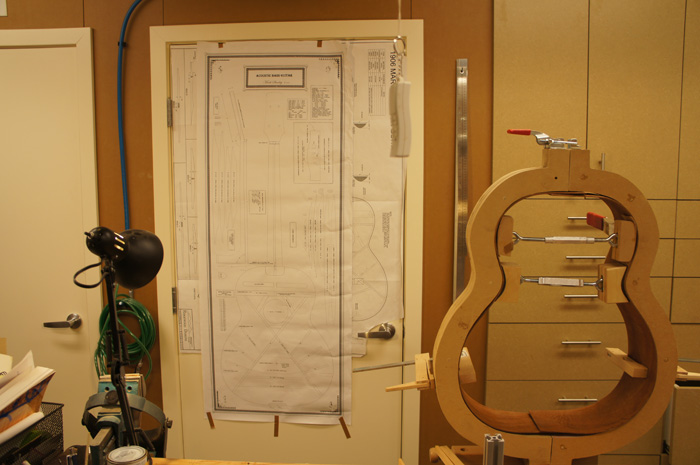
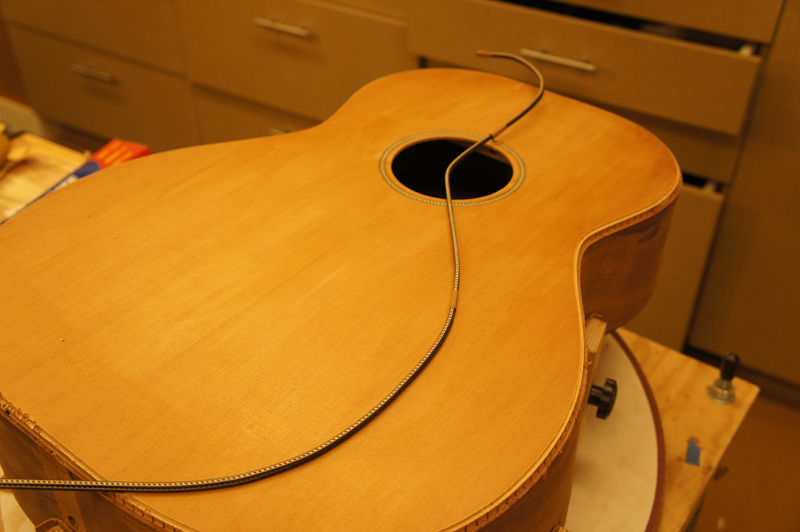
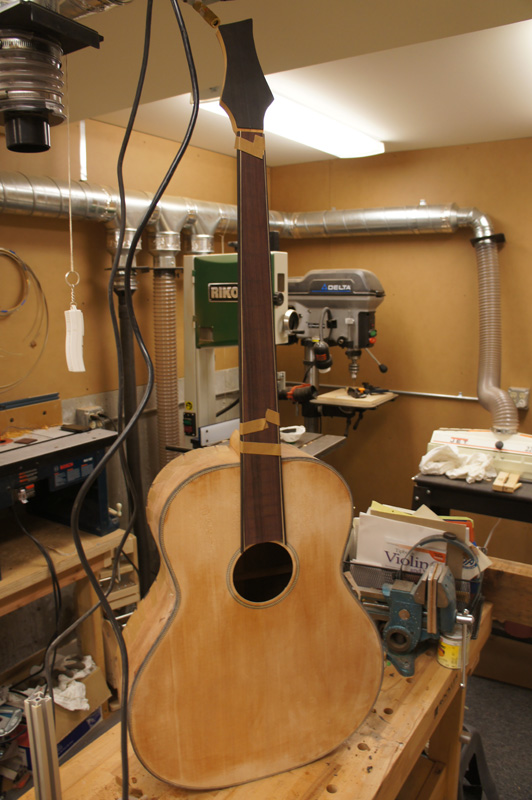
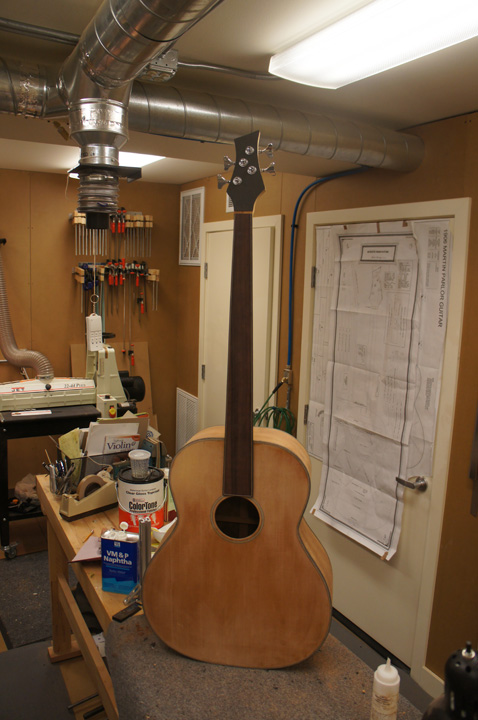
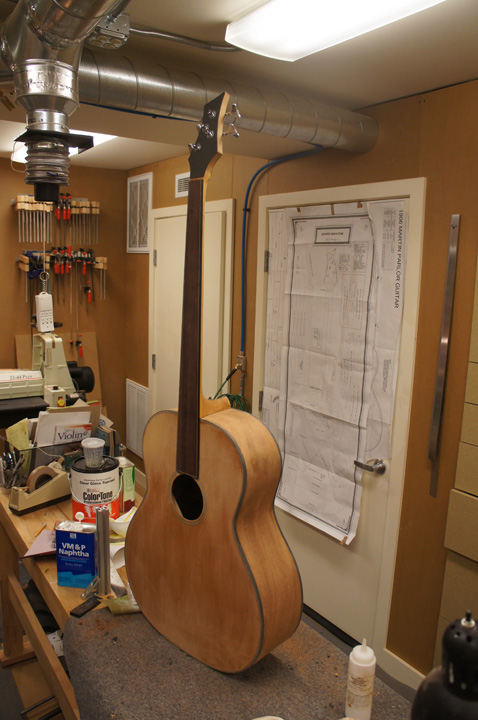
Perspective on ScaleI included a picture of the parlor guitar sitting inside the body mold of this bass. The guitar is going to be huge.
✦
January 29th, 2012 — Rims & Back
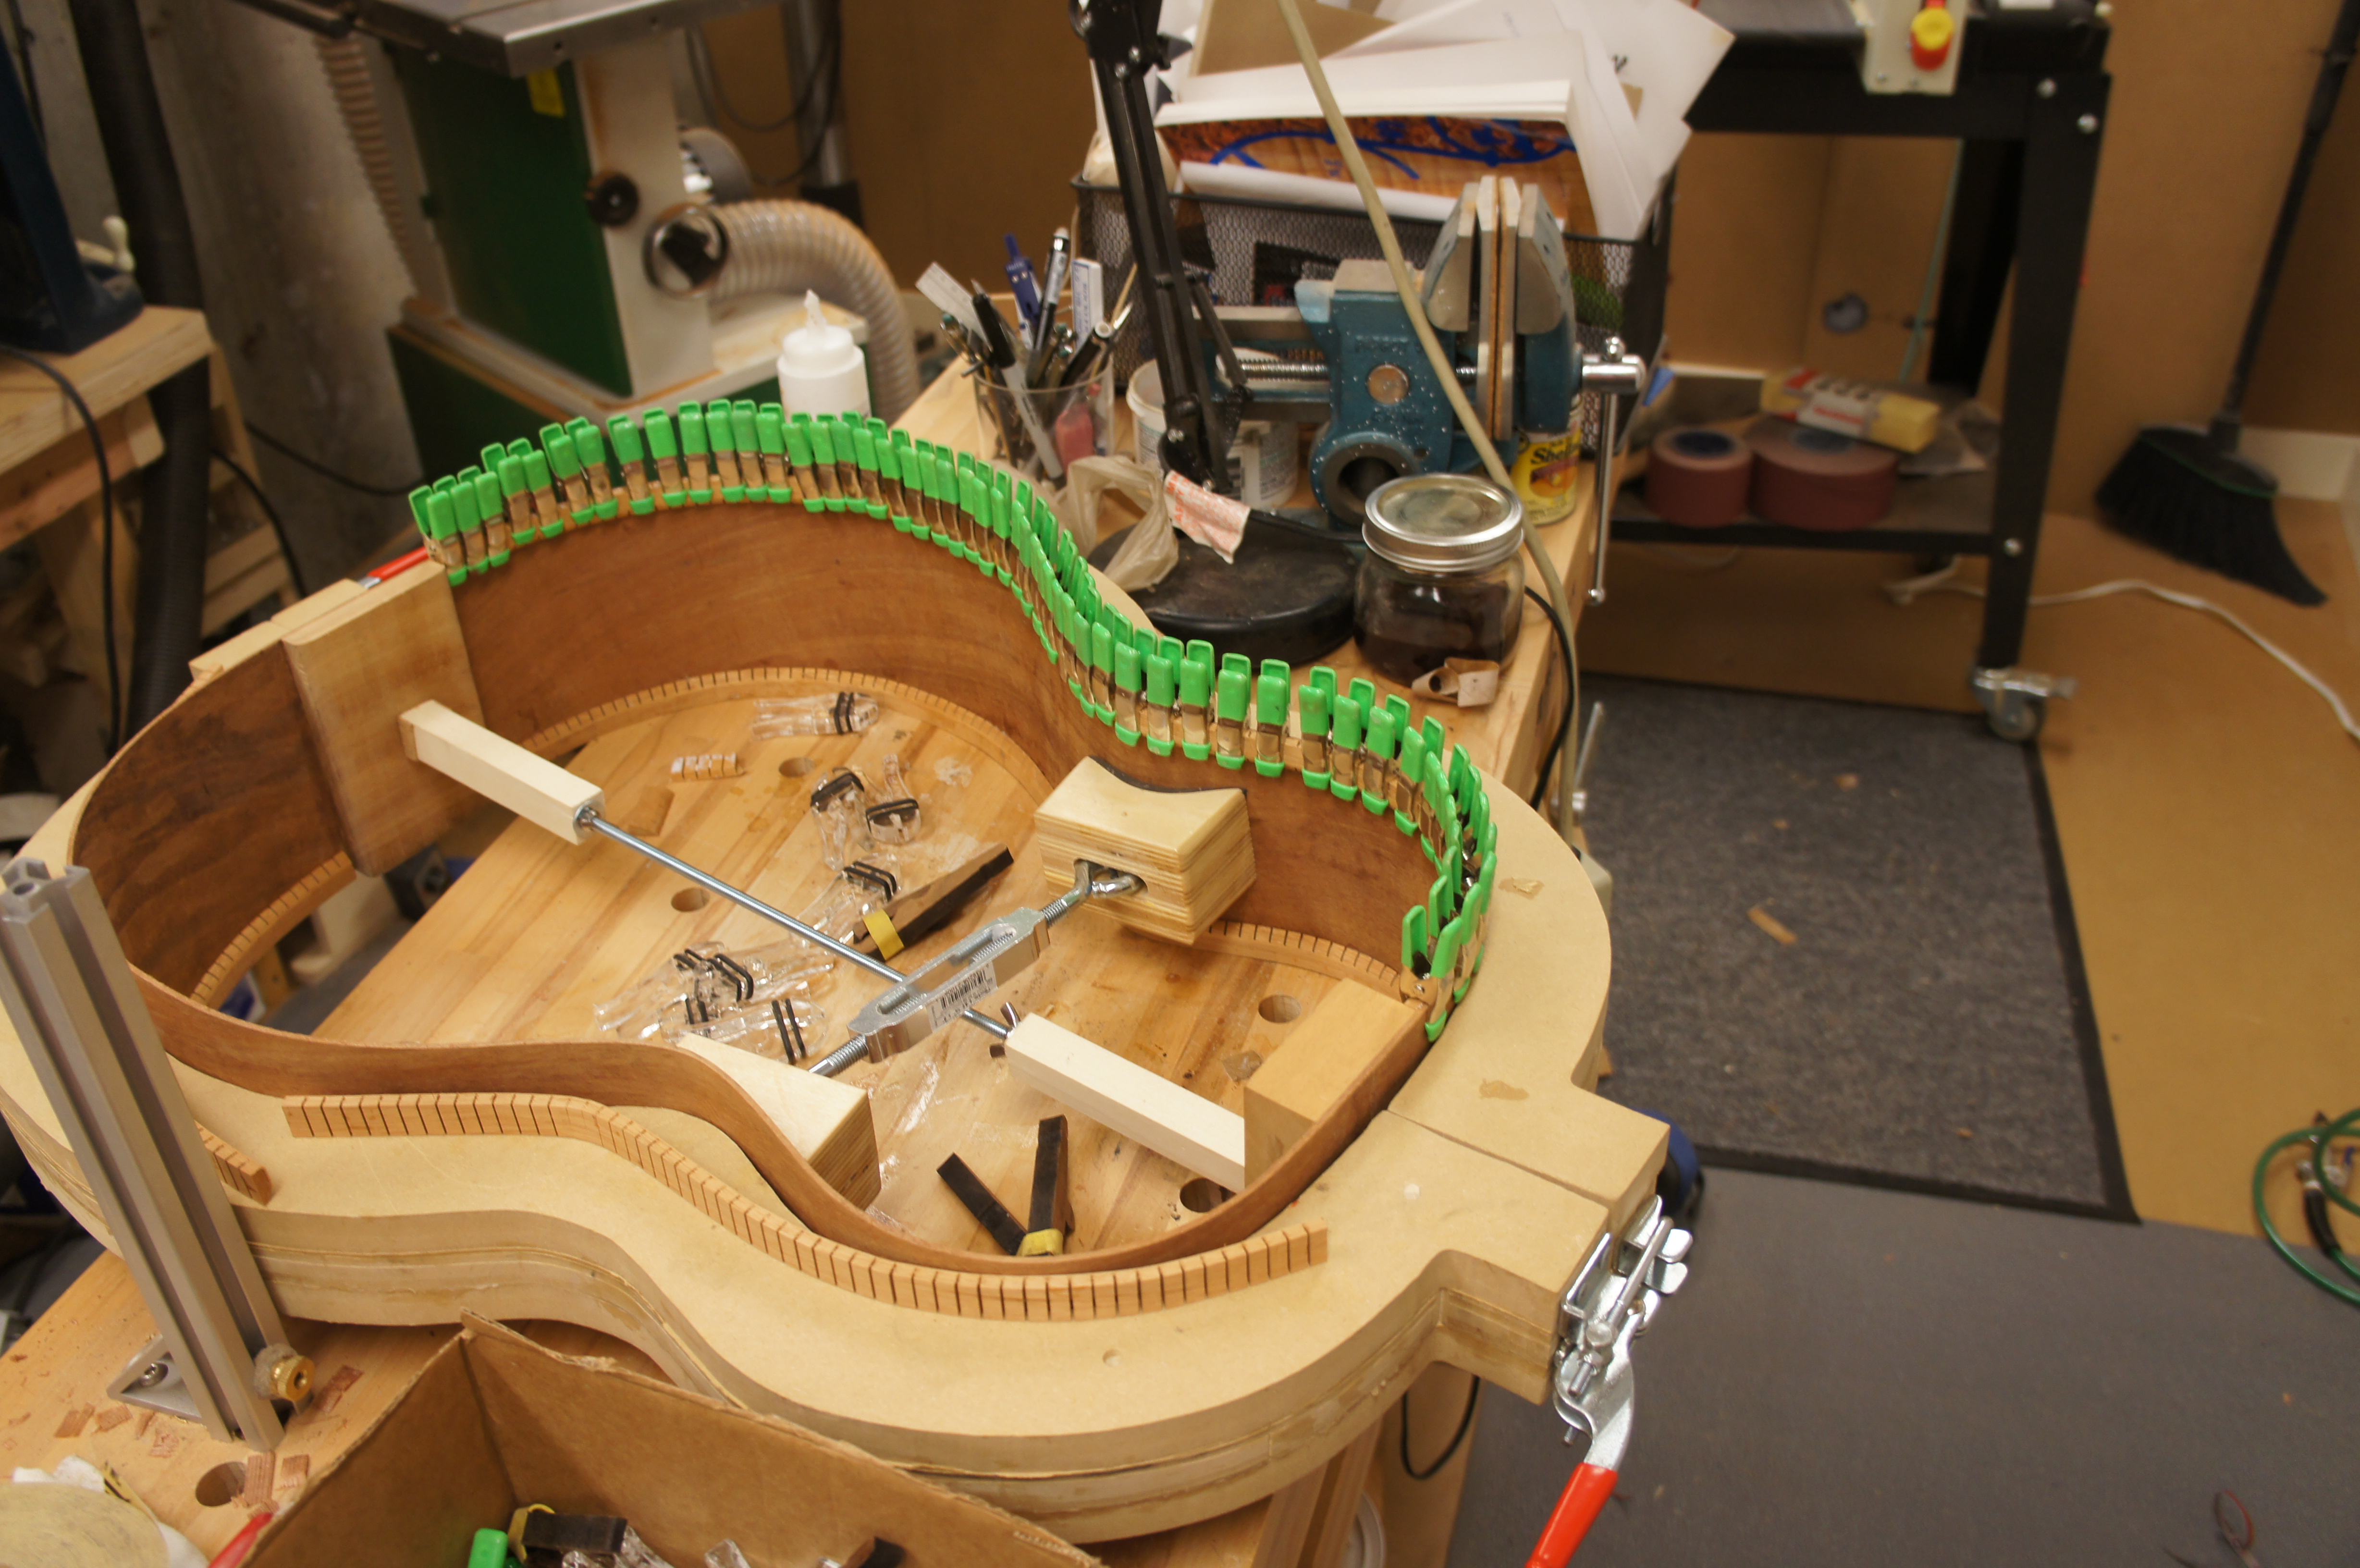
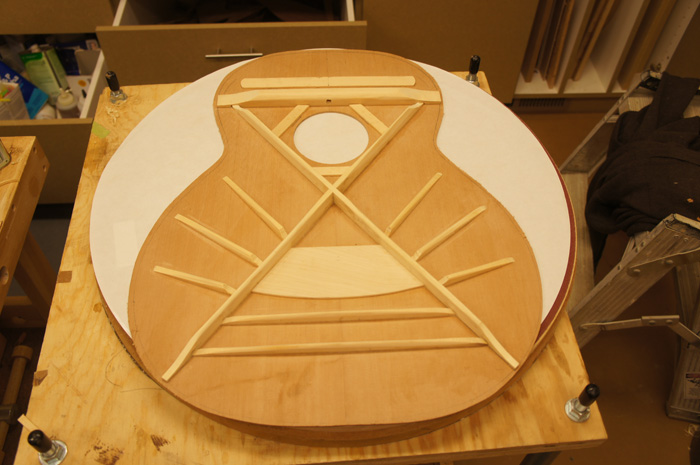
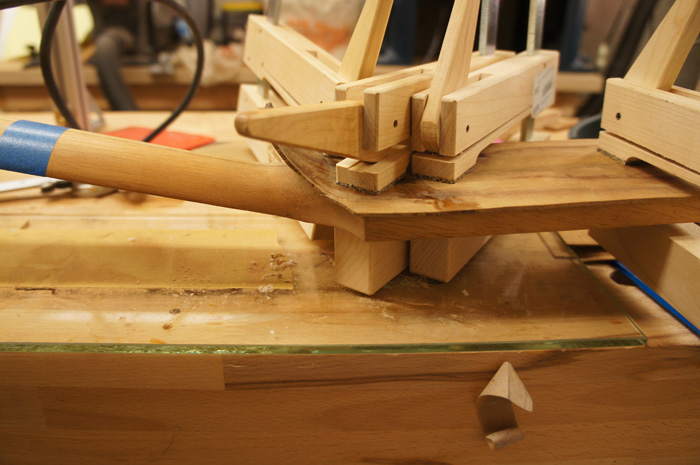
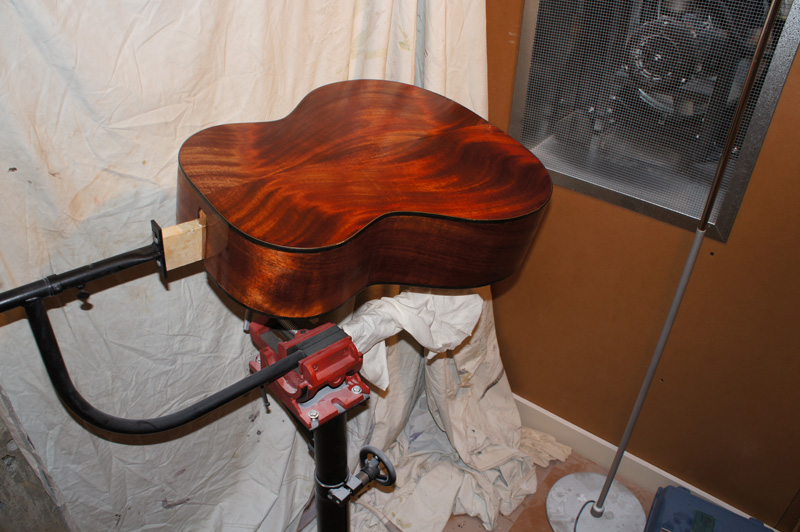
Managed to get a bit of work done. I completed the rims including radiusing top and bottom with a 40' radius. The plans called for the top and bottom braces to have a 40' radius and the middle two braces to have a 32' radius — my guess is Mark wanted a larger radius but damped it down a bit given the size of the guitar. I'm following the plan to see how it comes out. I went with reverse kerfling, top and bottom.
I used a trick I saw in a video: misting the kerfling on both sides and clamping it to the outside of the rim until dry. It worked really well, shaping the kerfling and making the gluing more straightforward. I have the back finished — the back braces are huge, made from Spanish cedar. I ordered a LR Baggs Element active system for the under-saddle pickup.
Back complete — the Spanish cedar braces are massive on this instrument
✦
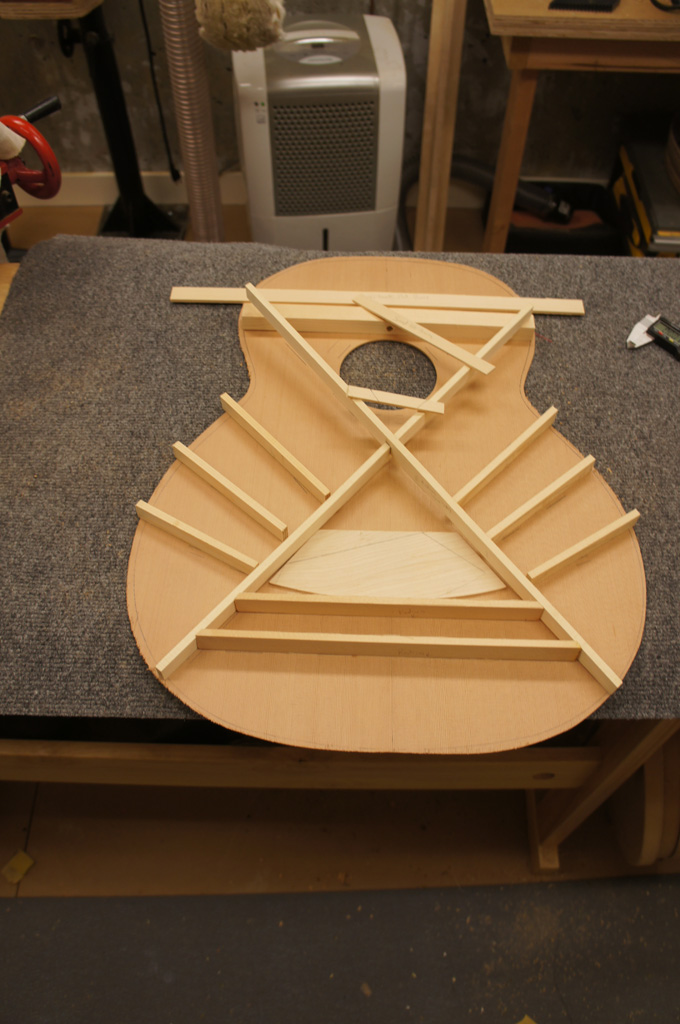
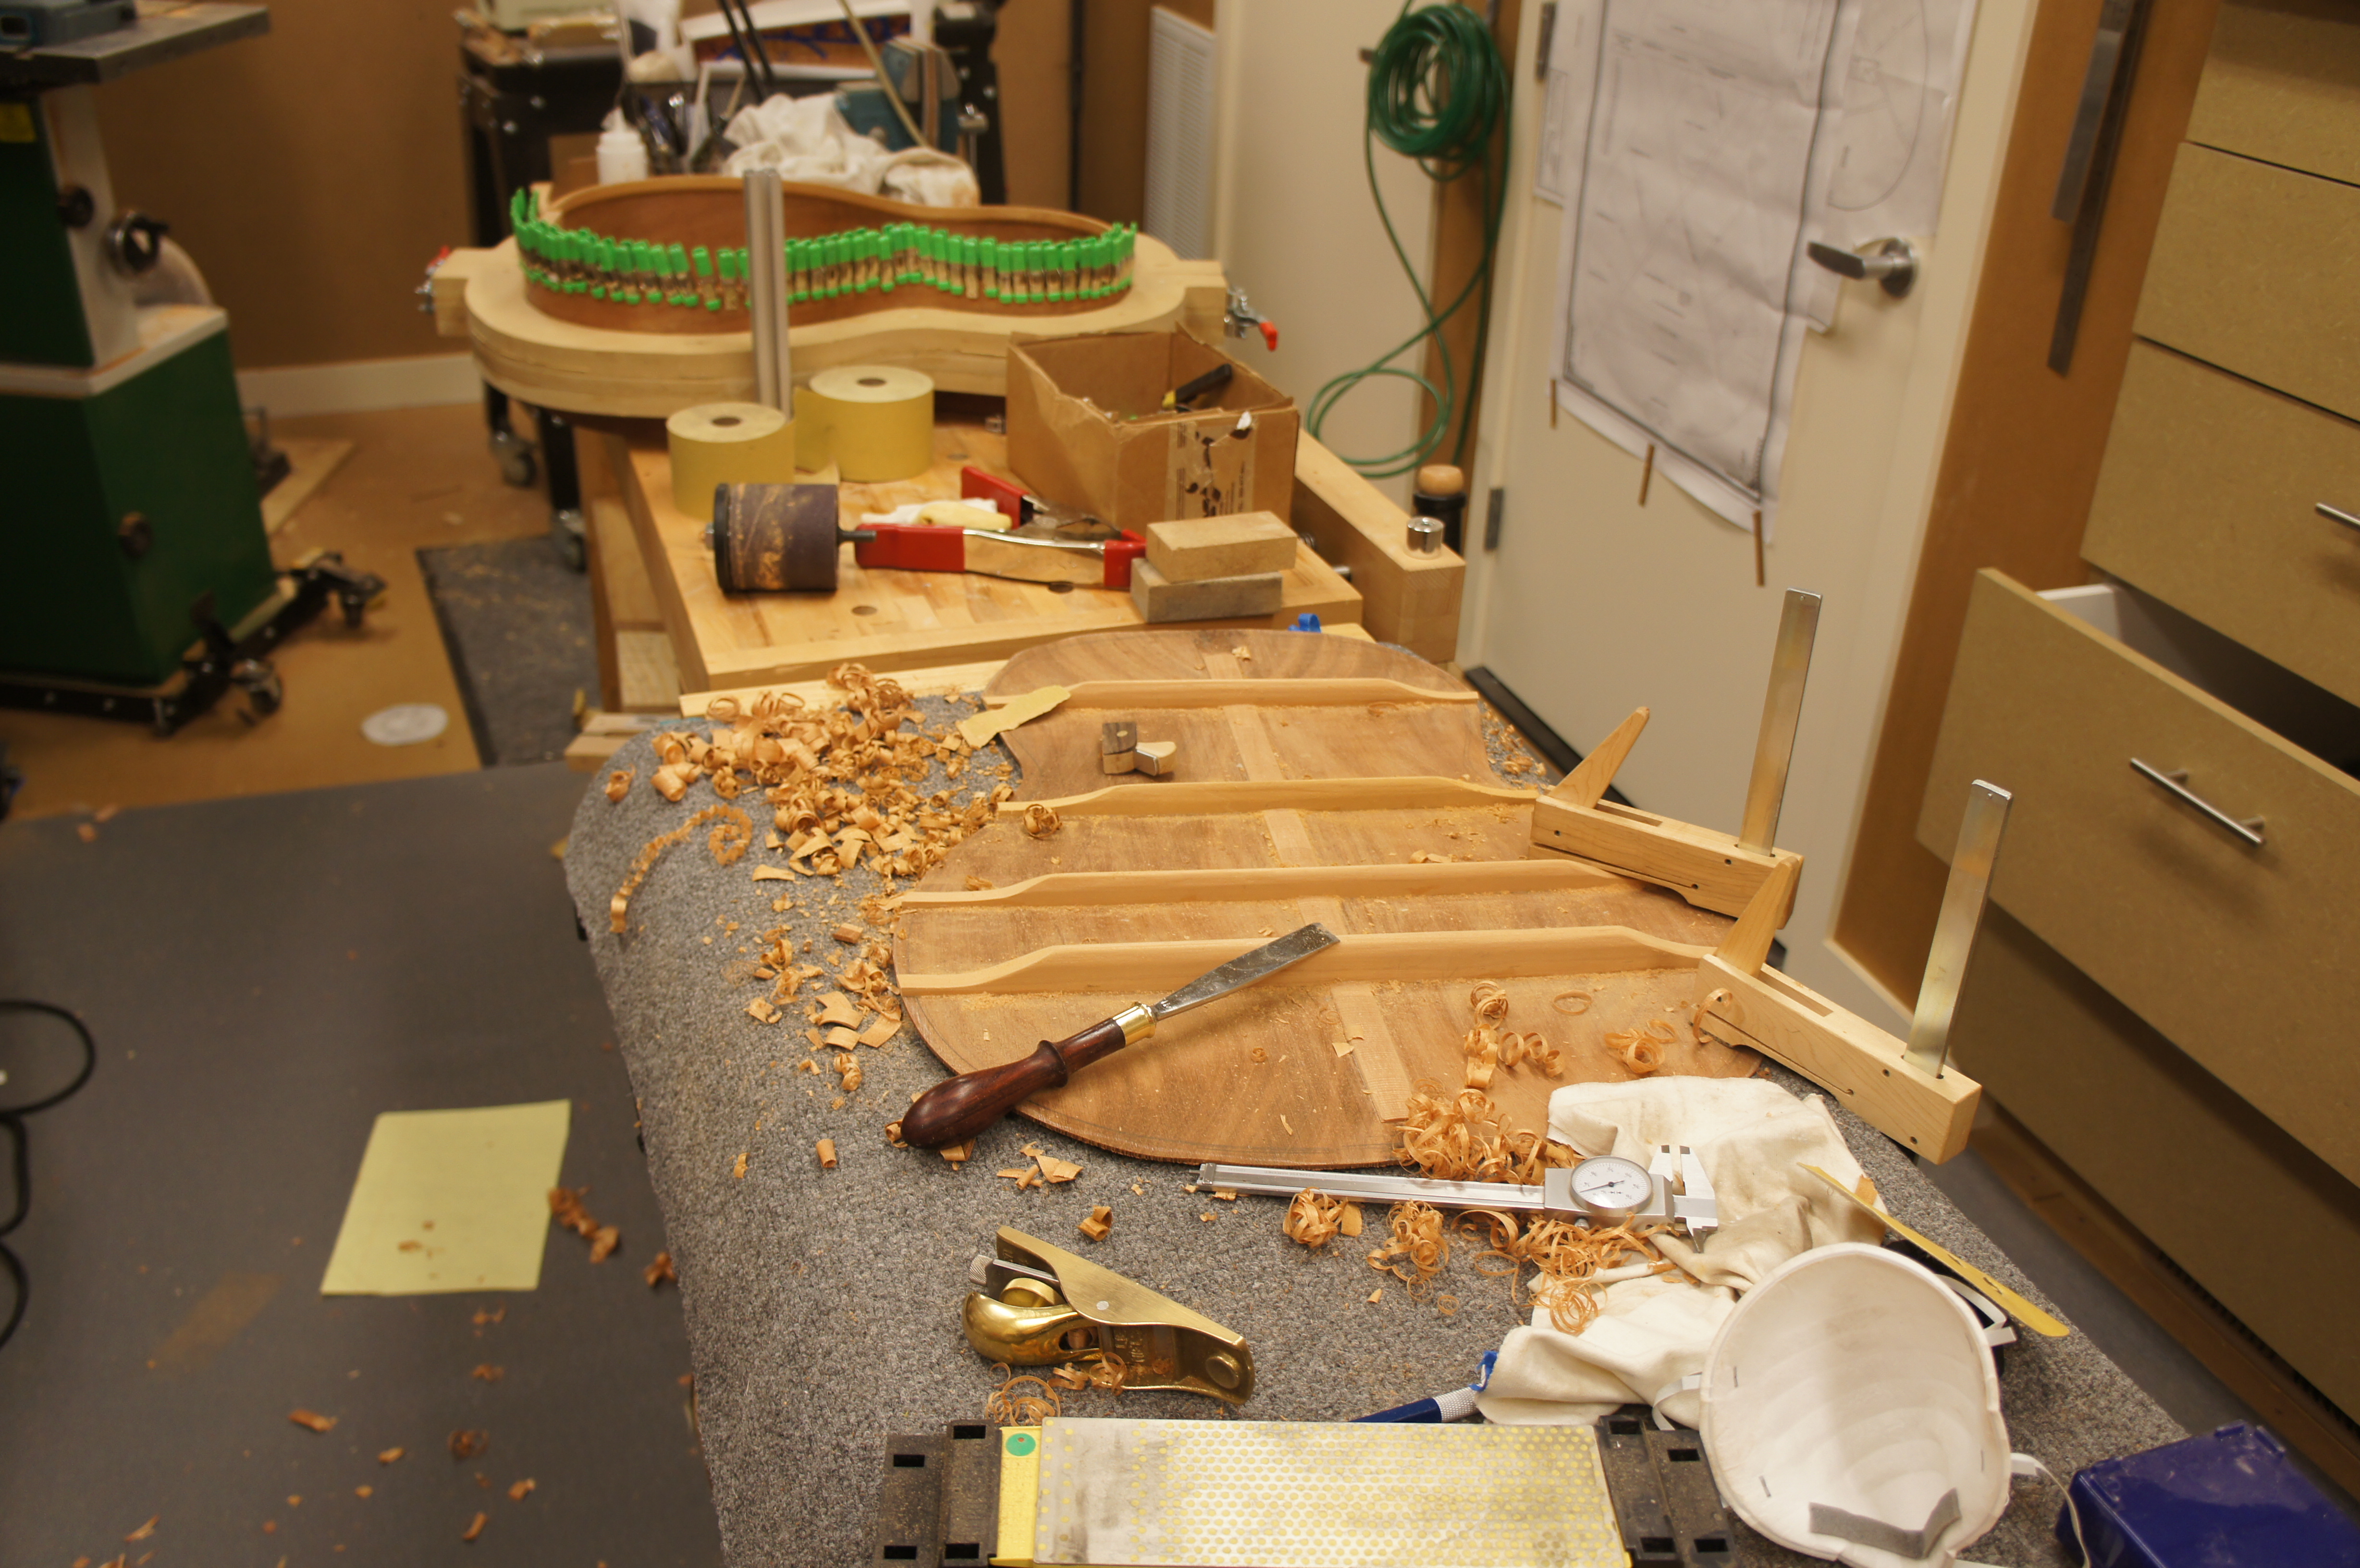
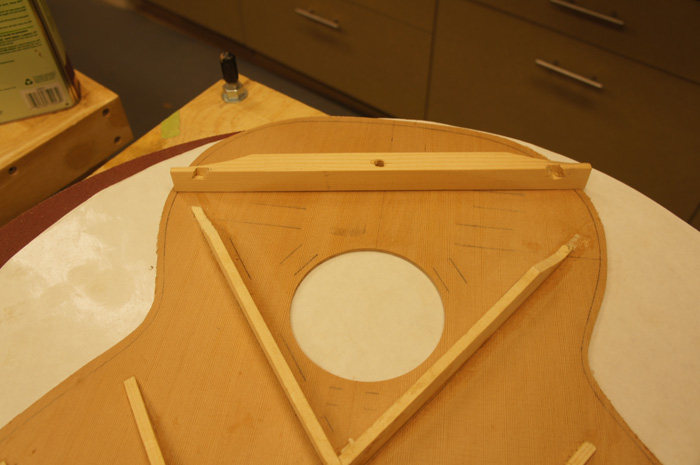
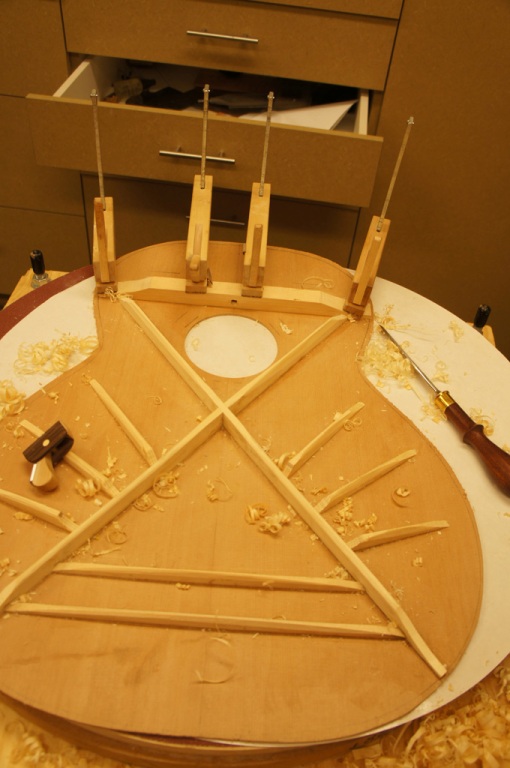
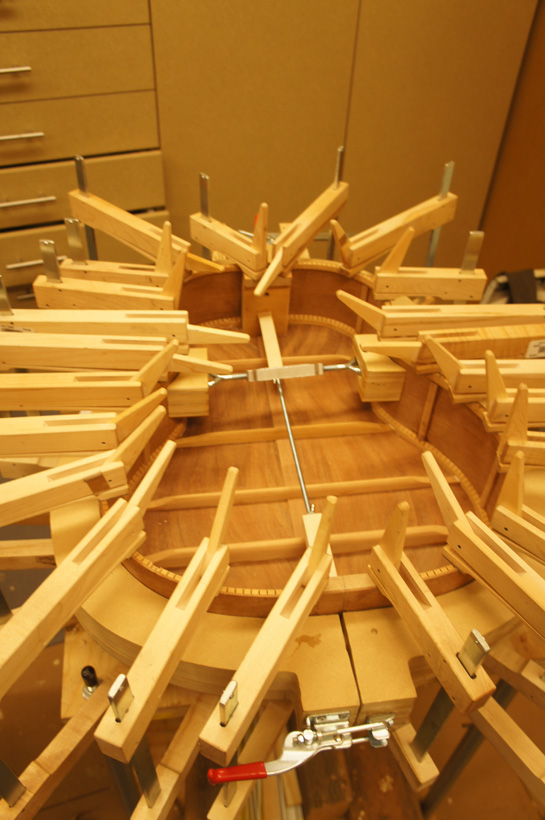
January 29th, 2012 — Top Bracing
I braced the top following the Mark Stanley plan exactly. It's interesting that a completed body kit I found online did the opposite with the transverse brace and X-braces — that kit terminated the X-braces into the rim and cut the transverse brace short to allow the X-braces to cross. I terminated the tops of the X-braces into the massive transverse brace instead, which goes into the sides for the support I want.
It finally dawned on me why it was done this way: while the guitar body is oversized, the bridge is not. To keep the X-brace underneath the bridge and optimally place the brace under the sound hole, the X hits the transverse brace instead of the rim.
✦
February 5th, 2012
I've never played an acoustic bass. Some consider an acoustic bass guitar an oxymoron — when I looked online I mostly found what is really a solid body guitar, some made to look a little acoustic but with a 2×4 hidden under the bridge where the neck attached. "Acoustic" just meant a piezoelectric transducer under the saddle. I wanted a real acoustic instrument, and from everything I read this Mark Stanley design was the closest to performing as a true acoustic that could hold its own with other instruments. To achieve that performance, the guitar is ridiculously huge.
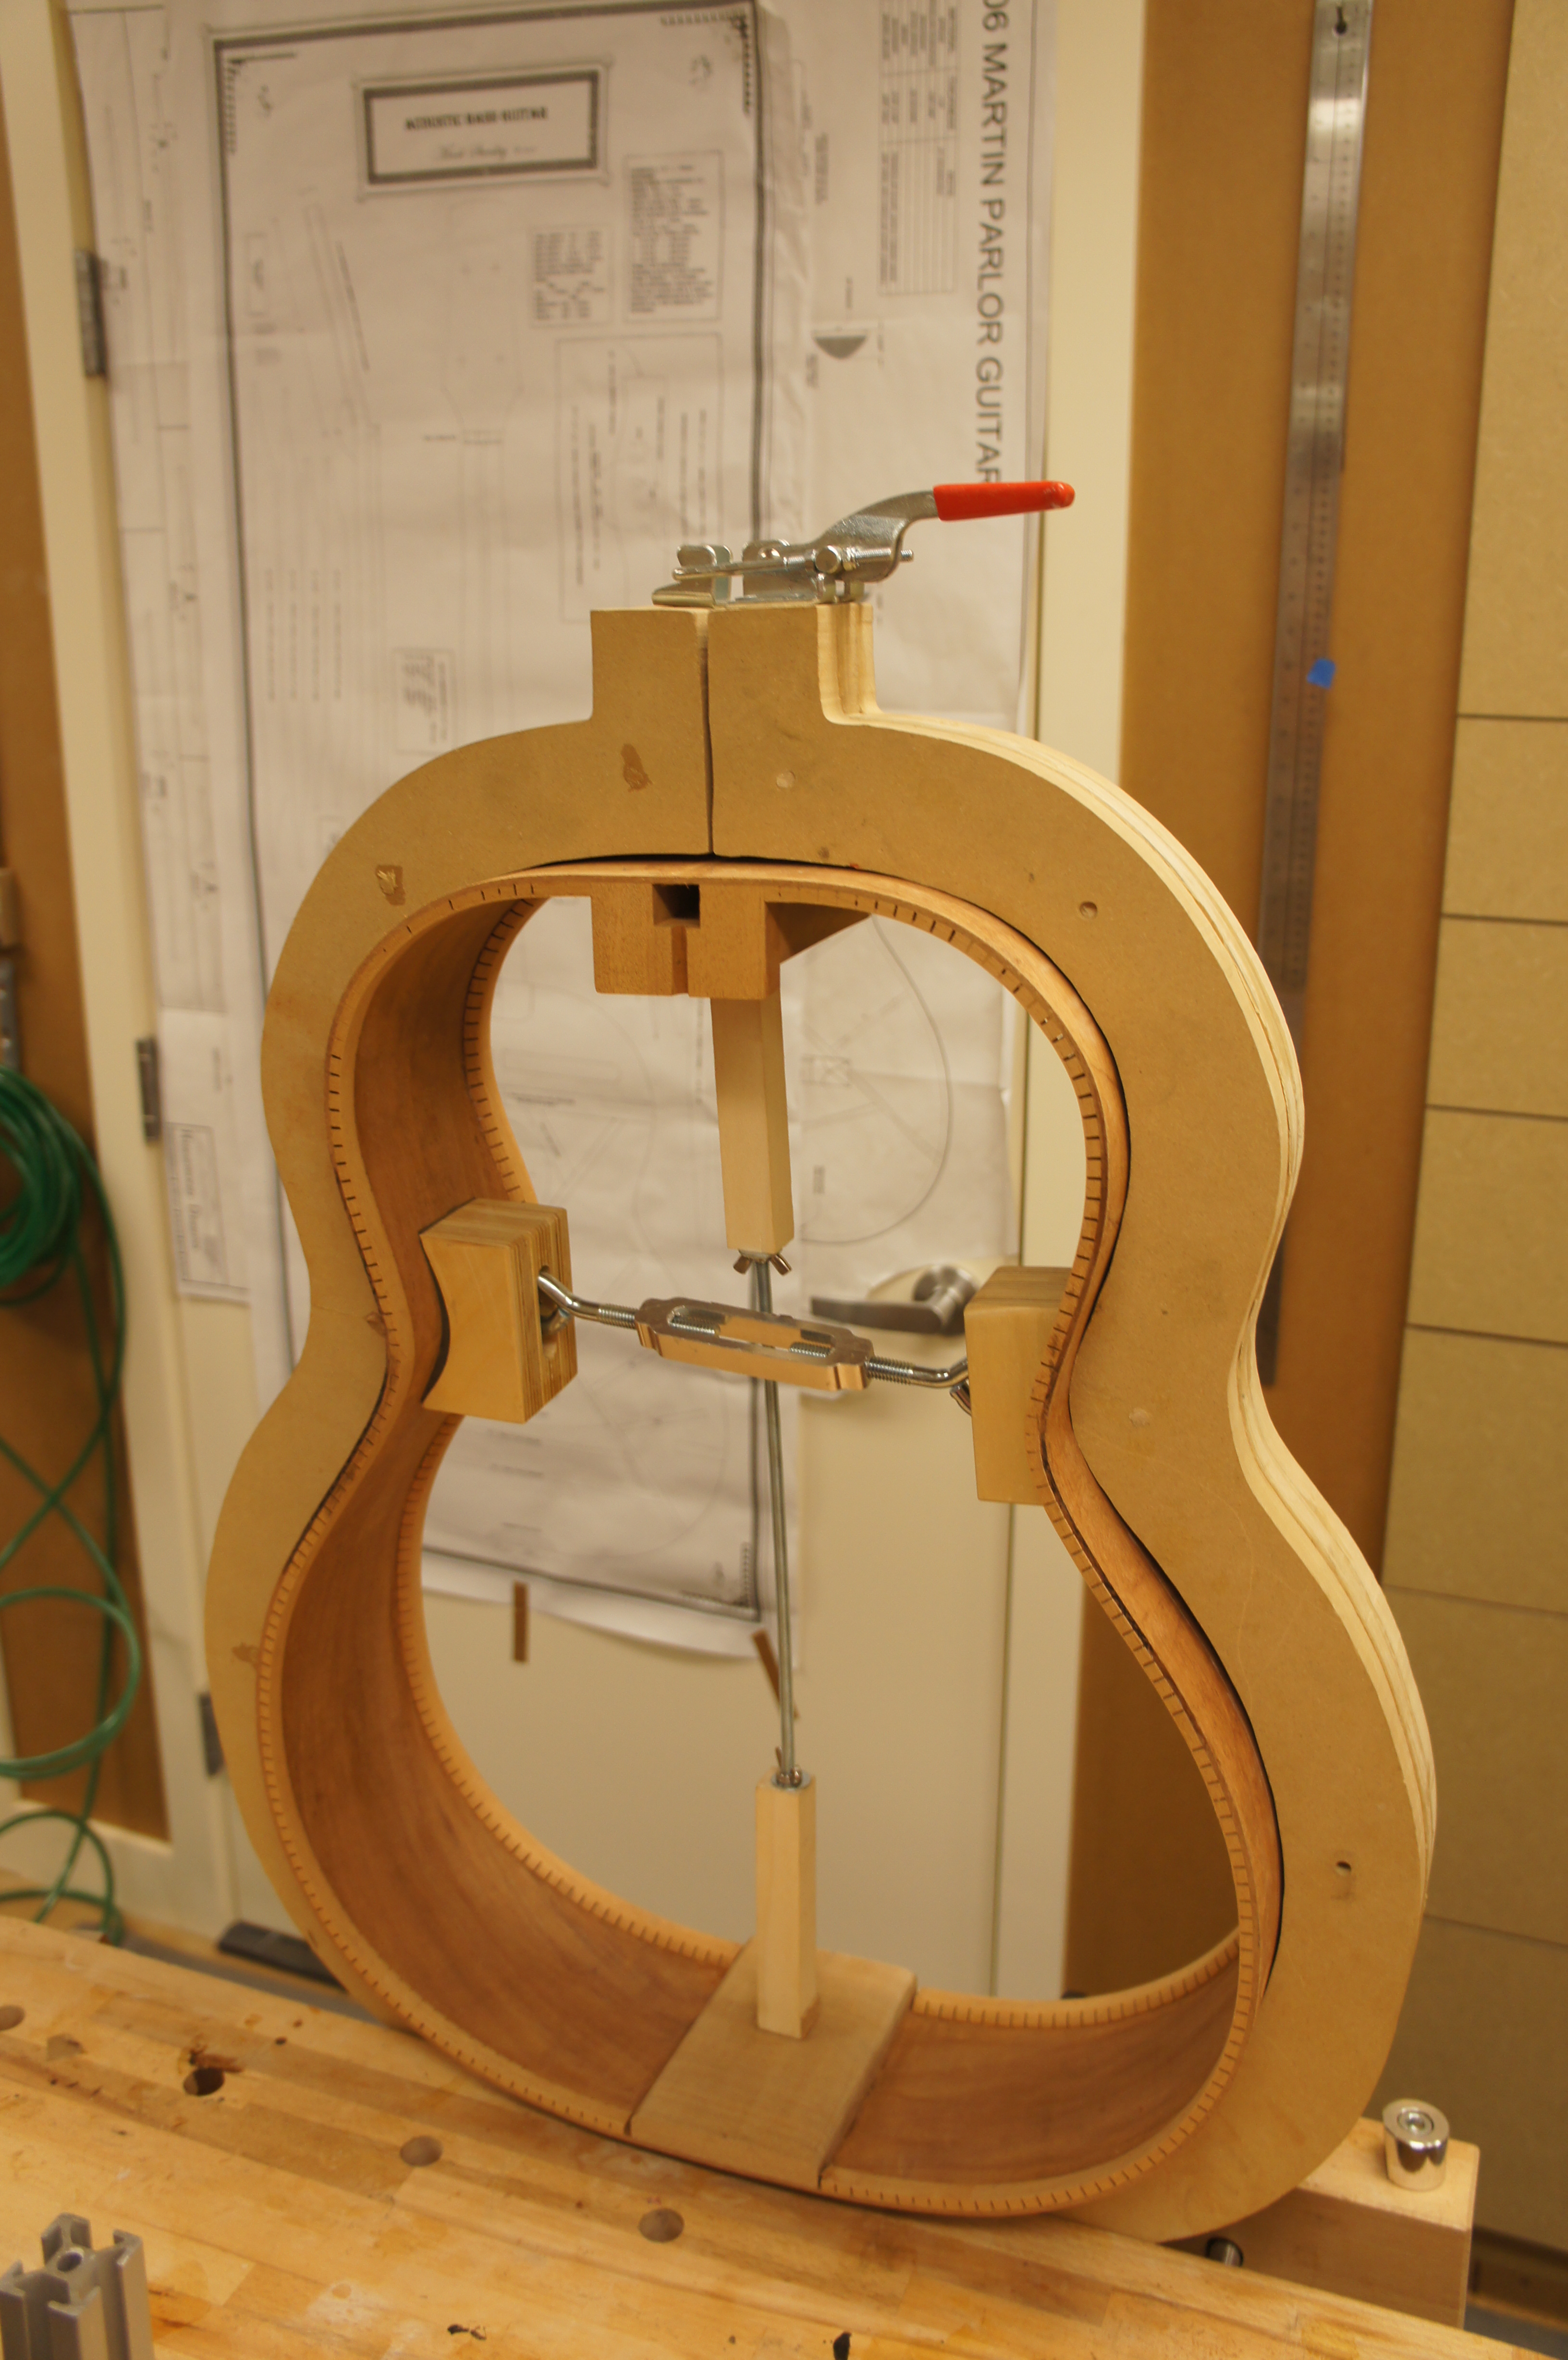
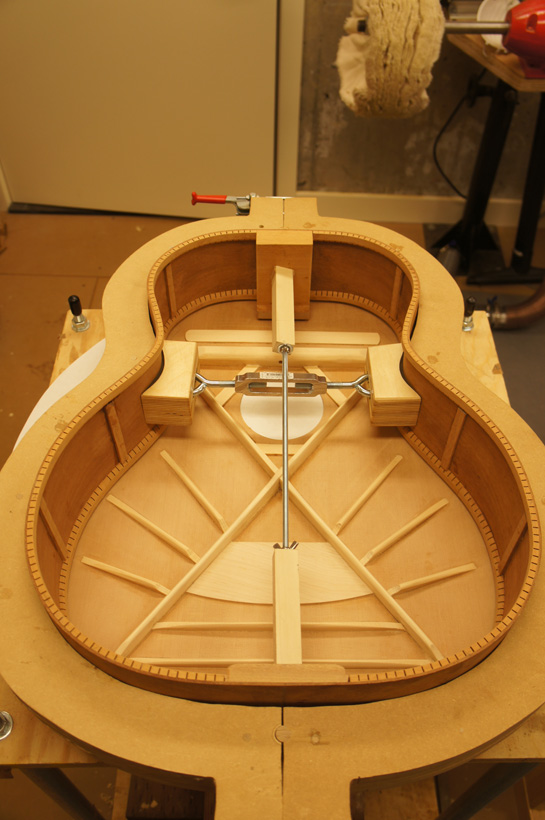
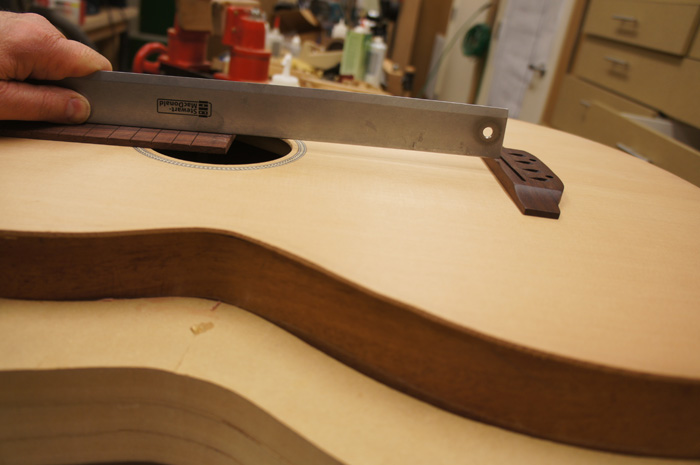
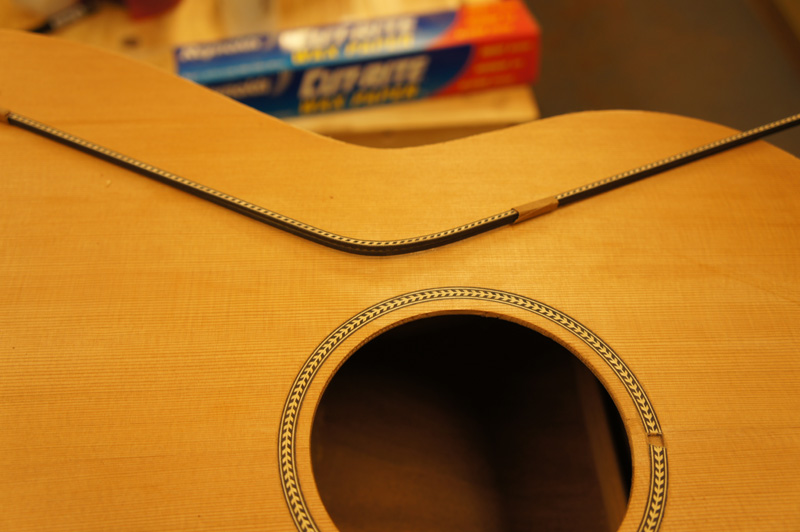
I have the bracing finished and glued the back onto the rims. I still need the end wedge so I held off gluing the top — being able to hang the rim on a board while cutting the end wedge makes the job more manageable. For trim: black fiber bindings on the sides (no bending needed), herringbone purfling on the top with a diagonal check marquetry accent, and BWB purfling on the back. Ebony for the pegboard veneer.
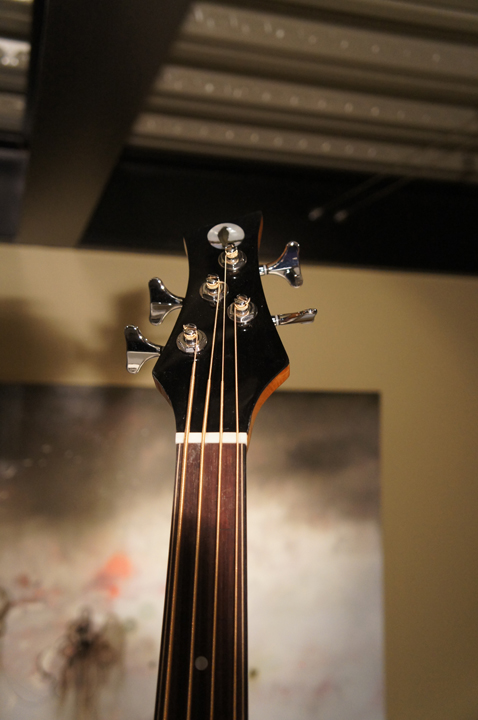
I played around with a rough pegboard shape. I want the strings to run straight to the nut, so I laid out the tuning holes on the string lines, placed a dot the correct distance toward the side, and drew curves to tie all the points together. The top has a 40' radius with the middle 4 inches of the transverse brace flat. The top height off the bridge came out just right — I had to think carefully about this since I'm building a fretless guitar and there's no fret height to compensate for. I guess I'll find out what ideal means when playing fretless.
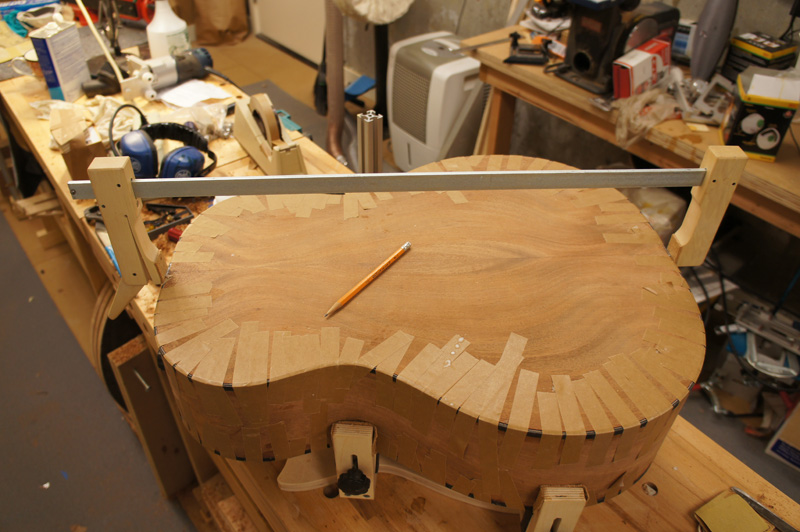
It is HUGE — shown resting on a stack of two full-sized radius disks
✦
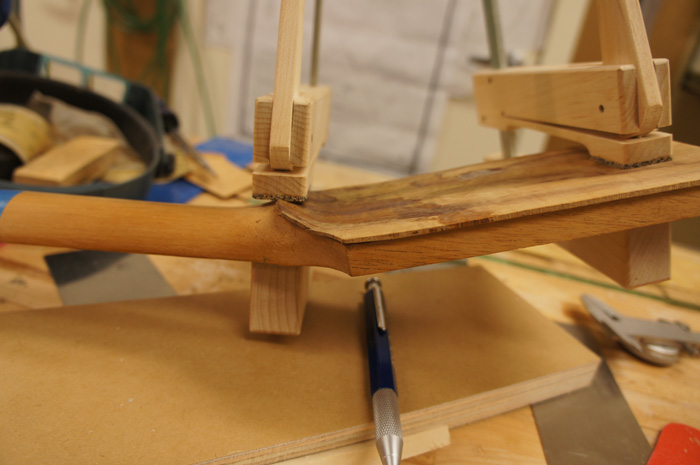
February 19th, 2012 — End Wedge & Headstock Veneer
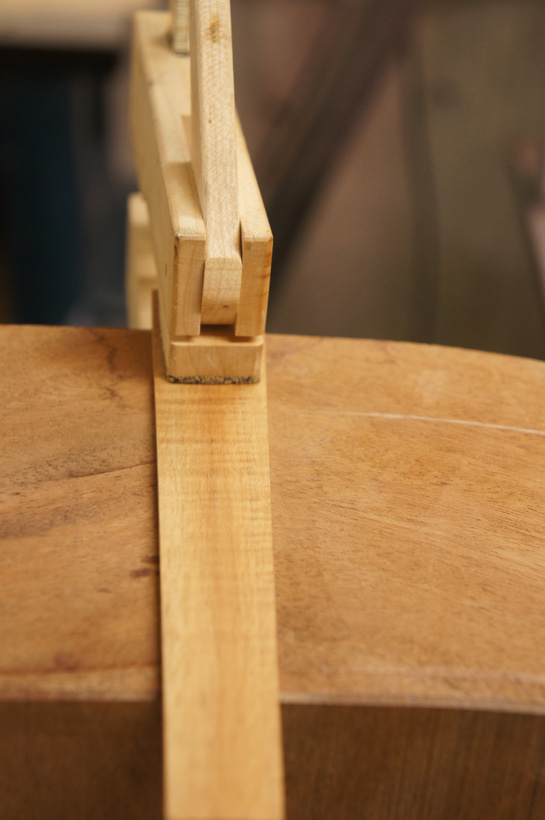
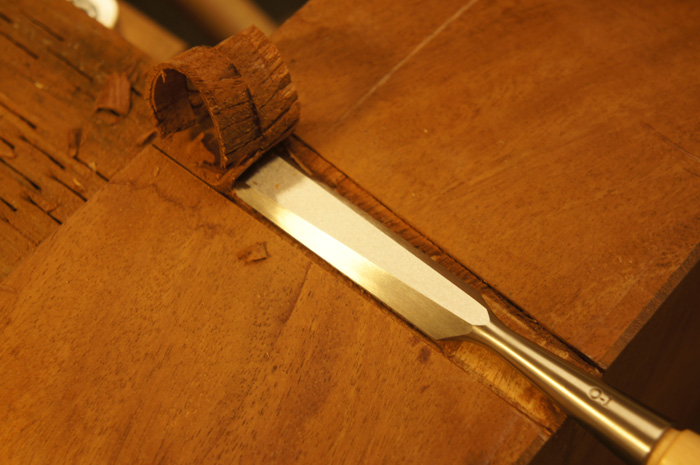
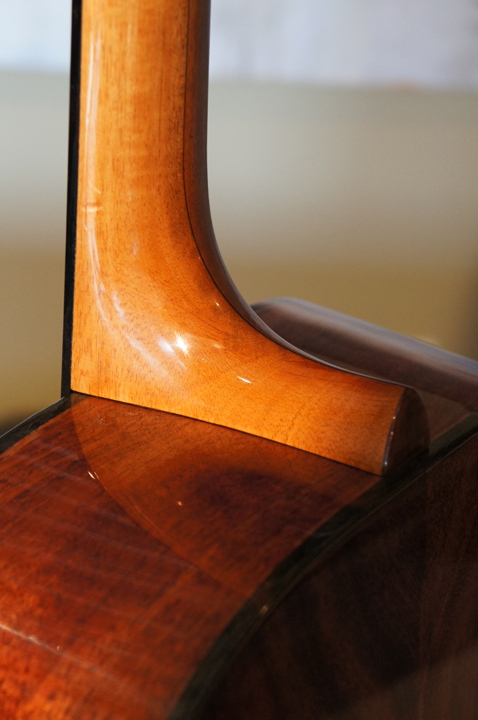
Making a bit more progress. The end wedge went smoothly — I used a scrap of Koa, laid out the wedge from a center line, cut it close on the bandsaw, and used a block plane to get right on the layout line. I clamp the wedge on the rim, scribe two lines with an X-Acto knife, clamp a block on the outside of the scribed line as a saw guide, then hand chisel out the waste. The wedge was tight enough not to need clamps for gluing, but I used a couple anyway.
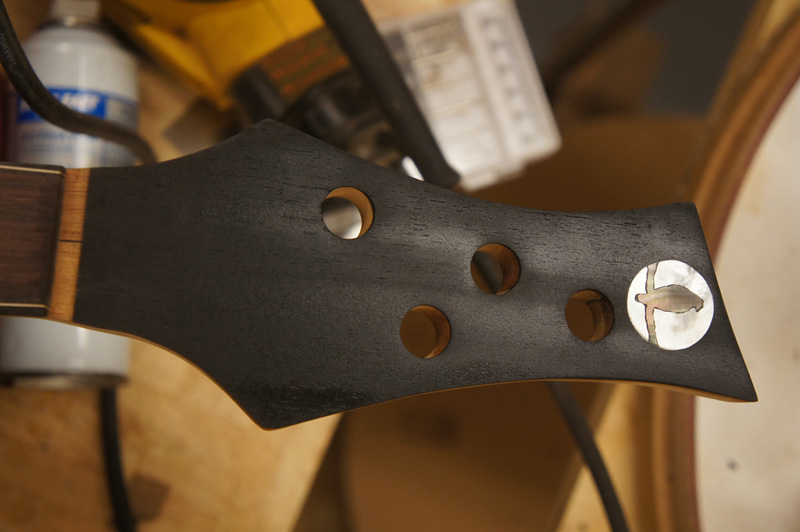
Koa end wedge — matched to the heel cap and back headstock veneer
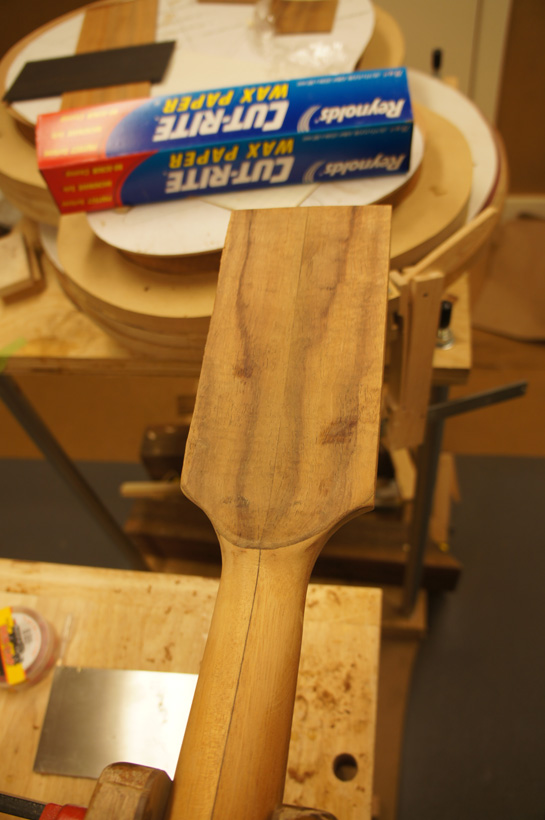
This is the first time I've added a veneer to the back of a headstock. The neck that came in the kit has a curved-up ridge in the back, requiring me to bend the veneer. I used a nicely book-matched bit of Koa from a previous guitar to match the end wedge and heel cap.
Harder Than It LooksThe pictures make this look easy, but I don't show the book-matched veneer separating from the heat, planing and sanding the glue edge to get a good joint, and realigning the curved pieces to glue back together. Next time I'll use a nice one-piece veneer.
✦
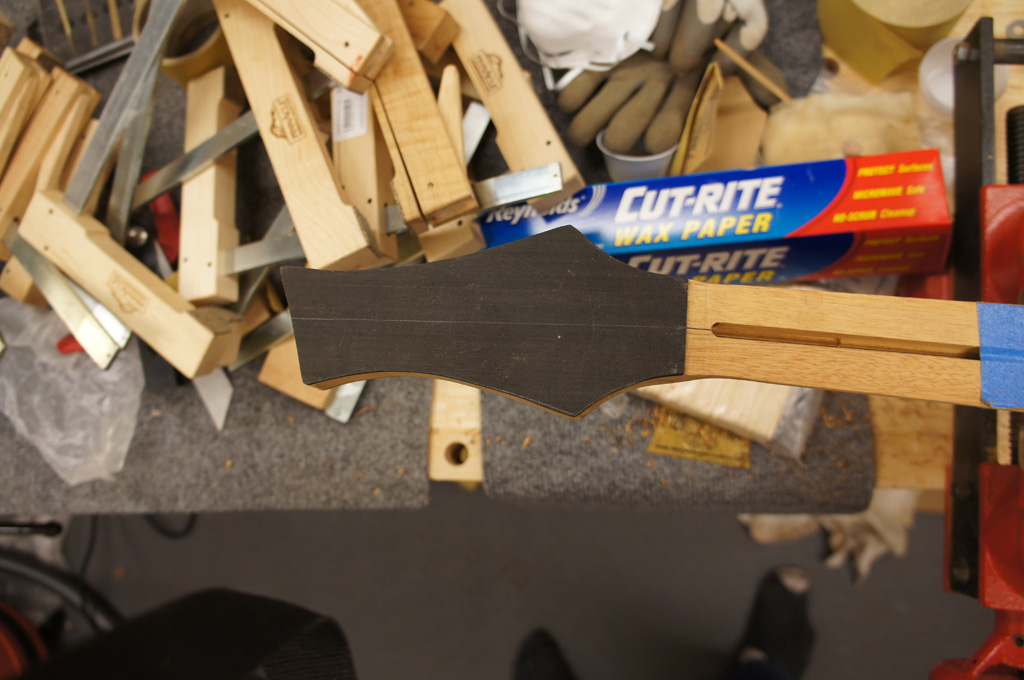
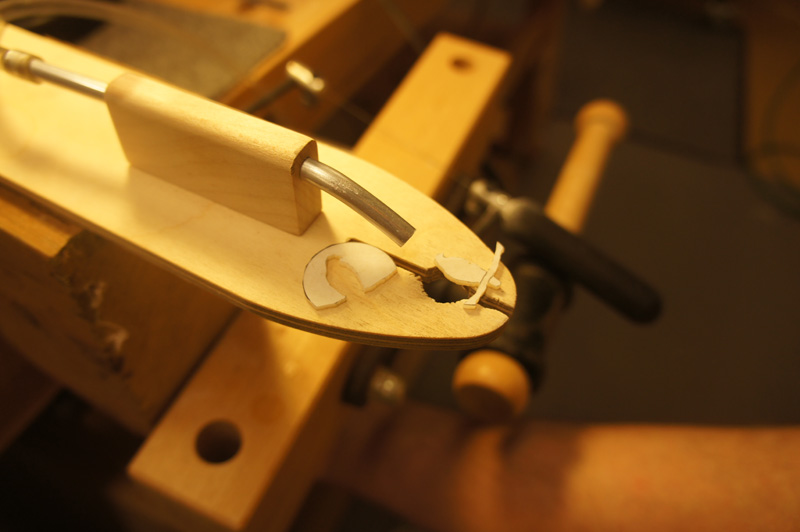
February 19th, 2012 — Headstock Profile
I went ahead and profiled the headstock. It was a scary enough operation that I decided to stop there for the day.
✦
February 26th, 2012
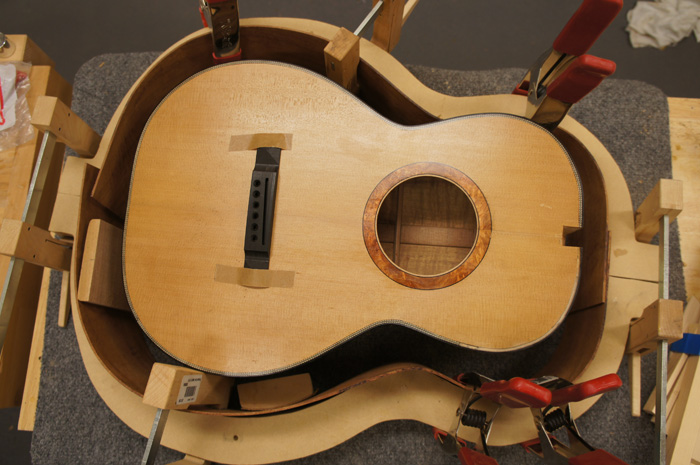
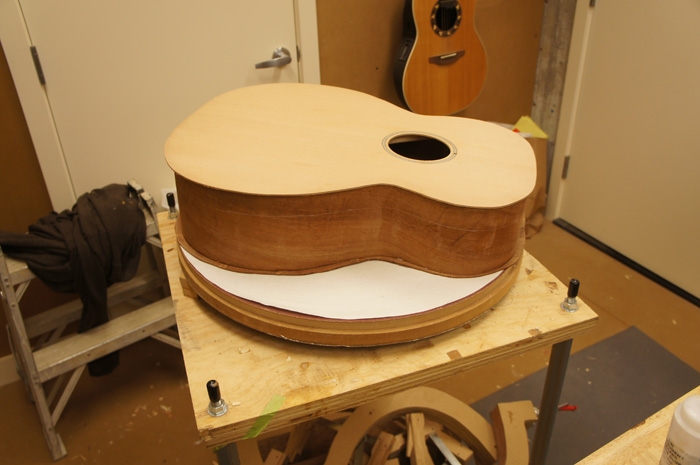
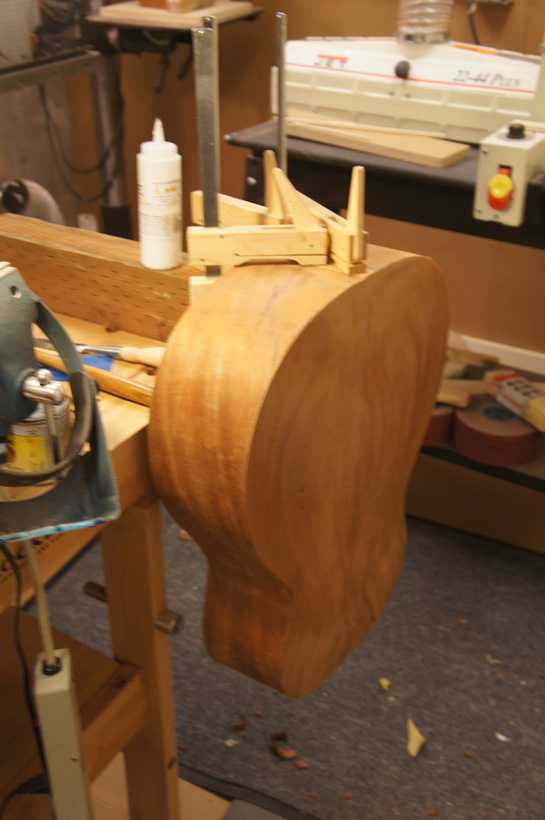
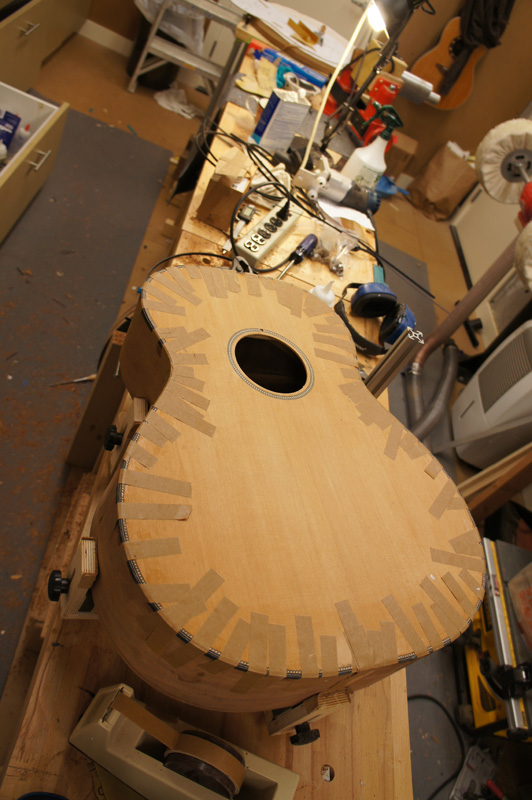
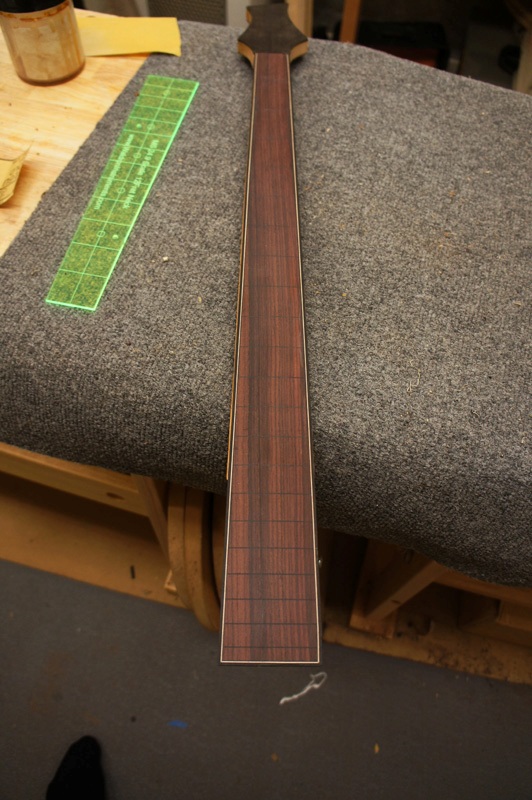
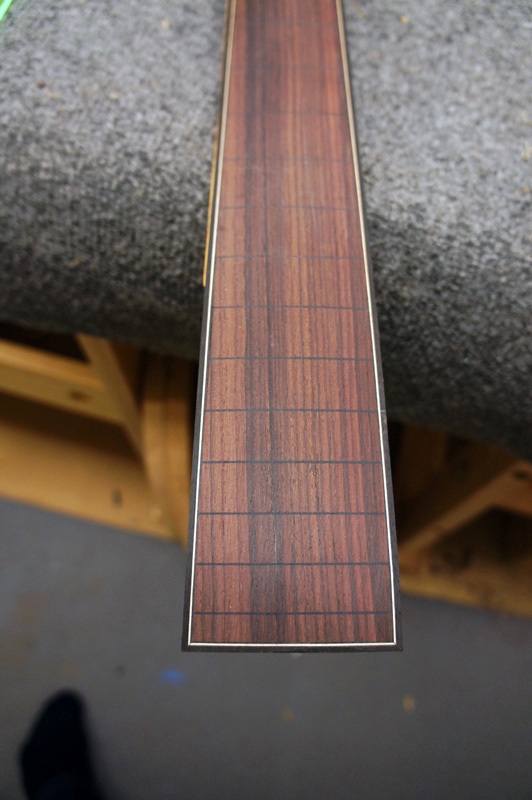
I have the bass closed up and bound. I used black fiber bindings with BWB purfling plus a diagonal check black-and-white marquetry purfling on the top. I was originally just going with binding and BWB purfling, but I had some funkiness on the bottom of the top so I added the marquetry to cover it. I also profiled the fretboard and filled the fret slots with black fiber — the fretboard will be bound with ebony binding and BWB purfling.
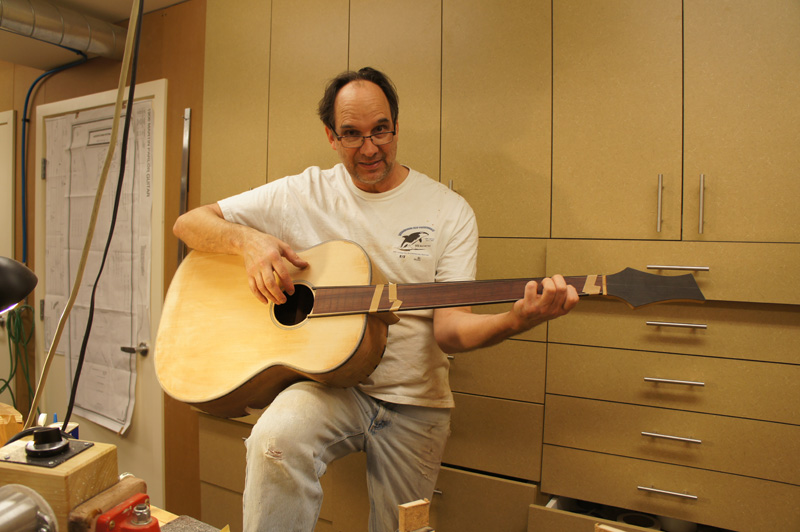
The guitar is huge, but it feels somewhat playable — at least for me. I'm nearly 6'4".
Closed, bound, and imposing — somewhat playable if you happen to be 6'4"
✦
March 5th, 2012
Got a little farther this weekend — finished the fretboard. I'm waiting on a size adjustment to the truss rod; there just aren't many acoustic bass guitars out there, so finding the right hardware takes some hunting. All that's left is the final profile of the neck to match the fretboard and finish sanding the rims.
This weekend a really good local bass player came by the shop. He plays both jazz guitar and upright bass, and we went over strings and the possible placement of a thumb rest. When I'm finished he'll come by and check it out. He was nearly as excited about the guitar as I am.
✦
March 22nd, 2012
I need to start thinking about my next project. The bass is getting close — I just need to cut and inlay the logo on the headstock, and after that construction is finished. The guitar has been sanded, though I like to come back the next day with a fresh attitude and sand it properly. I had thought this instrument was big, but by the time I finished sanding I really knew how big it was.
Sanded and ready — just needs a logo before going to the spray room
✦
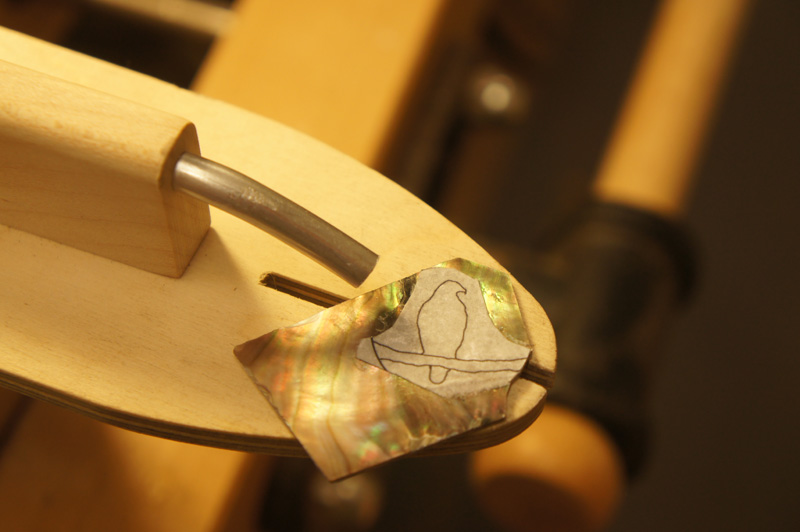
March 24th, 2012
Thursday and Friday morning before work I cut and installed my logo on the headstock. That set me up this weekend to start finishing. I pulled the parlor guitar out of the spray room and moved the bass in. Getting the first coat of Zpoxy filler on is always exciting — that's when I get to see what the wood will really look like.
✦
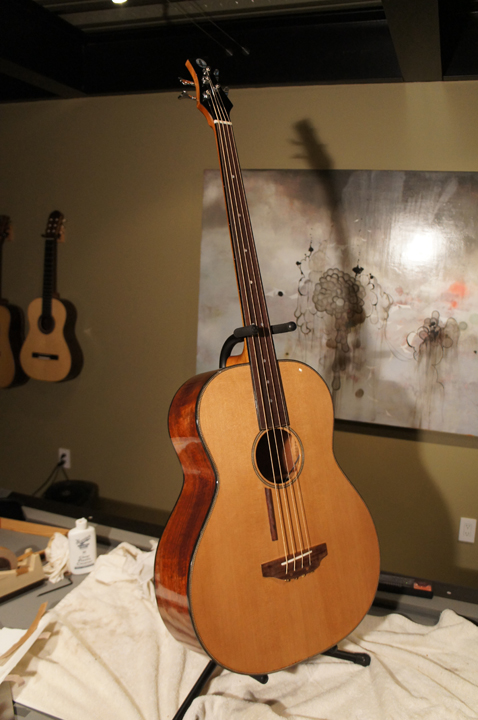
May 1st, 2012 — Complete!
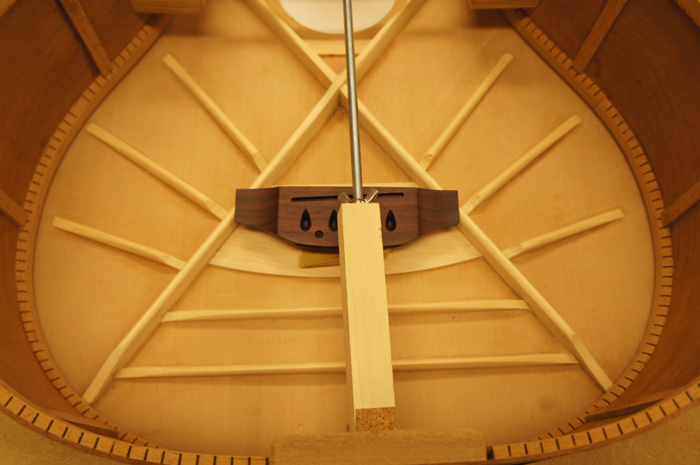
I finished the bass guitar tonight. Mahogany back and sides, Red Cedar top. The headstock veneer is ebony and the back of the headstock has book-matched Koa veneer. Fretless Rosewood fingerboard and Rosewood pinless bridge. LR Baggs under-saddle Element pickup.
It actually sounds OK both plugged in and unplugged. Right now I have GHS Acoustic Light bass strings. Last night I had medium Martin Acoustic bass strings — it was a lot more powerful with the mediums and I'll probably try them again. I just had this feeling the guitar would explode. Unplugged the mediums sounded better. Plugged in the lights sounded great.
Being played at a guitar recital — you can see it for the first 23 seconds.
✦
Final Specifications
Mark Stanley Acoustic Bass Guitar
DesignMark Stanley kit & plans
TopWestern Red Cedar
Back & SidesMahogany
BracingX-brace into transverse; Spanish cedar back braces
FingerboardFretless Rosewood — black fiber fret lines, ebony binding