Kenneth Michael Guitars est.1978
Fitting the neck to the body --- KMG Neck set --- PART #2
| A DIFFERENT APPROACH |
The neck fit and adjustment process below is the result of much experimentation.
During that time it occurred to me that one of the basic elements of the neck set
angle related to the geometry of the top that is under the fingerboard. So why not
make an adjustment there?
During that time it occurred to me that one of the basic elements of the neck set
angle related to the geometry of the top that is under the fingerboard. So why not
make an adjustment there?
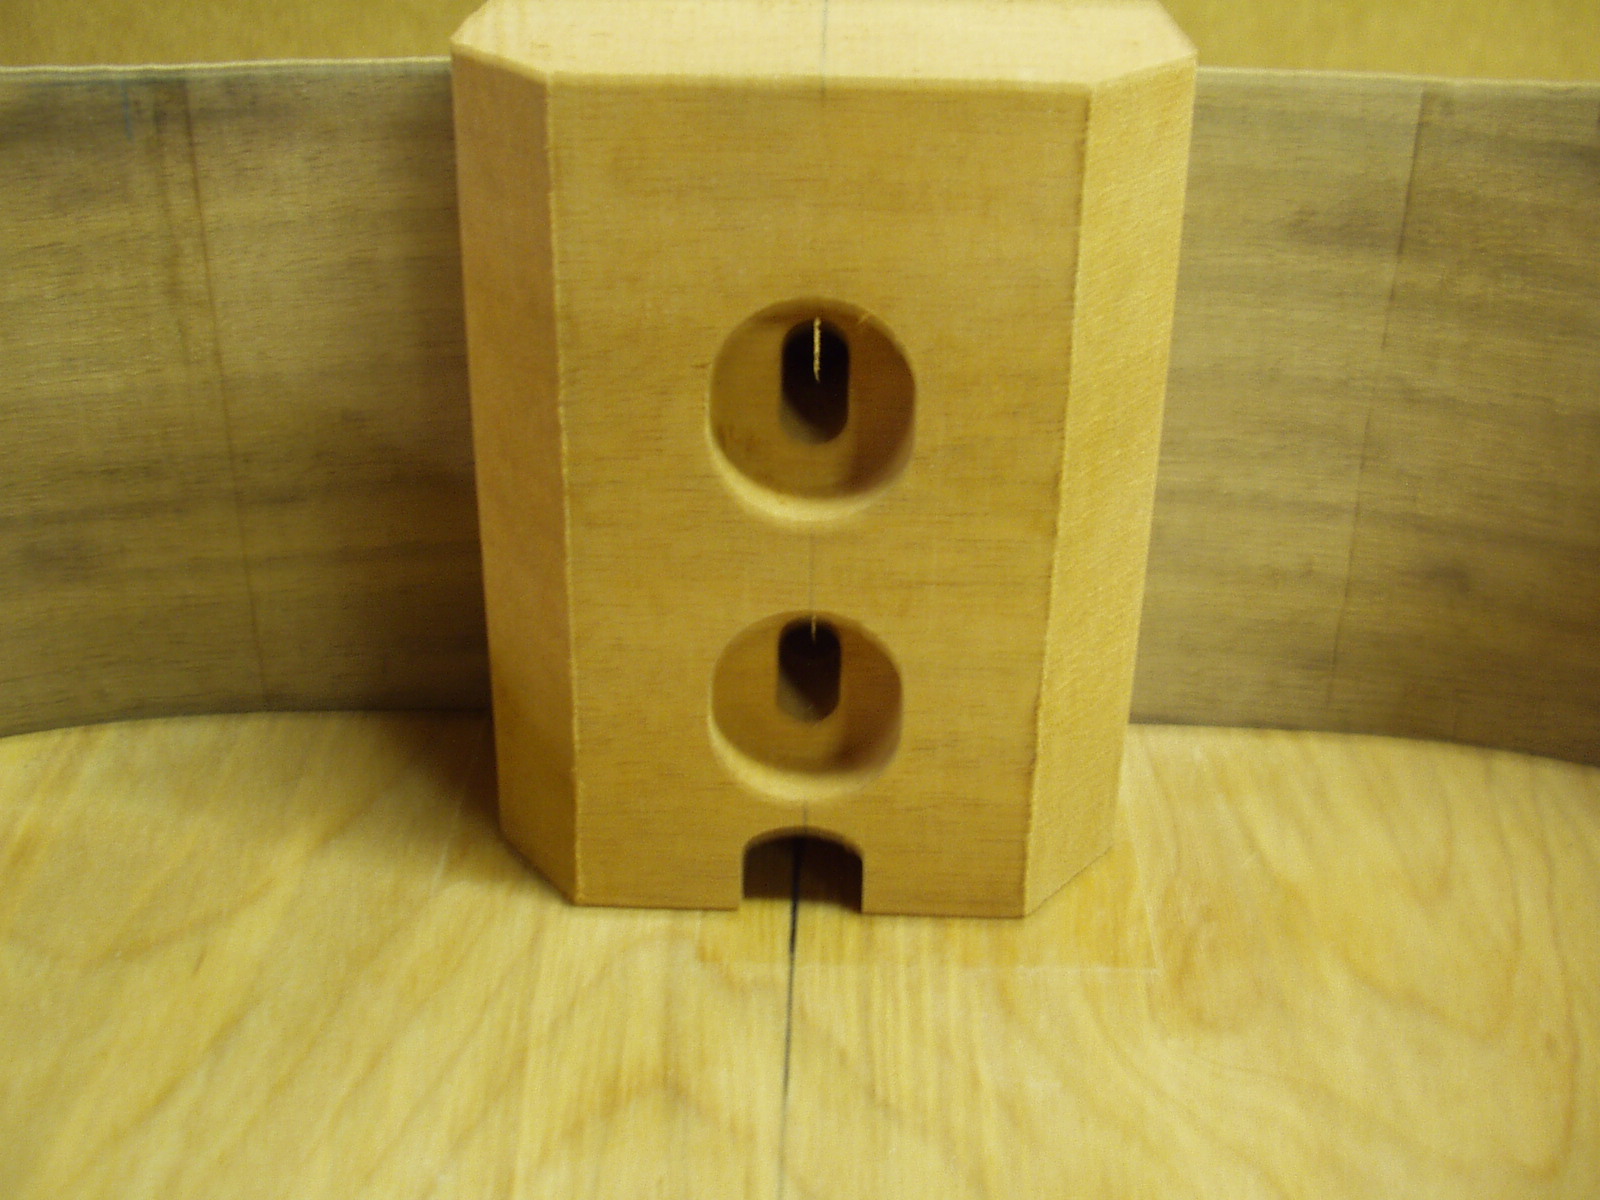
The components used in this
presentation are KMG proprietary
parts. The neck block and neck are
Martin compatible but as you can see
they allow for true “bolt-on” installation
with the added features to
accommodate adjustments. I see no
reason this procedure would not work
for any neck joint system.
presentation are KMG proprietary
parts. The neck block and neck are
Martin compatible but as you can see
they allow for true “bolt-on” installation
with the added features to
accommodate adjustments. I see no
reason this procedure would not work
for any neck joint system.
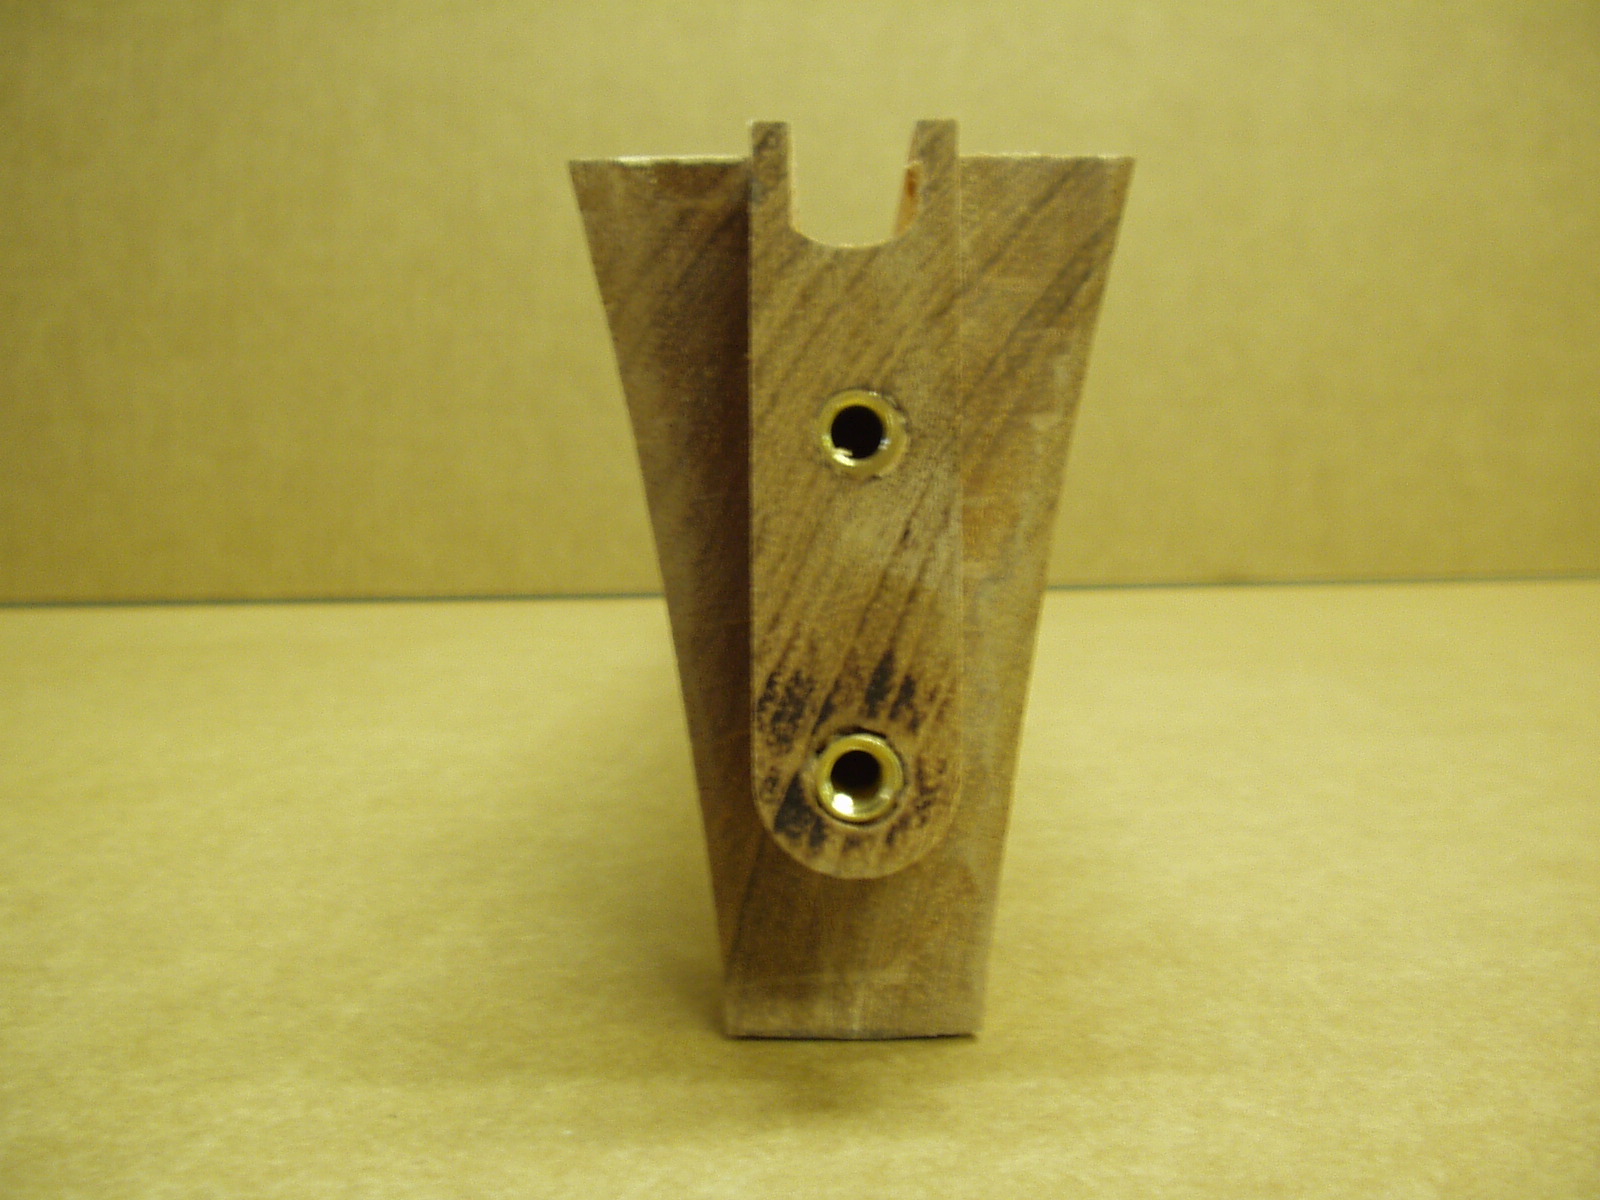
Our necks and “TRUE” Martin necks have an angle machined on the cheeks of the
heel. It is 88.8 +/- degrees to the fingerboard surface.
heel. It is 88.8 +/- degrees to the fingerboard surface.


The assumption is that the “built-in /
“machined-in” neck set angle has not
been altered during the preliminary
appearance neck fit (getting the neck
cheeks flush with the body). Changing
this angle is a mistake! Also, the top at
the neck block should be 90 degrees.
“machined-in” neck set angle has not
been altered during the preliminary
appearance neck fit (getting the neck
cheeks flush with the body). Changing
this angle is a mistake! Also, the top at
the neck block should be 90 degrees.
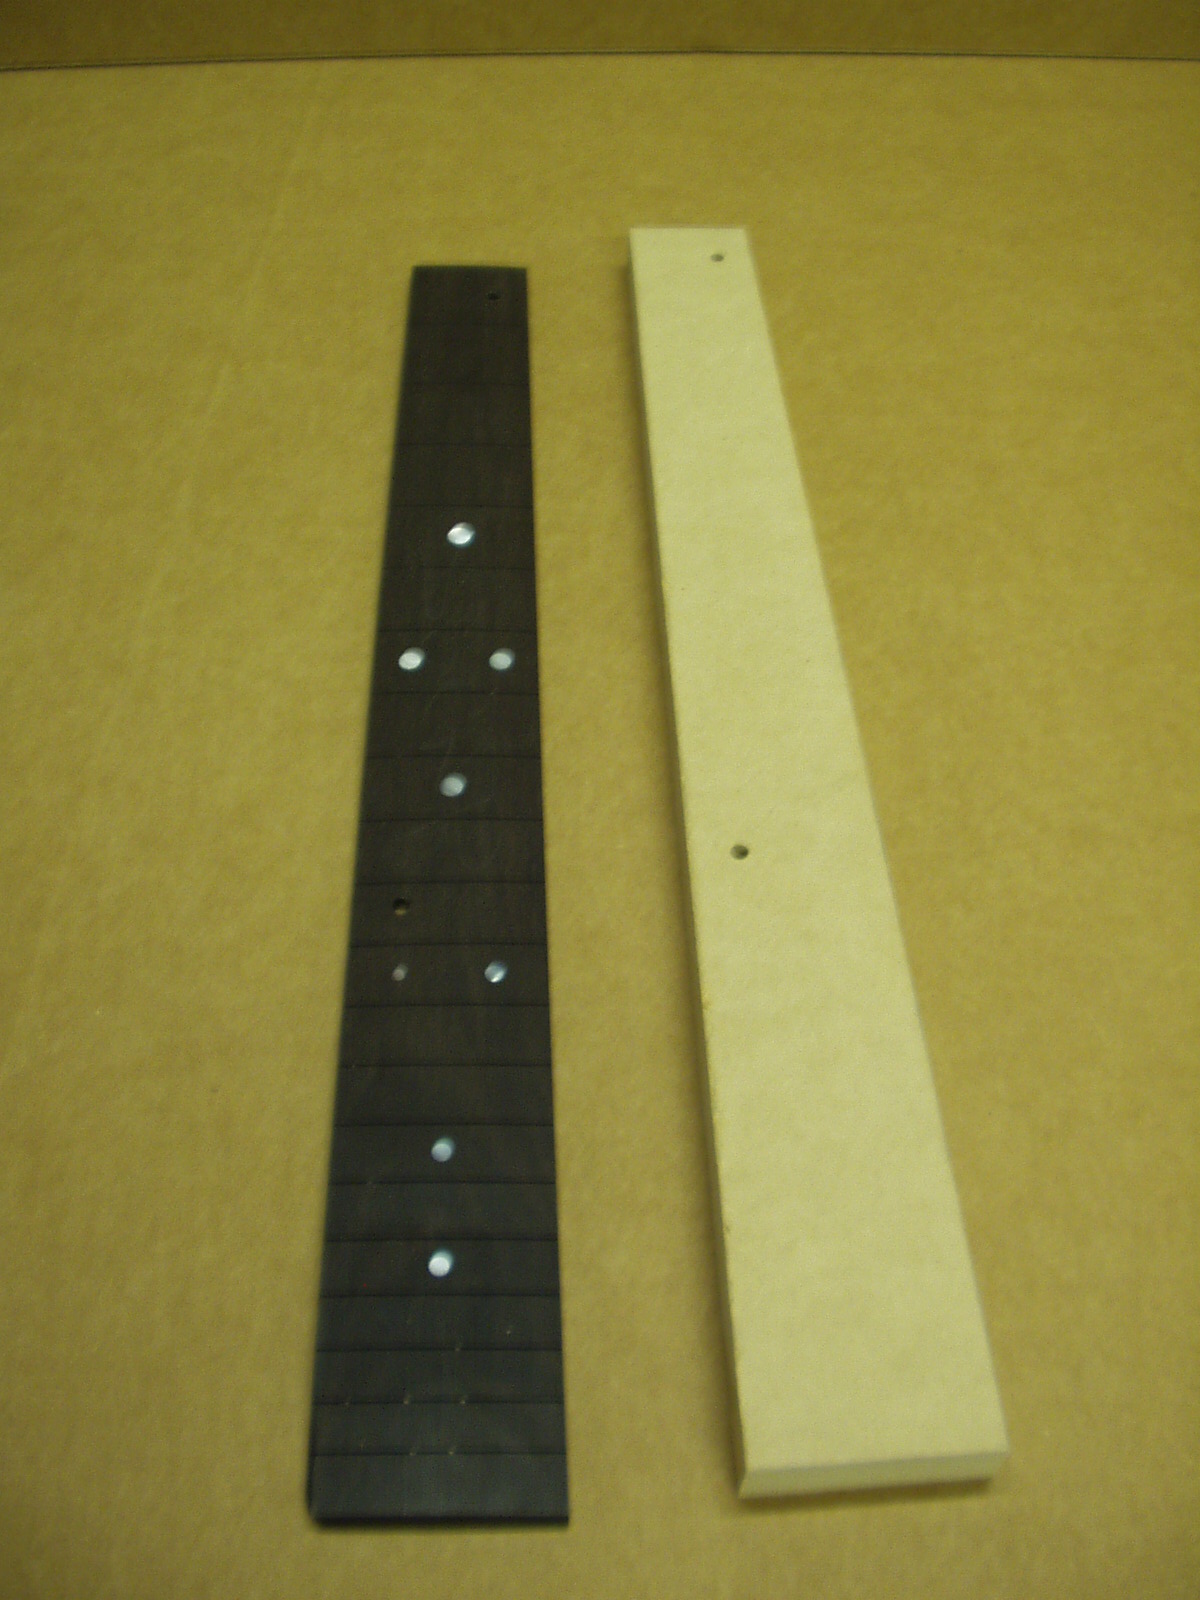
A fingerboard straight edge/level
should be constructed out of material
that is dead flat. The one shown is
MDF, it also has the FB locating holes
drilled.
should be constructed out of material
that is dead flat. The one shown is
MDF, it also has the FB locating holes
drilled.

To speed assembly and disassembly
of the neck we made up a set of
fasteners that are a little easier to
position through the sound hole with
out using a wrench
of the neck we made up a set of
fasteners that are a little easier to
position through the sound hole with
out using a wrench

The fingerboard straight edge/level
simulates the FB position.
simulates the FB position.
NOTE: FOR PHOTOGRAPHIC CLARITY THE SAMPLE GUITAR HAS
THE BINDINGS INSTALLED – THIS PROCEDURE IS NORMALLY
PERFORMED PRIOR TO BINDING ASSEMBLY.
THE BINDINGS INSTALLED – THIS PROCEDURE IS NORMALLY
PERFORMED PRIOR TO BINDING ASSEMBLY.

Assemble the neck so the top edge is
absolutely level with the top.
absolutely level with the top.
Place the FB straight edge/level in position.

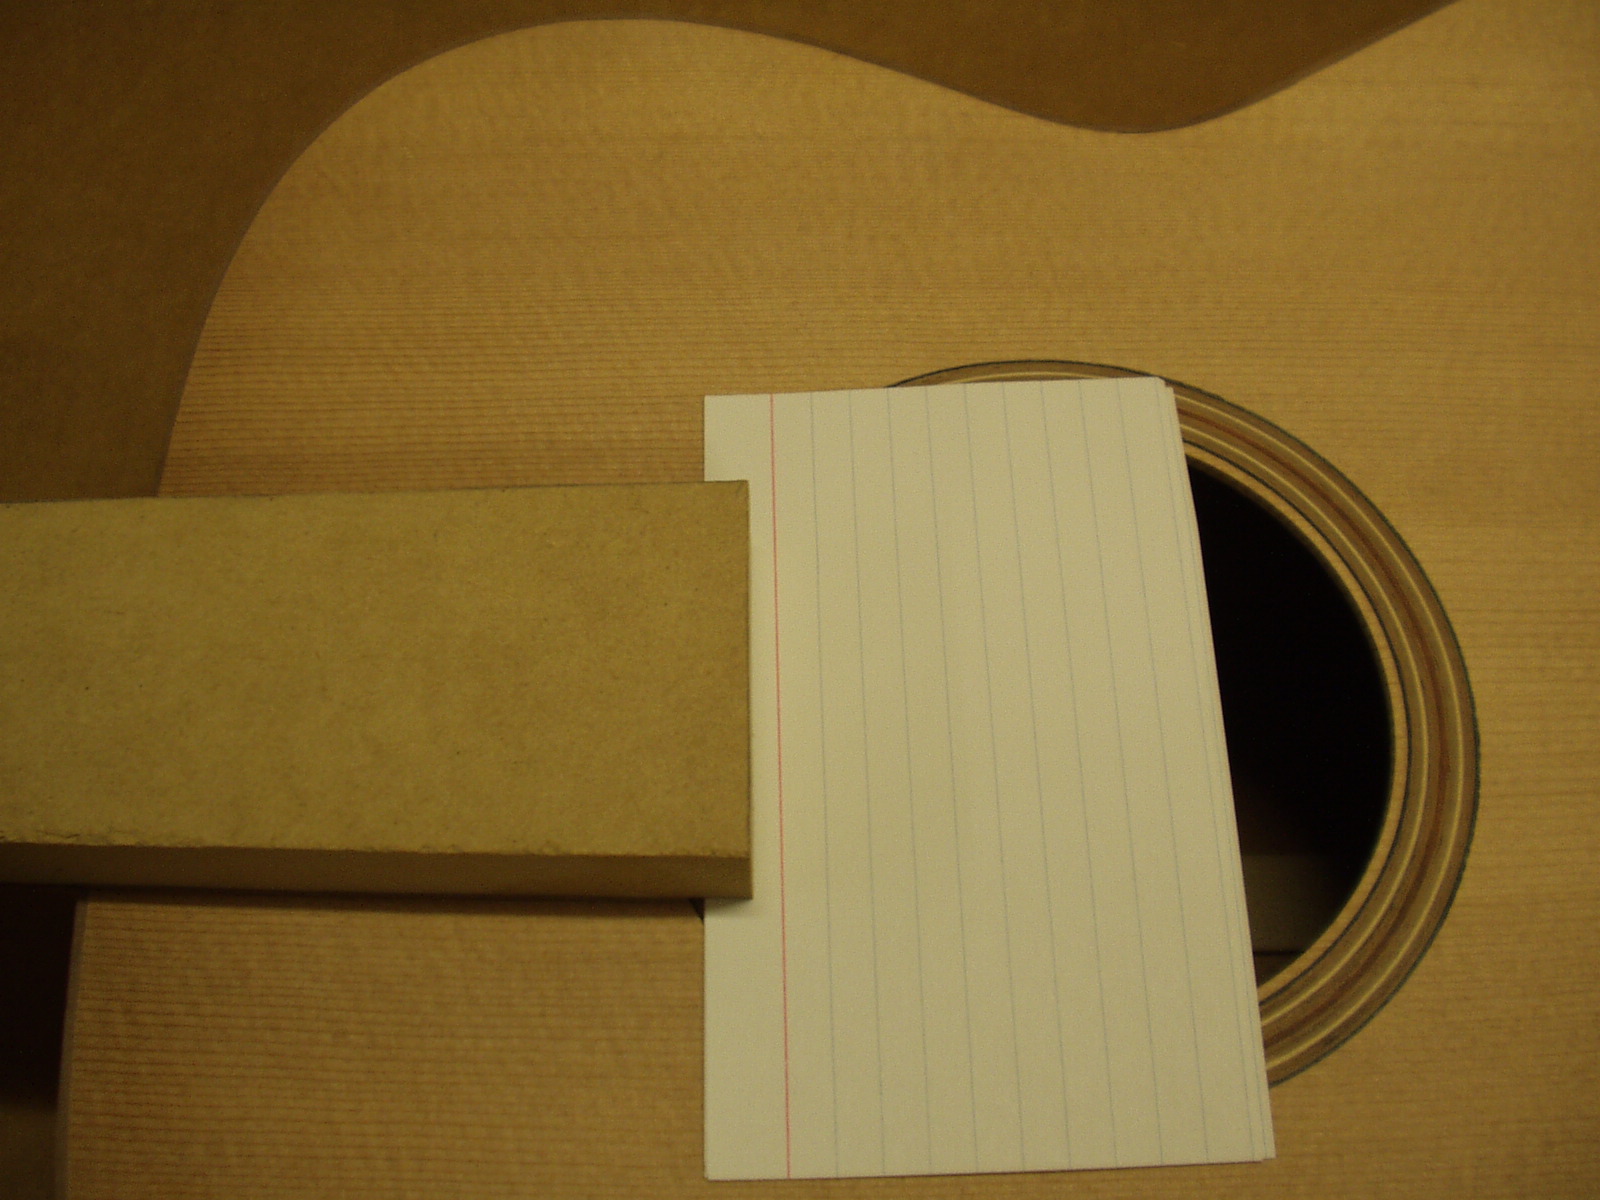
In all likely hood there will be a small gap
at the end of the FB straightedge/level.
Use a stack of index cards to measure the
gap. This example happens to be three
high.
at the end of the FB straightedge/level.
Use a stack of index cards to measure the
gap. This example happens to be three
high.

Trim some index cards to size and tape
a stack equal to the measurement
above to the neck. (this example three
high)
a stack equal to the measurement
above to the neck. (this example three
high)

Loosen the neck and adjust so the
stack of cards is flush with the top.
This will reveal the discrepancy in the
top to neck angle.
stack of cards is flush with the top.
This will reveal the discrepancy in the
top to neck angle.

You will need a sanding block about 4
½ X 1 ½ with the (150G) sandpaper
exposed 2 inches. I like to make these
with 3M 77 adhesive.
½ X 1 ½ with the (150G) sandpaper
exposed 2 inches. I like to make these
with 3M 77 adhesive.

Mark the outline of the fingerboard
location and also pencil in a shaded
area near the sound hole. These
marks will be helpful for regulating your
sanding progress
location and also pencil in a shaded
area near the sound hole. These
marks will be helpful for regulating your
sanding progress
Carefully, sand down the top flush with
the neck fingerboard surface. Position
the sanding block as shown. The end
of the sanding block that does not
have paper will act as guide. The
marks made earlier will barely be
visible when the job is completed. Be
certain not to sand the FB surface.
When the top is flush with the neck ,
sand the top two or so inches out from
the fingerboard edges to feather in the
adjustment.

Check your progress with the straight edge / level to make sure the taper is
sanded evenly from the edge of the rim to the sound hole – its much easier
than it sounds.
sanded evenly from the edge of the rim to the sound hole – its much easier
than it sounds.


The procedure above takes advantage of the precision machining that is performed
on the neck and the neck block. We have found this to be a quick and effective way
to fine tune the neck angle. I have even made gross corrections this way. Over 1/16
taper, feathering out to the edges of the upper bout and smoothing the taper under
the finger board is a little more difficult. Changing the neck angle to close the gap
under the fingerboard IS NOT THE ANSWER. Doing that would take out the required
neck set angle and ruin any chance of low action. A tapered shim under the end of
the fingerboard works well and if executed properly looks very nice.
KMG "Success kit" builders note that you have already properly
sloped the rim during the assembly sequence and much of the
following does not apply to your situation.
sloped the rim during the assembly sequence and much of the
following does not apply to your situation.