Kenneth Michael Guitars LLC
| “Guitar Binding Channel Routing System” ™ v2 plus top and back overhang trimmer |
The “Guitar Binding Channel Routing System” © is a turnkey tool that is ready to work
using your sharp standard 1/4" straight bit. A down-spiral bit can also be used, up-
spiral bits are not recommended. The package includes Trim Router with sealed ball
bearing spindle and an easy to use geared height adjuster, Wood grain Melamine
table base with raised platen and infinite depth “MICRO” adjuster, and the “GBC
shuttle”©. NOTE THAT THE ABILITY TO EASILY CHANNEL CONTOURED TOPS AND
BACKS WAS THE "NUMBER ONE" DESIGN CRITERIA OF THIS SYSTEM.
This product design was developed over a number of years. We have purchased or
built virtually every binding/purfling gadget and tool out there including the one with the
router mounted on the sliding vertical stand. In our opinion none of them are very user
friendly. The inspiration for this machine came while observing the crafts persons at the
CF Martin Factory. These individuals effortlessly routed the top and back binding
rebates in just a few minutes. Although skilled, it was obvious that they did not have a
fear that their machines were going to initiate an improper cut. Also, they were in total
control of the process and the guitar body. The same is true of the operation at the
Taylor factory.
The following sets this machine apart from all others:
· Cost – Ours is reasonably affordable where as the complicated, not so user
friendly, West coast and Ohio style overhead machine with cutters is almost $700 and it
is still unable to cut custom grooves or handle slightly over or under size binding and
purflings!!!
· Router Bit – No fancy expensive bits or bearing size math calculations required!
All that is needed is a sharp 1/4" HSS (high speed steel) straight bit. Down-spiral bits
yield great results--- up-spiral bits or end mills are not recommended.
· Setup – Infinite height and depth adjustment in about 2 minutes – No Bit or
bearing changes – No carriage to adjust. We route D’s 000’s and J200 Jumbos using
the same bit settings. Simply put the body on the “GBC Shuttle” and start.
· Control – The cutting bit is directly in front of the operator and guitar is easily
and precisely guided on the platen using the “GBC Shuttle” The “GBC Shuttle” while
eloquently simple in design, provides for variable height. In addition it automatically and
gently handles tapered sides as well as top and back radius contours
· Quality – The captive bit feature virtually eliminates the possibility of damage
caused by presenting the body at the wrong angle to the bit or vise versa
· Dust Collection – We are not aware of any other machine with this feature.
Note: photos are file copies of our prototype machine.
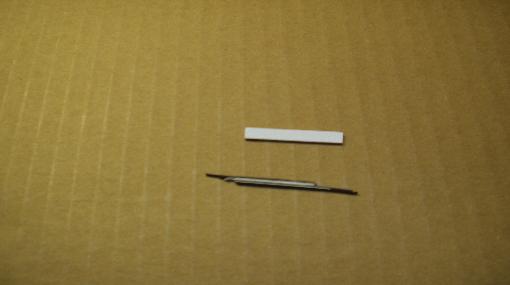
The set up parameters are established using the actual binding and purfling materials
as gages. First step is to glue up a sample of the binding trim. In addition to providing
the exact thickness and height of material, the slight compensation for the glue line is
also inserted into the process.
as gages. First step is to glue up a sample of the binding trim. In addition to providing
the exact thickness and height of material, the slight compensation for the glue line is
also inserted into the process.
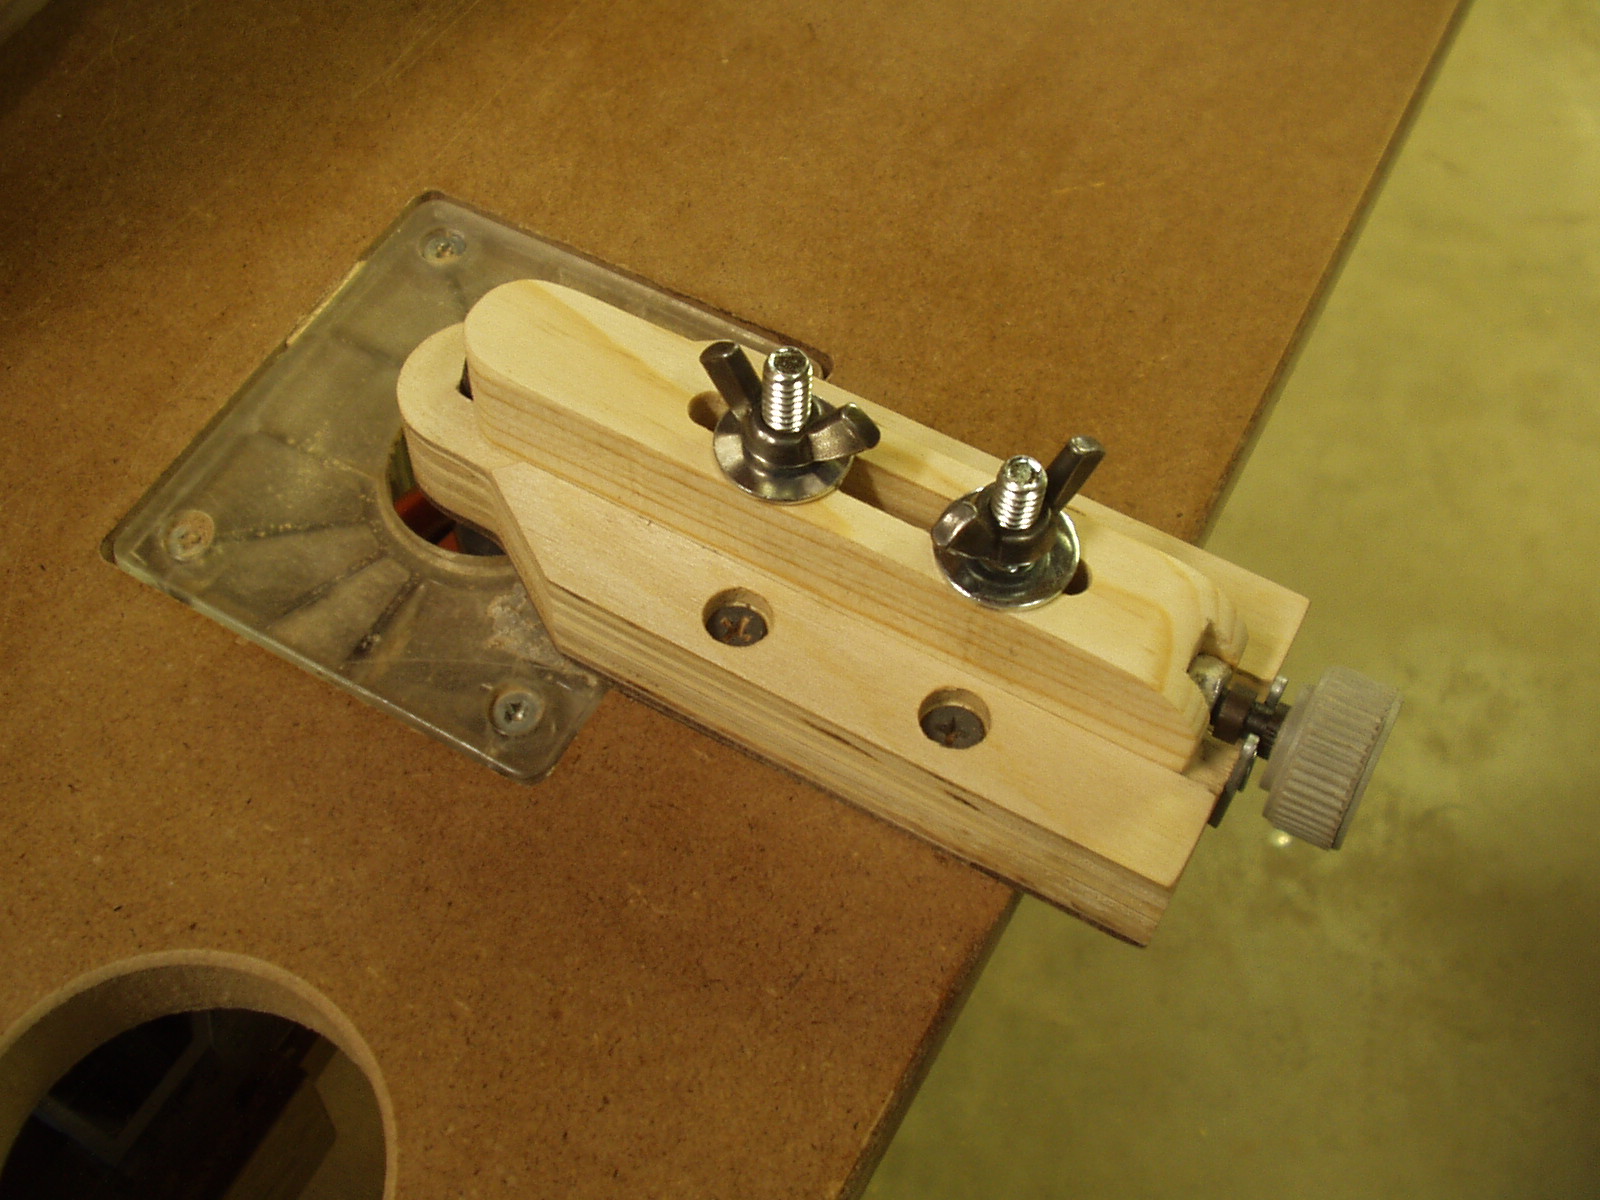
Use glue-ups like the ones above as gages to adjust the height and depth of the cut.
Height is set with the rack and pinion on the router and the Depth is set using the
Infinite Adjustment Sliding Guide.
Height is set with the rack and pinion on the router and the Depth is set using the
Infinite Adjustment Sliding Guide.
Place small piece of trim on the platen, raise the cutting edge of the bit flush with the
top of the sample
top of the sample

To set the depth, use a small piece of material as a stop block. Rotate the bit so the
tips of the cutting edges are parallel to the guide. Pinch the gage sample material
between the stop block and the guide tighten the wing nuts.
tips of the cutting edges are parallel to the guide. Pinch the gage sample material
between the stop block and the guide tighten the wing nuts.
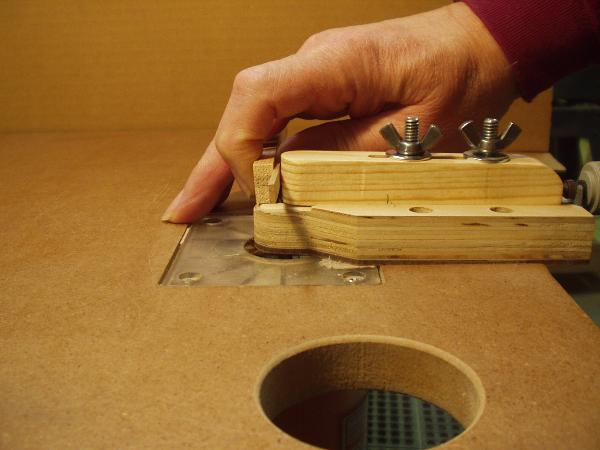
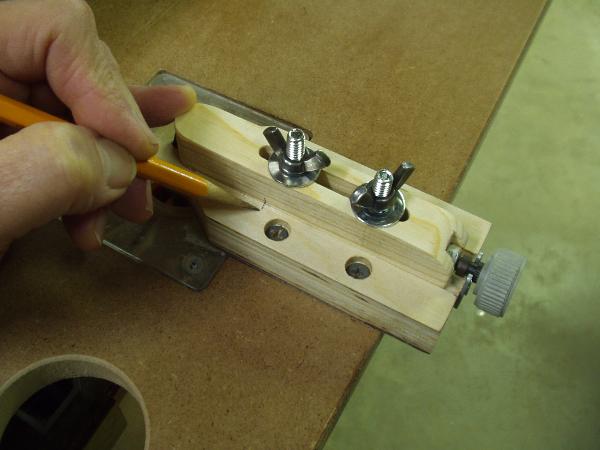
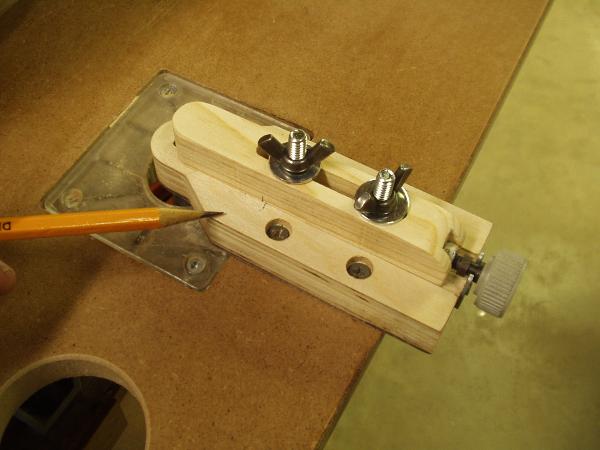
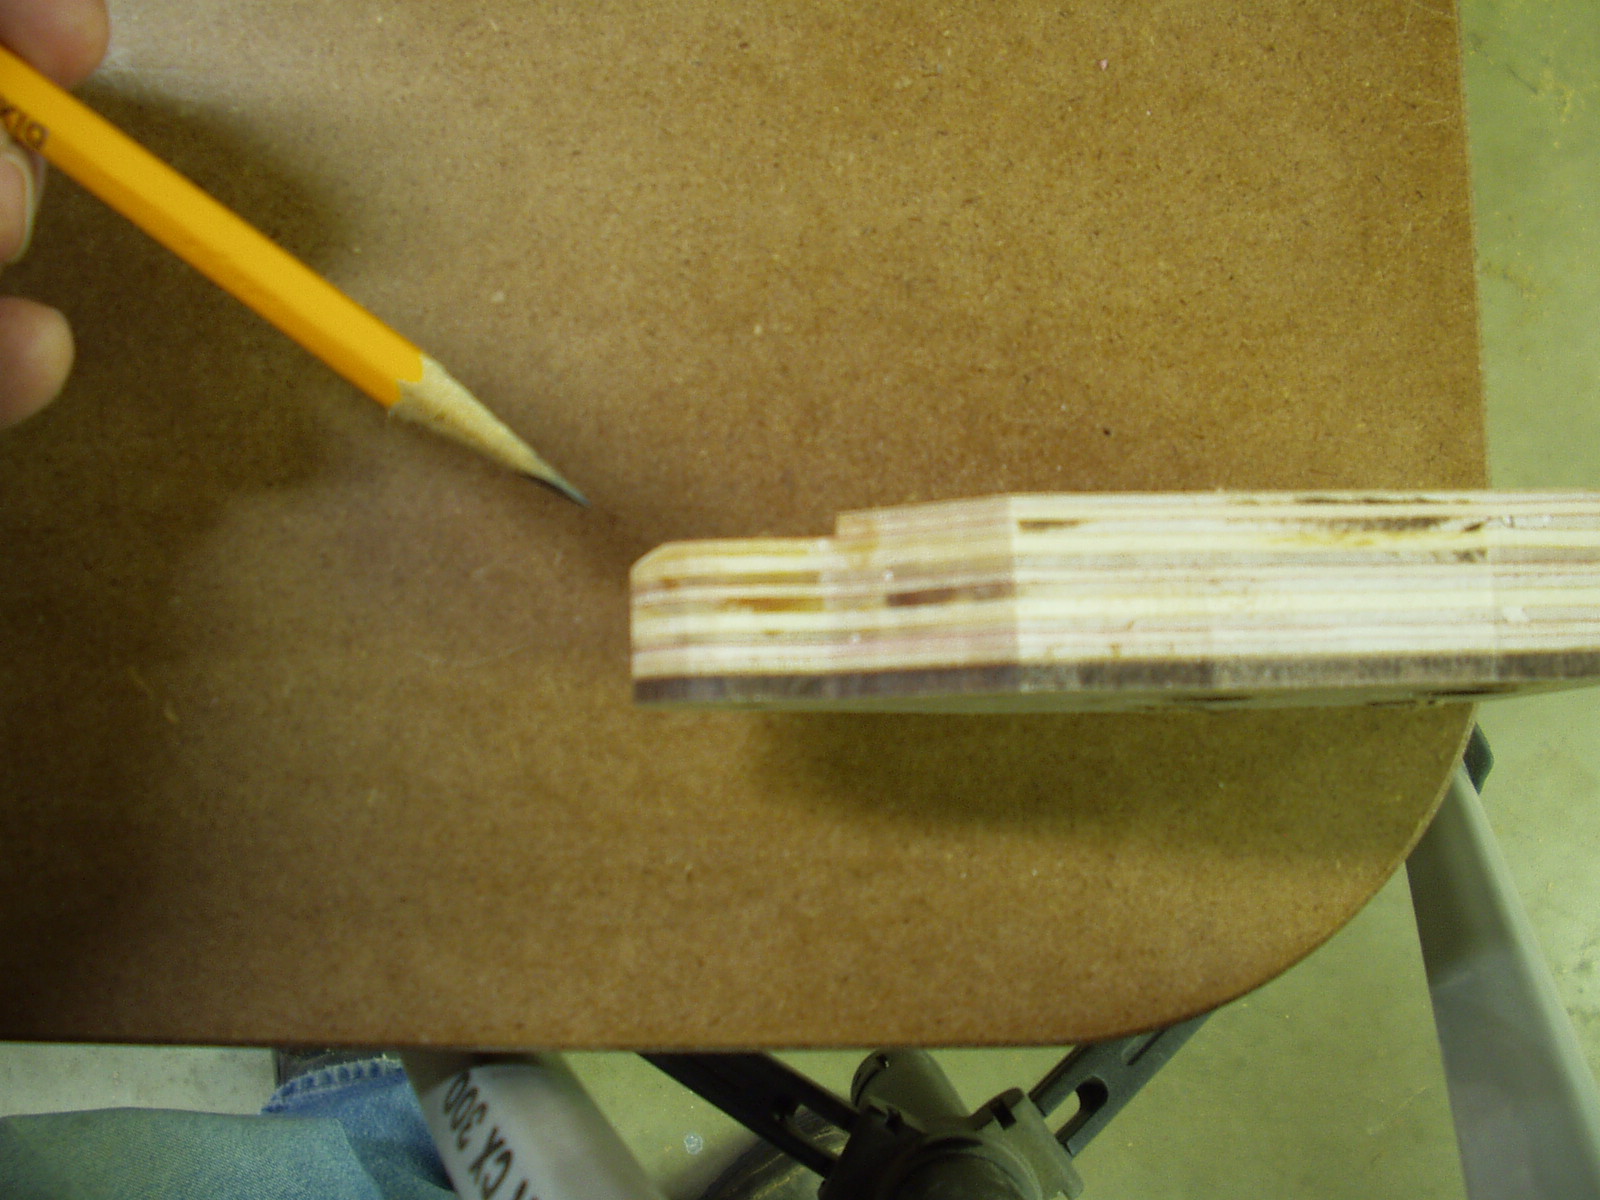
After initial set-up, test the cut using pieces of scrap material, most likely fine
adjustment will be necessary. To aide in the fine tuning, mark a short continuous line on
the guide and slide base as illustrated below. This makes it easy to track the progress
of your fine adjustments.
adjustment will be necessary. To aide in the fine tuning, mark a short continuous line on
the guide and slide base as illustrated below. This makes it easy to track the progress
of your fine adjustments.
The KMG Binding Machine is the most user friendly device available,
however it is advised that you take time to make some practice cuts to get
familiar with the process before working on your guitar.
however it is advised that you take time to make some practice cuts to get
familiar with the process before working on your guitar.
When you have the proper tool, like our binding channel system, cutting rebates is not all
that difficult. However, realistically this process for many requires a completely new hand
eye coordination skill set. So like all other new motor skills it should be rehearsed. When it
is time to actually cut the channels on the prized instrument, the operator should be
comfortable in the knowledge that he understands what the router is about to do and that
he can control the tool to produce clean rebates in just a couple of passes. This is not a
simplistic approach ---- anything less is a “hope and a prayer” not craftsmanship.
Practice cuts can be made using scrap material. Shape does not matter. Make cuts with
the grain, against the grain, on the edges, on the flat sides. Get the feel of starting the
cut. Stopping in the middle of a cut. Get comfortable holding and controlling the scrap
material, gliding the it over the table with the shuttle while positioning the edge on the
platen and against the guide. Developing this coordination simply improves productivity.
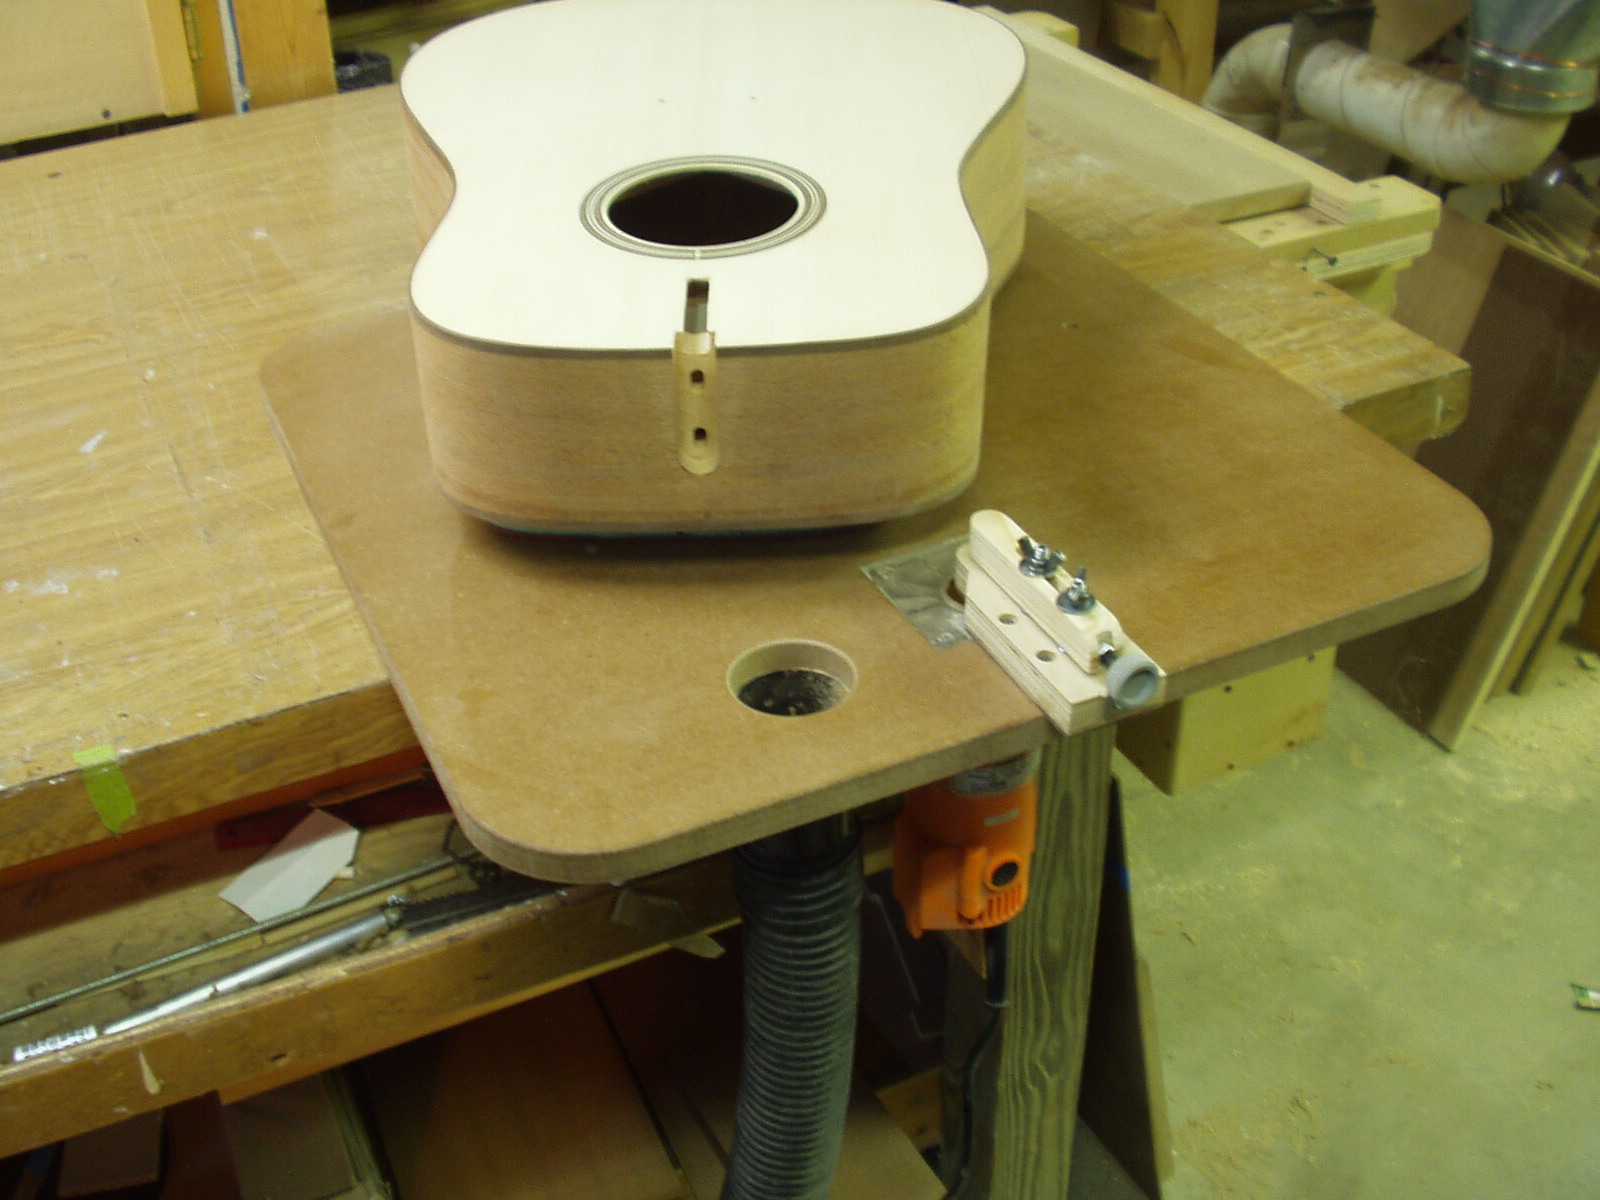
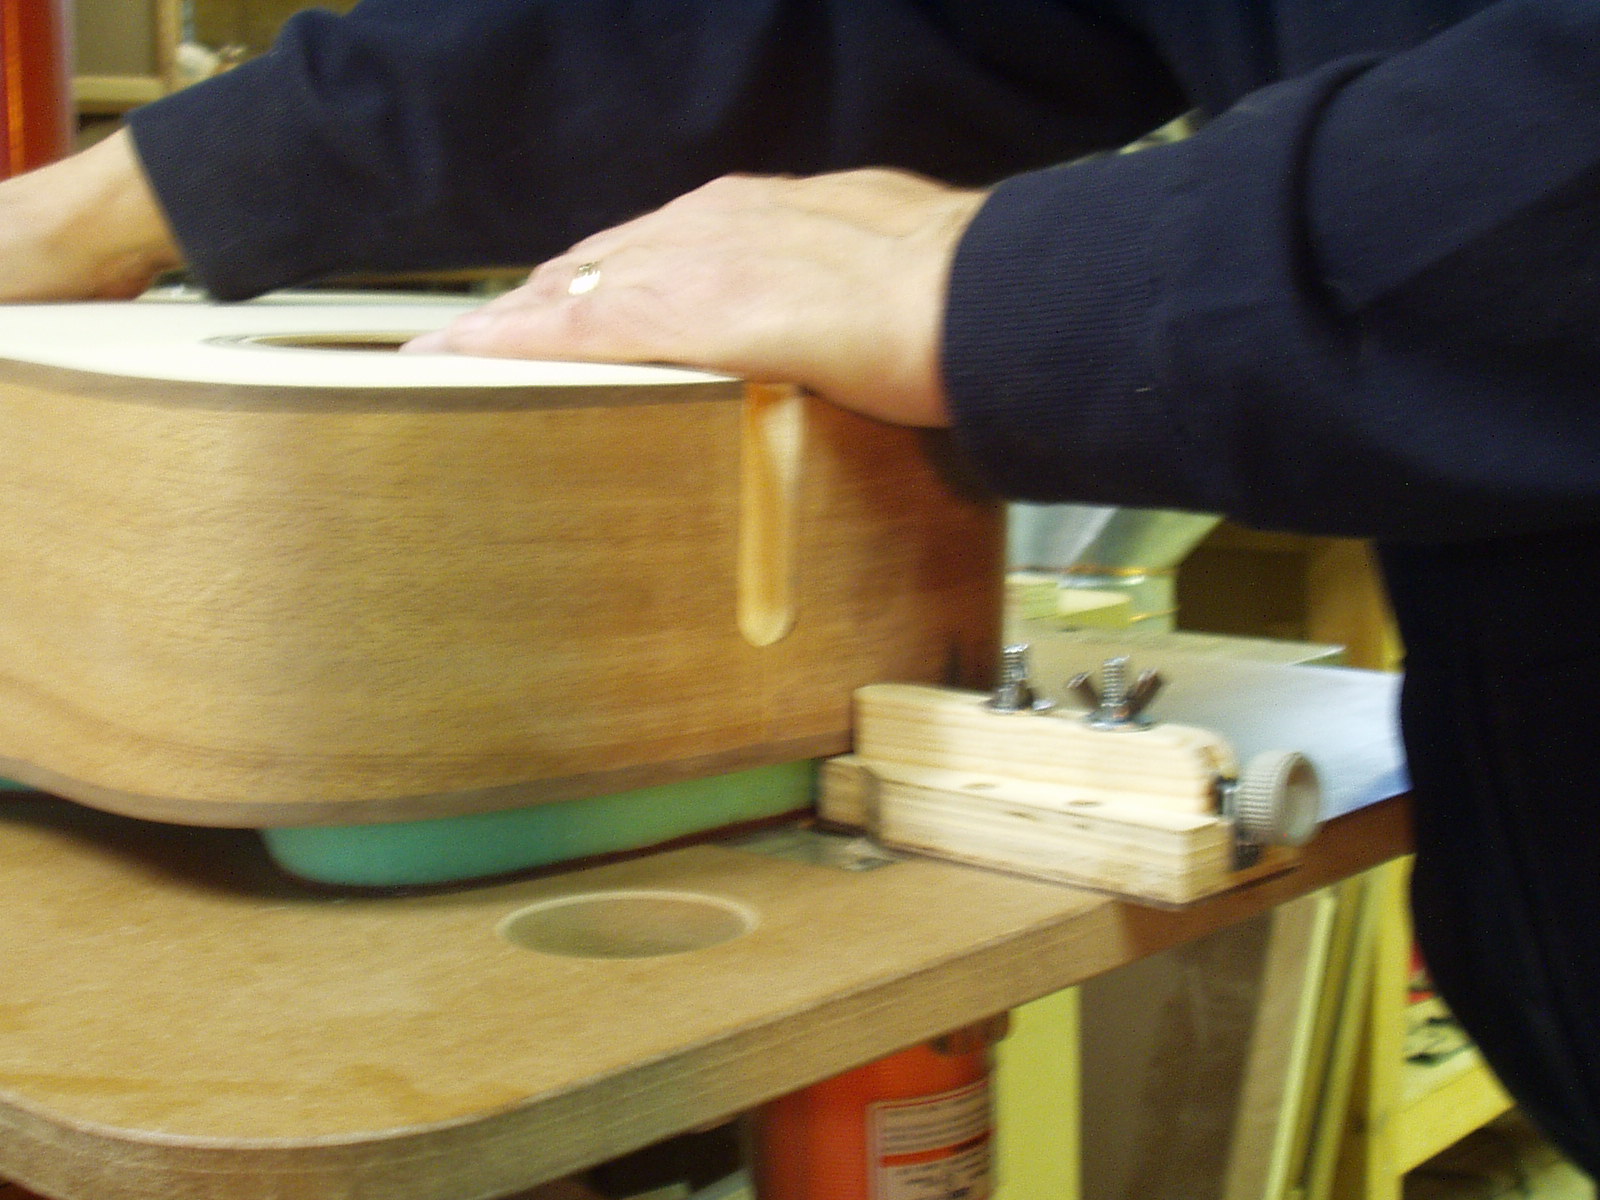
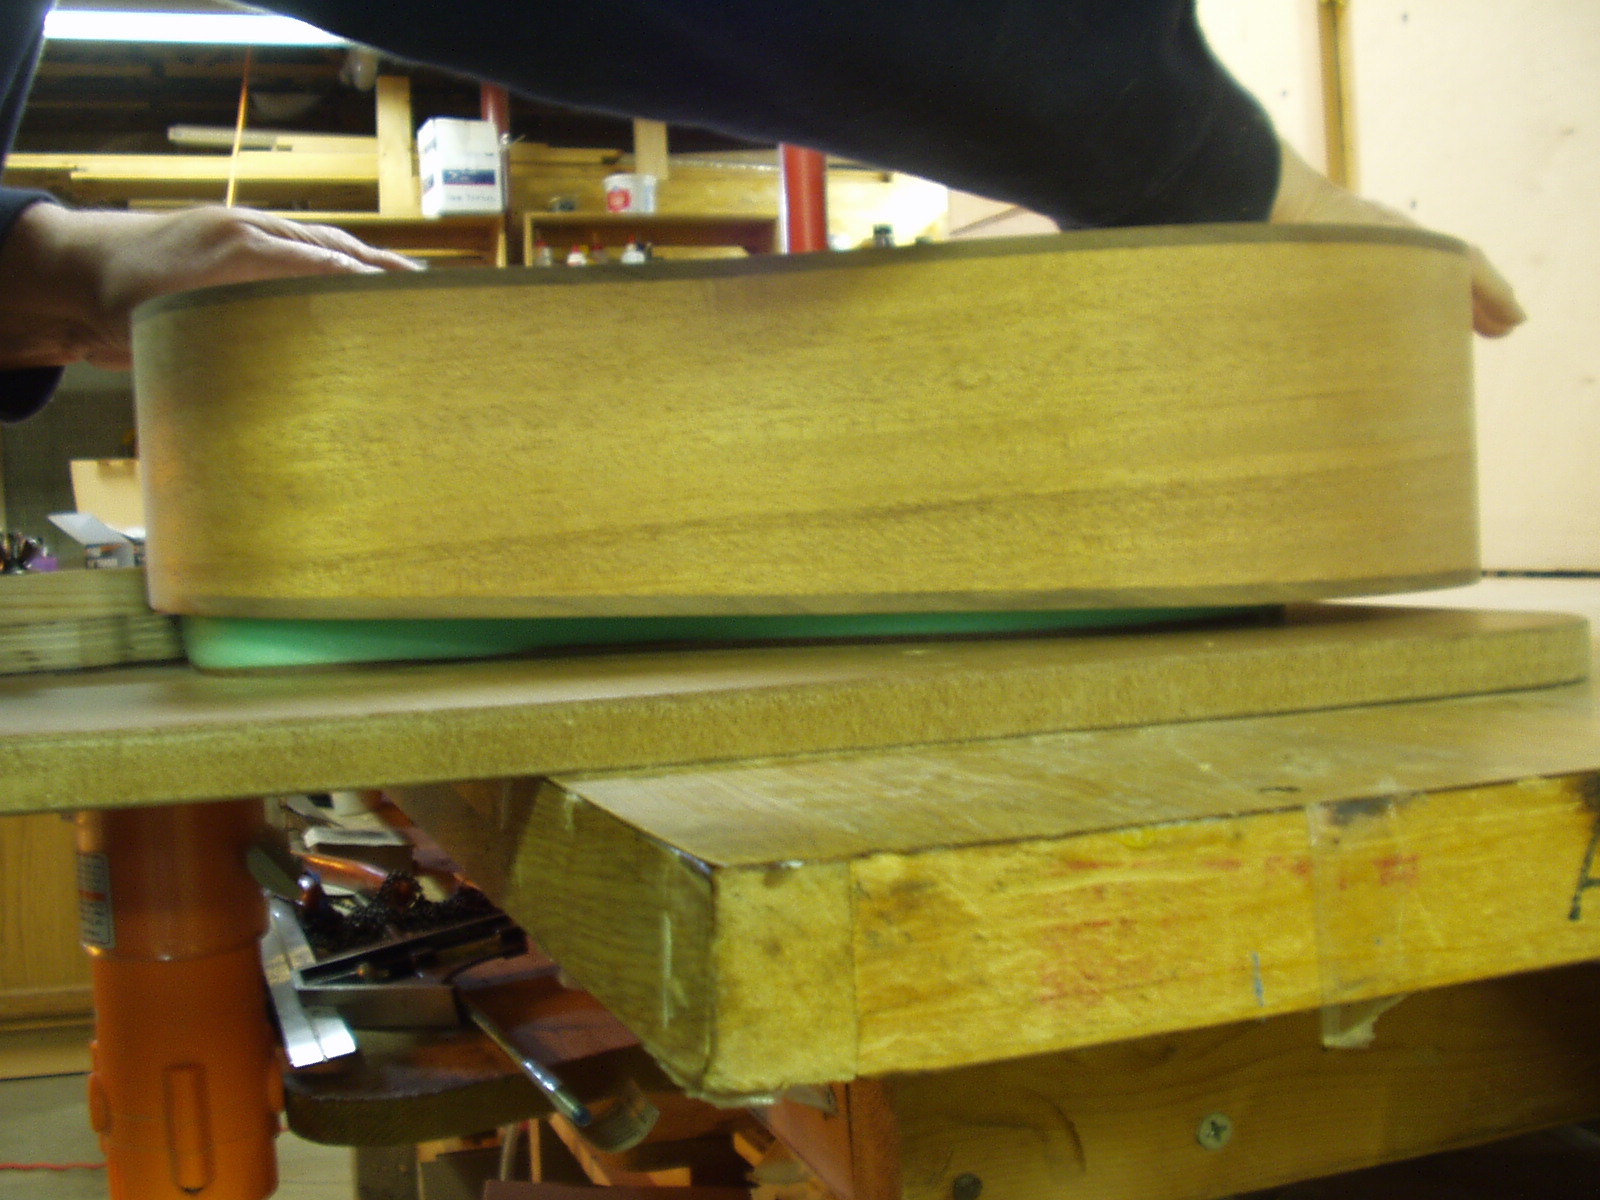
The “GBC” shuttle is placed on the
table – “green side up” than the guitar
is positioned on the shuttle. Note that in
the idle position, the guitar is above
and clear of the router bit. THIS FAIL
SAFE MODE OCCURS ANY TIME THE
BODY IS RELEASED --a good thing!
table – “green side up” than the guitar
is positioned on the shuttle. Note that in
the idle position, the guitar is above
and clear of the router bit. THIS FAIL
SAFE MODE OCCURS ANY TIME THE
BODY IS RELEASED --a good thing!

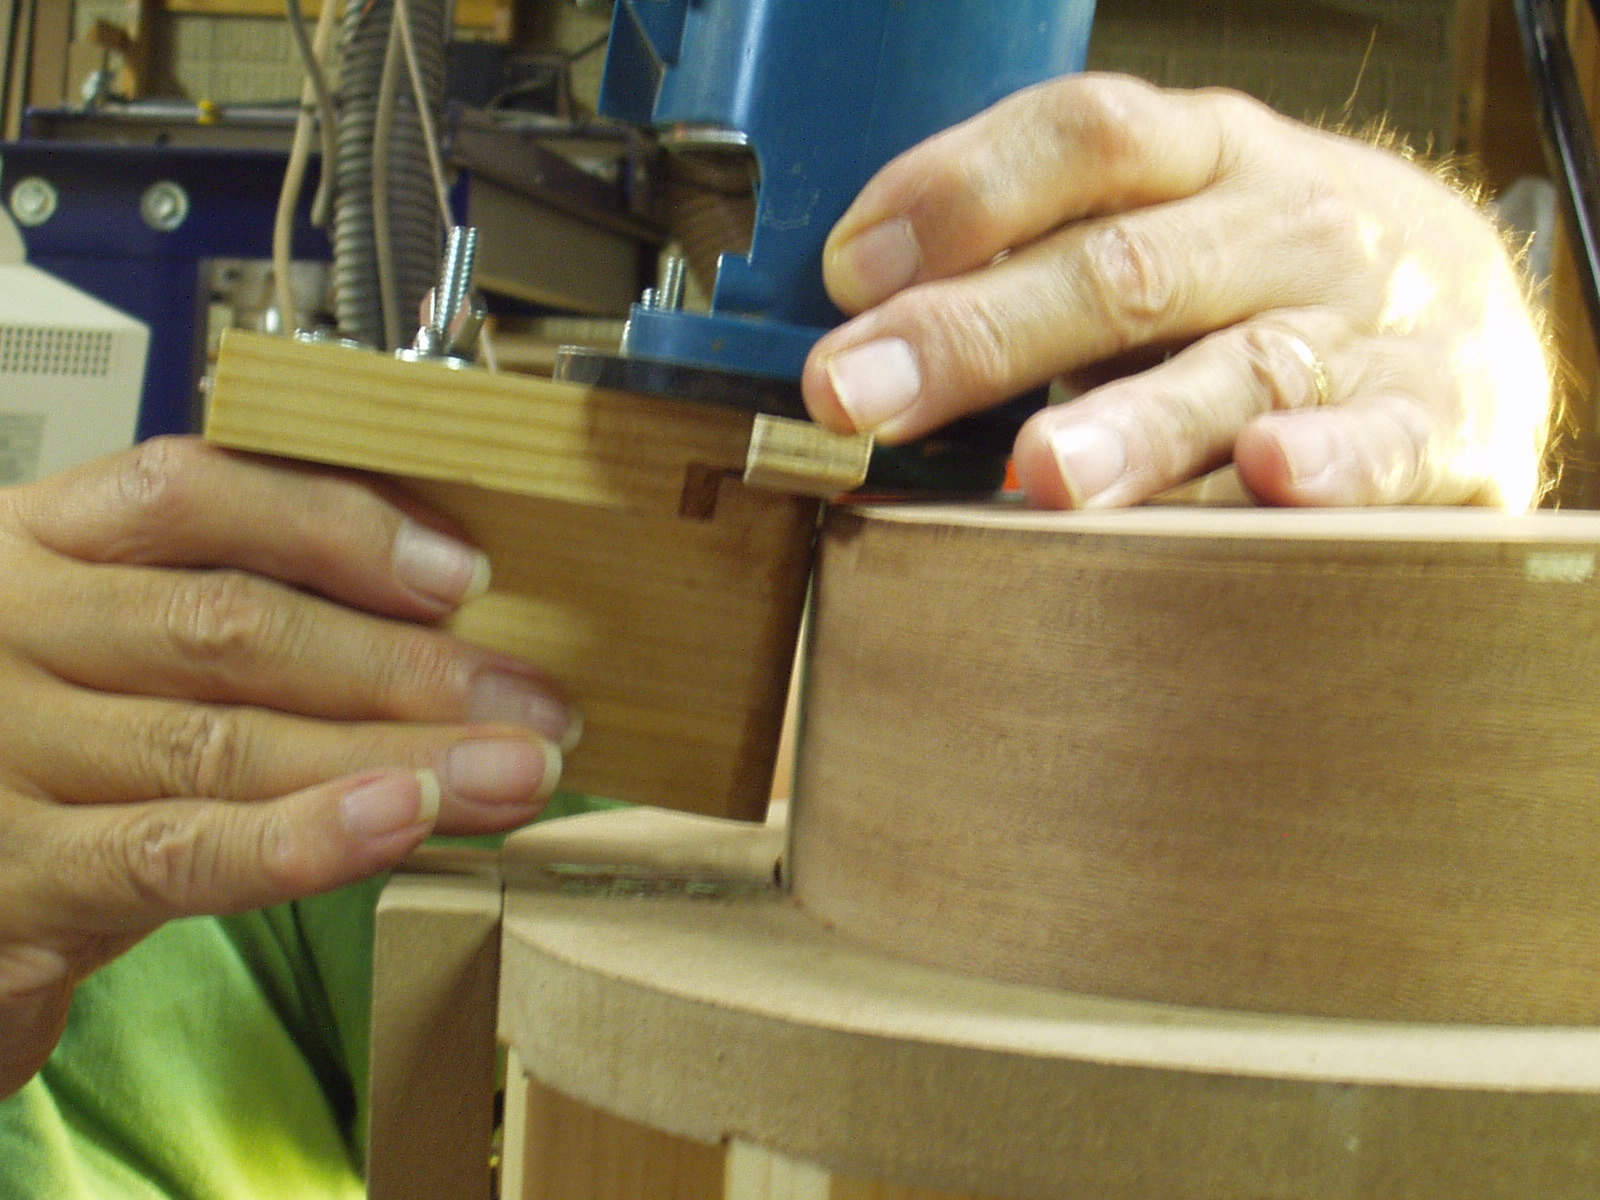
To make the actual cut simply place
the edge of the guitar body on the
platen and pull it into the bit. Think in
terms of routing “one inch at a time”
this is an important concept to
visualize. --With ANY routing tool
focus must be on the cutting bit.
Simply keep the edge flat on the platen
while feeding the body into the bit, this
is easy to do and becomes automatic
in a minute or two. Also, as the body is
moved along keep the chord of the
curve perpendicular the guide.
Since about the only error that can
be made is a too shallow cut,
moving the body across the platen
and guide is a very quick process.
There is no fear of the dreaded
over cut or deep cut. Note that in our
shop we actually complete the channels
using three passes. A shallow cut, a
finish cut and finally a clean up cut,
paying close attention to carefully follow
the curves as described above.
| Unlike other tools there is no balancing act needed to prevent damage!! |
The ability of the KMG Binding machine to easily cut the channels on the neck block
end of the body sets it apart from the others. When routing this area, continue to
keep the edge of the body positioned on the platen, in addition push down on the tail
block section. The unique design of the “GBC” shuttle allows the operator to change
attitude of the body so the edge at the neck block can be pulled tight into the guide
while flat on the platen
The KMG Binding Machine as shipped usually has sufficient slope sanded on the front
edge of the platen to allow the body to be tilted and pulled tight against the guide. If
additional clearance is needed, use sand paper or a file to increase the slope angle on
the end of the guide. Work slowly, only making small changes; check your work as you
go. The idea is to keep as much of the platen flat as possible.
| WHY IT WORKS!! |
A hand held router must be guided
along the side of the guitar. There are
a few router attachments available that
facilitate this action. The problem is,
even with those devices there is a risk
of tipping the router, which will result in
a channel that is too deep and too
wide on the top or back.
along the side of the guitar. There are
a few router attachments available that
facilitate this action. The problem is,
even with those devices there is a risk
of tipping the router, which will result in
a channel that is too deep and too
wide on the top or back.

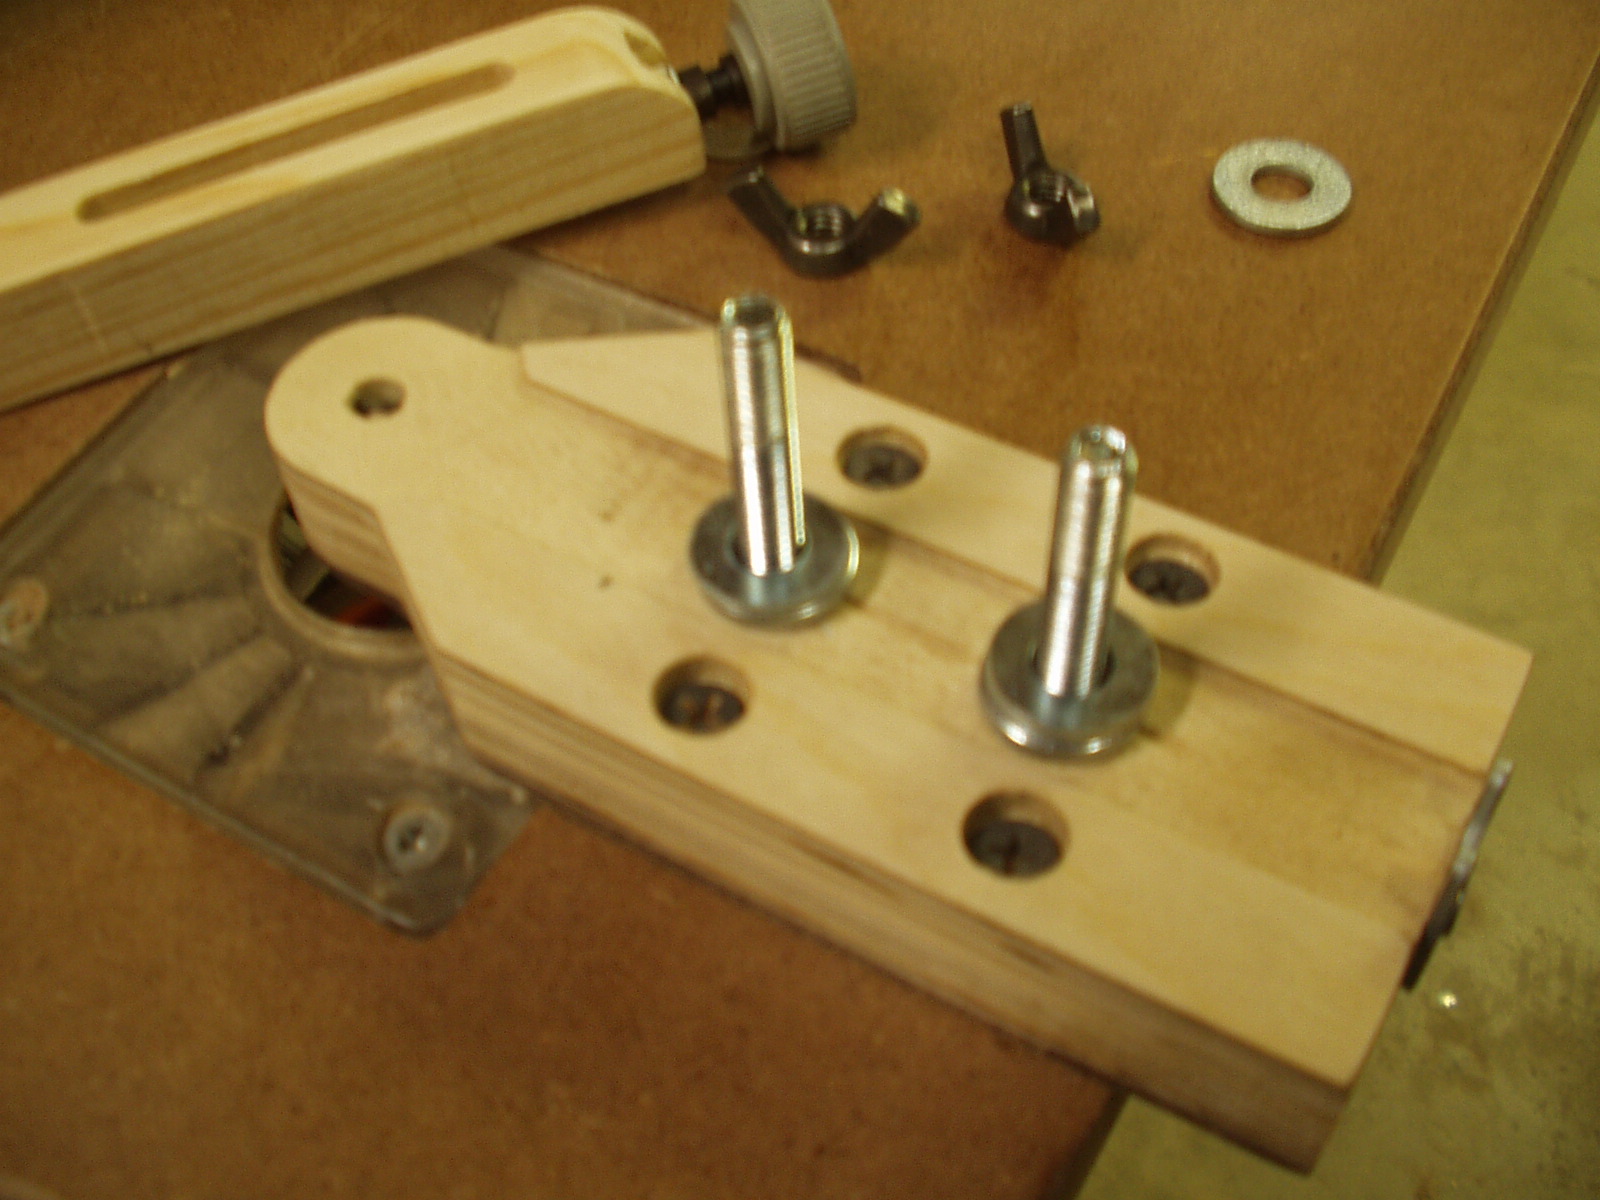
Remove the sliding guide and place
three small 1/4" id washers on each
bolt. Install the guide on top of the
washers.
three small 1/4" id washers on each
bolt. Install the guide on top of the
washers.
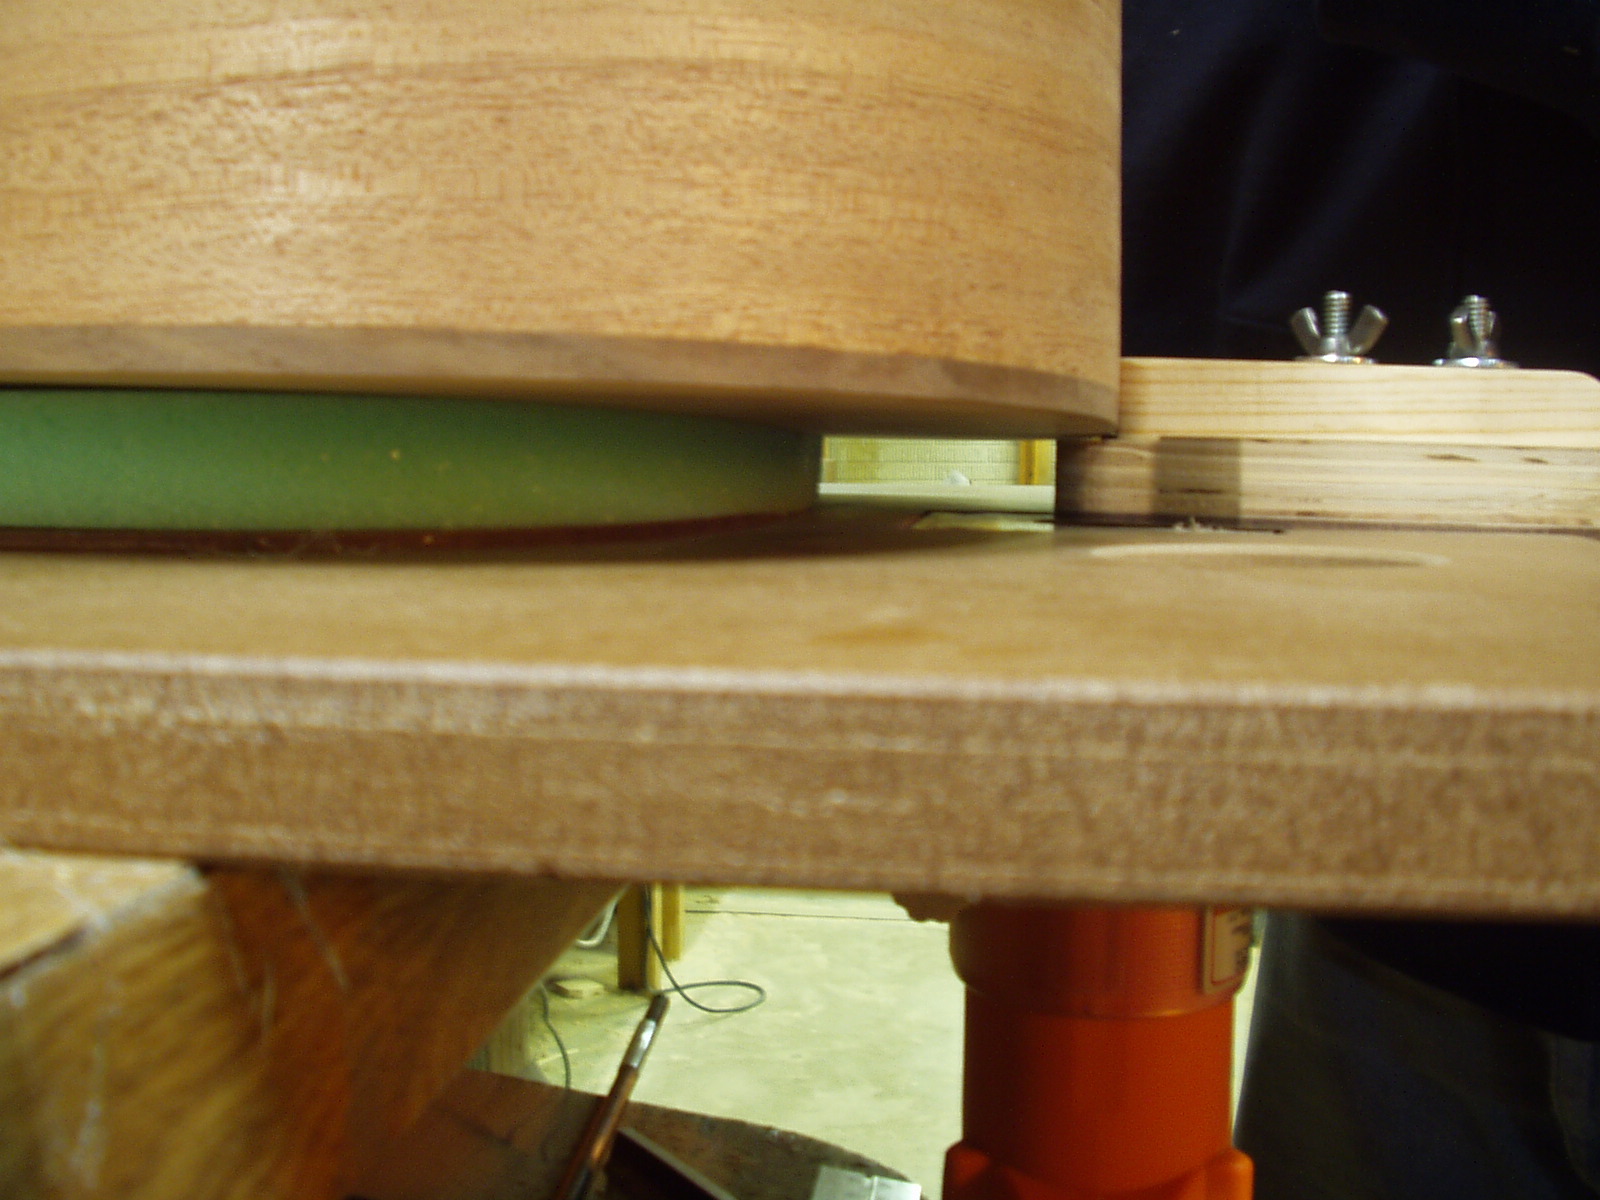
Note the gap that is formed between
the bottom of the guide and the top of
the platen.
the bottom of the guide and the top of
the platen.
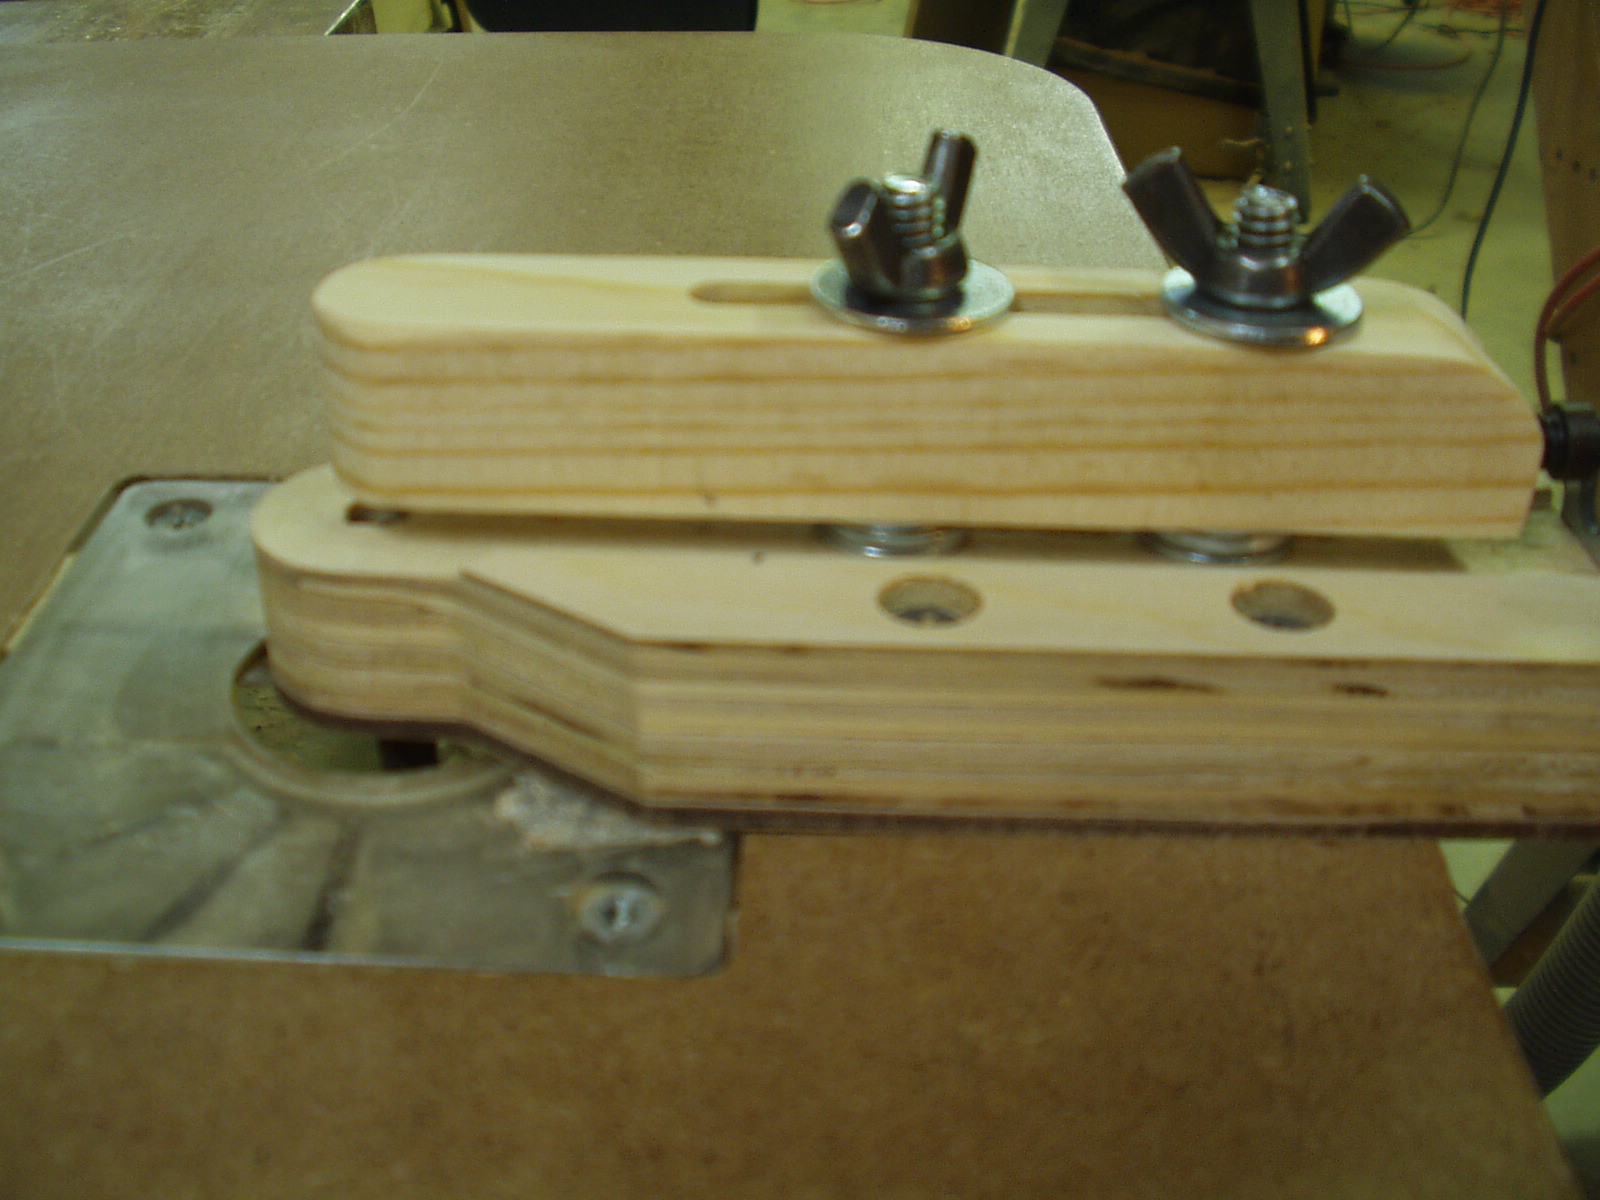
Raise the bit just slightly higher then
the bottom of the sliding guide. Adjust
the sliding guide flush with the bit's
cutting edge. With this set-up the side
rides on the guide but the over hang
fits in the gap and will be trimmed flush
to the side.
the bottom of the sliding guide. Adjust
the sliding guide flush with the bit's
cutting edge. With this set-up the side
rides on the guide but the over hang
fits in the gap and will be trimmed flush
to the side.
The components for the Channel routing system are precision CNC machined in our
shop. By design the table is meant to be fastened to a workbench using two screws. We
have found this to be an ideal working height in addition to providing a compact space
saving configuration. The vacuum port is the standard 2 ¼” diameter.
shop. By design the table is meant to be fastened to a workbench using two screws. We
have found this to be an ideal working height in addition to providing a compact space
saving configuration. The vacuum port is the standard 2 ¼” diameter.
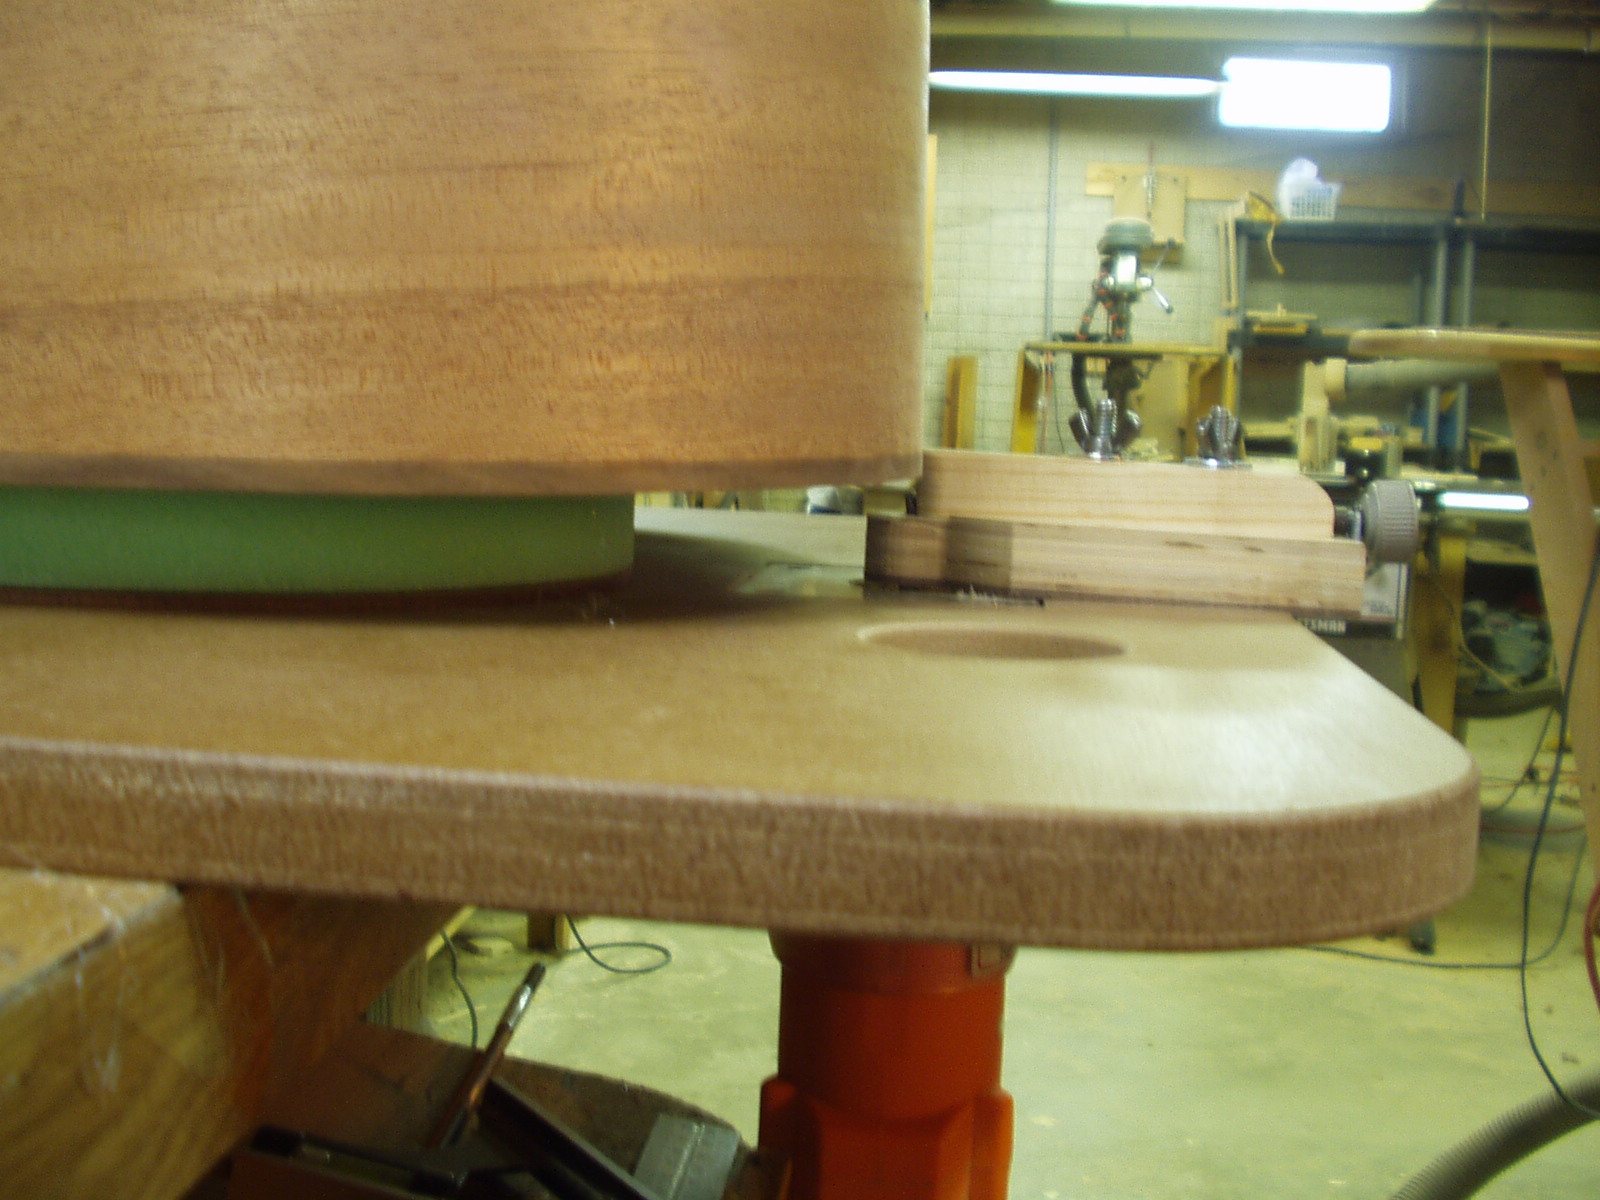
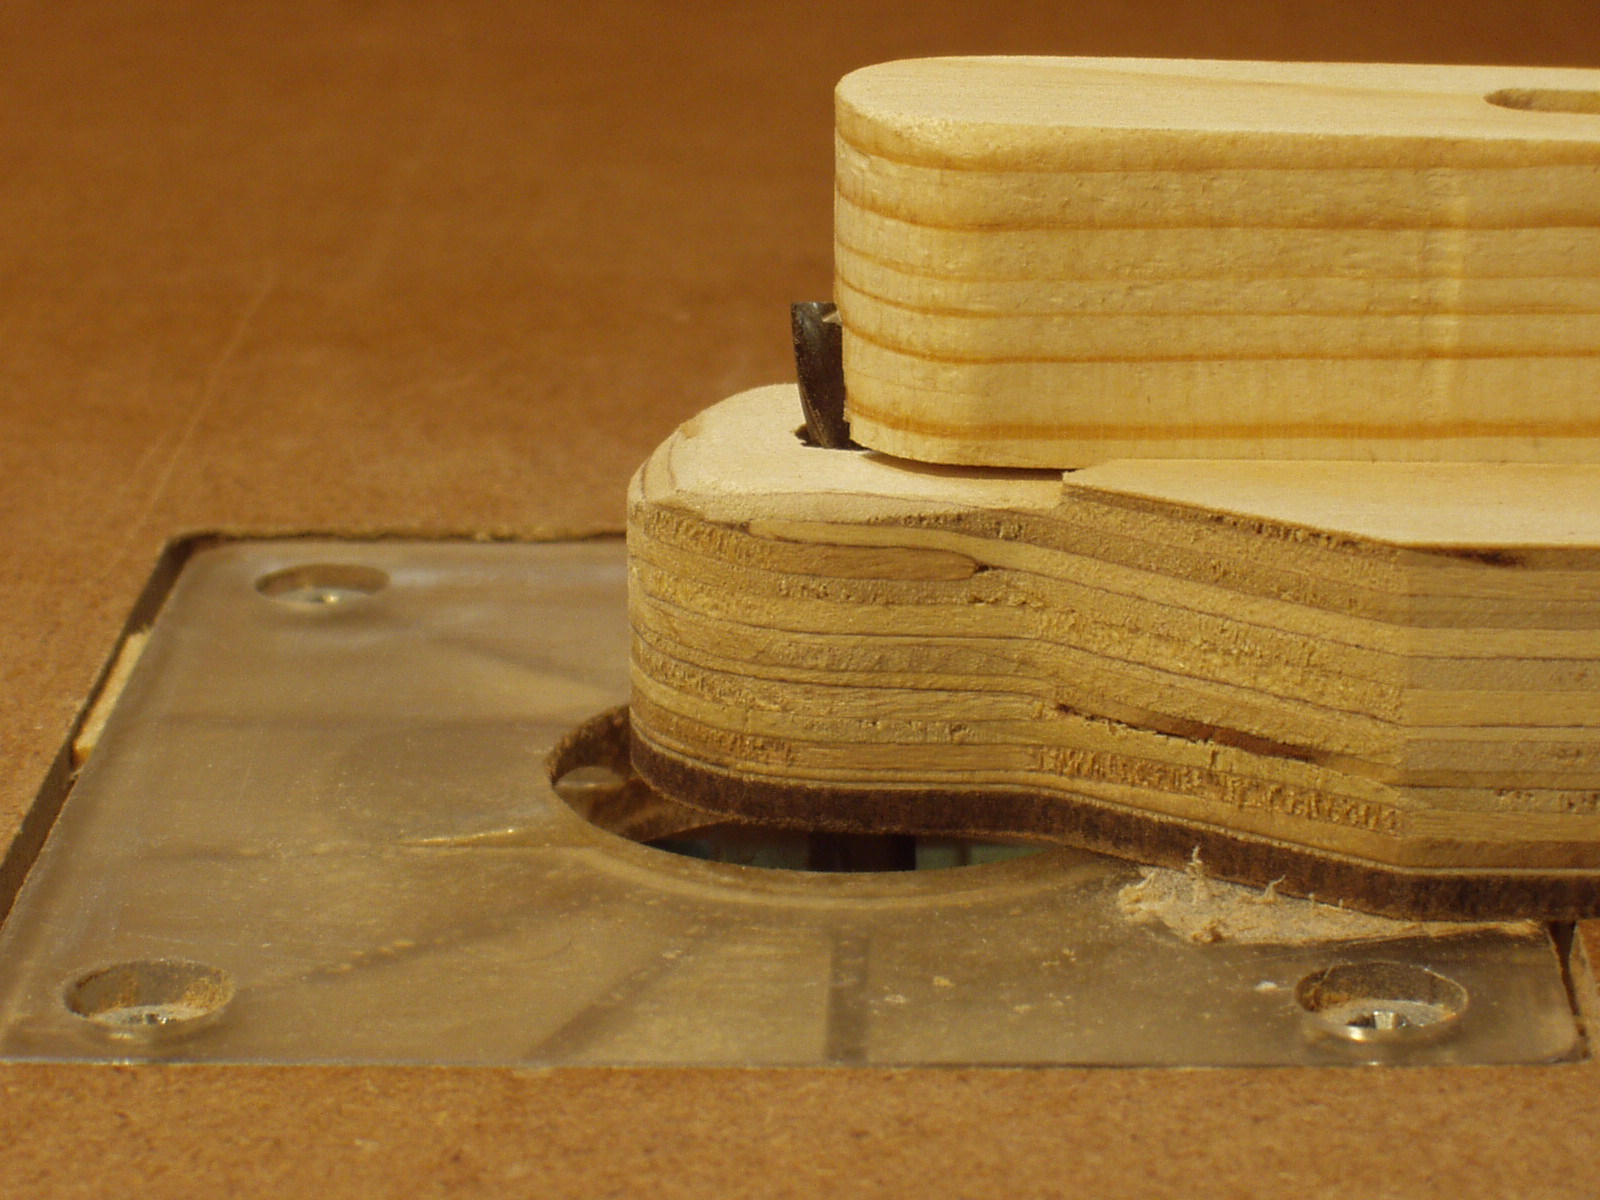
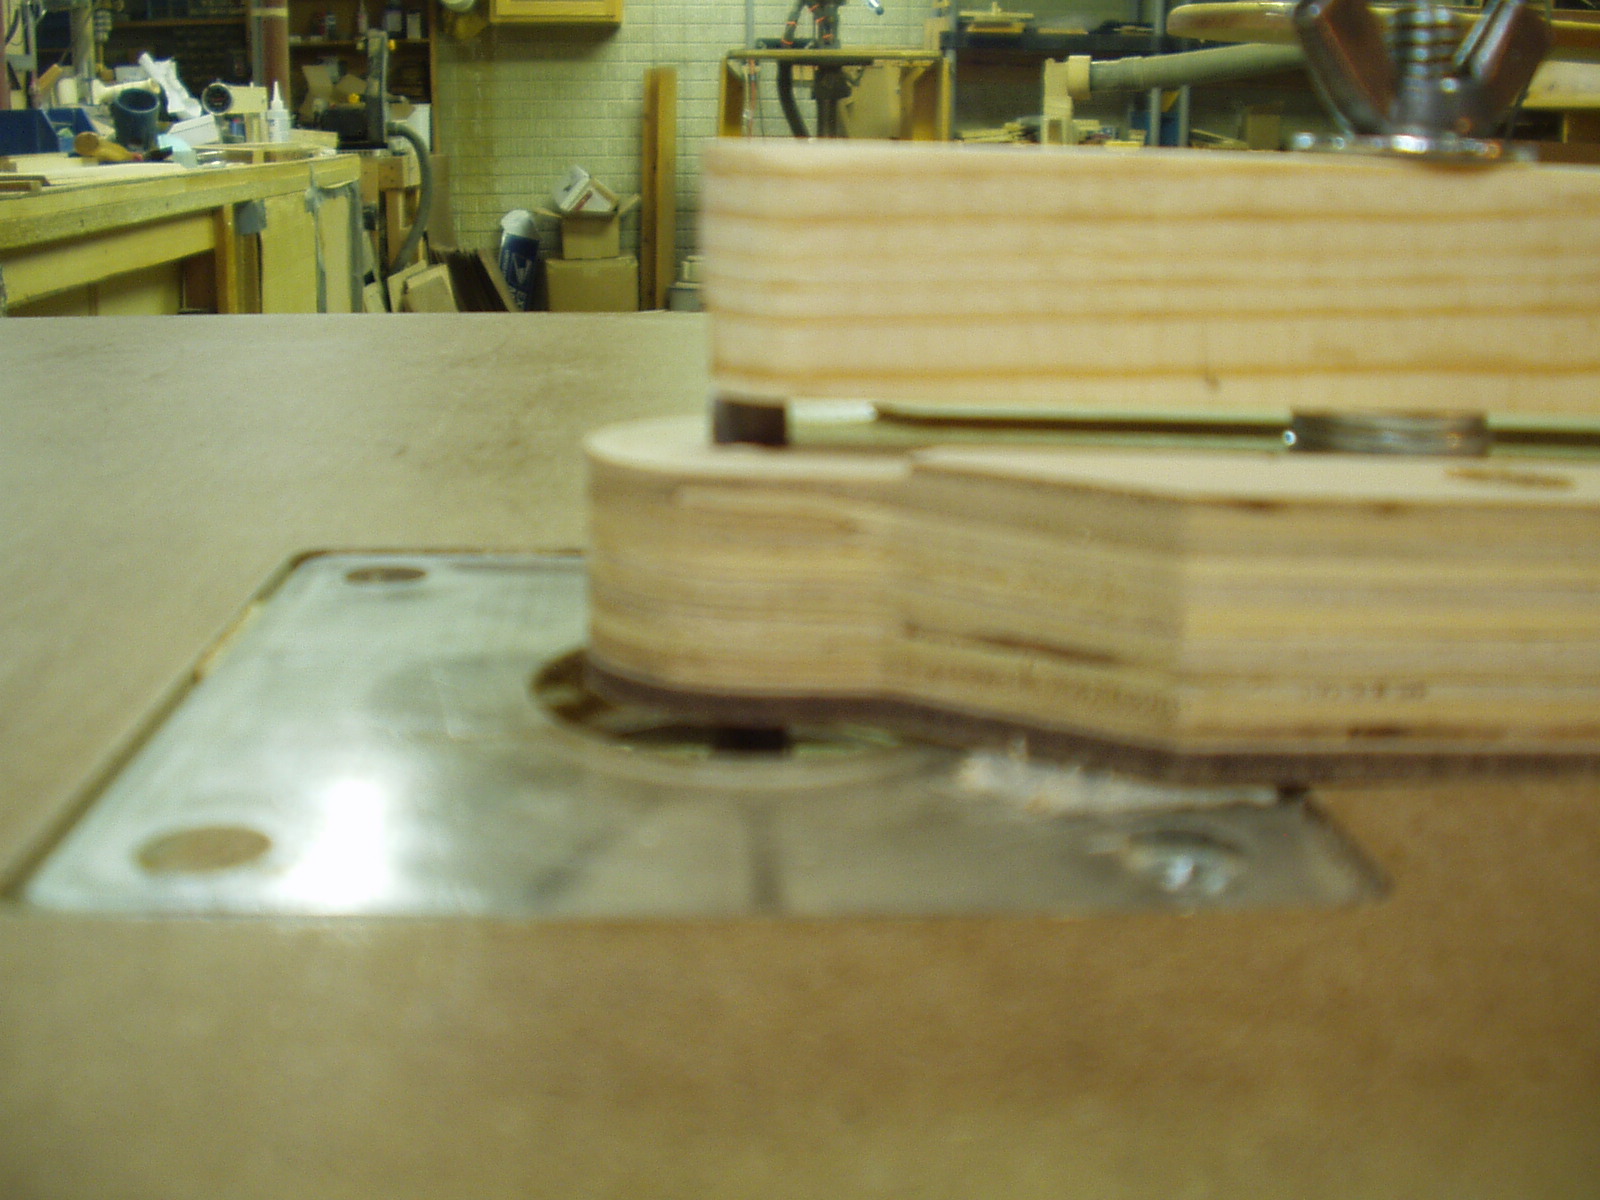
The guidance scheme on the KMG Binding System works differently. The sides and the
Top or Back of the body are used to regulate the height and depth of the channels.
The adjustable guide and the platen form a wedge shape/corner. The matching edge of
the body is simply moved across the wedge – in fact, care must be taken to make sure
the channel is cut the entire height and depth. As illustrated below even if the body
contacts the bit at steep angle off the table only a minor error would occur.
| BONUS FEATURE A two minute modification converts the unit into a precision Top and Back overhang trimmer |
If it occurred to you that the hobby tower and articulating monster binding
machines may be built up-side down you are correct -- that is why you'll never
see those gadgets in a factory tour video. Like KMG those seeking high
quality and efficiency keep it simple --- read on!
machines may be built up-side down you are correct -- that is why you'll never
see those gadgets in a factory tour video. Like KMG those seeking high
quality and efficiency keep it simple --- read on!