Kenneth Michael Guitars LLC
"SS Bridge Clamp" ™ Instructions
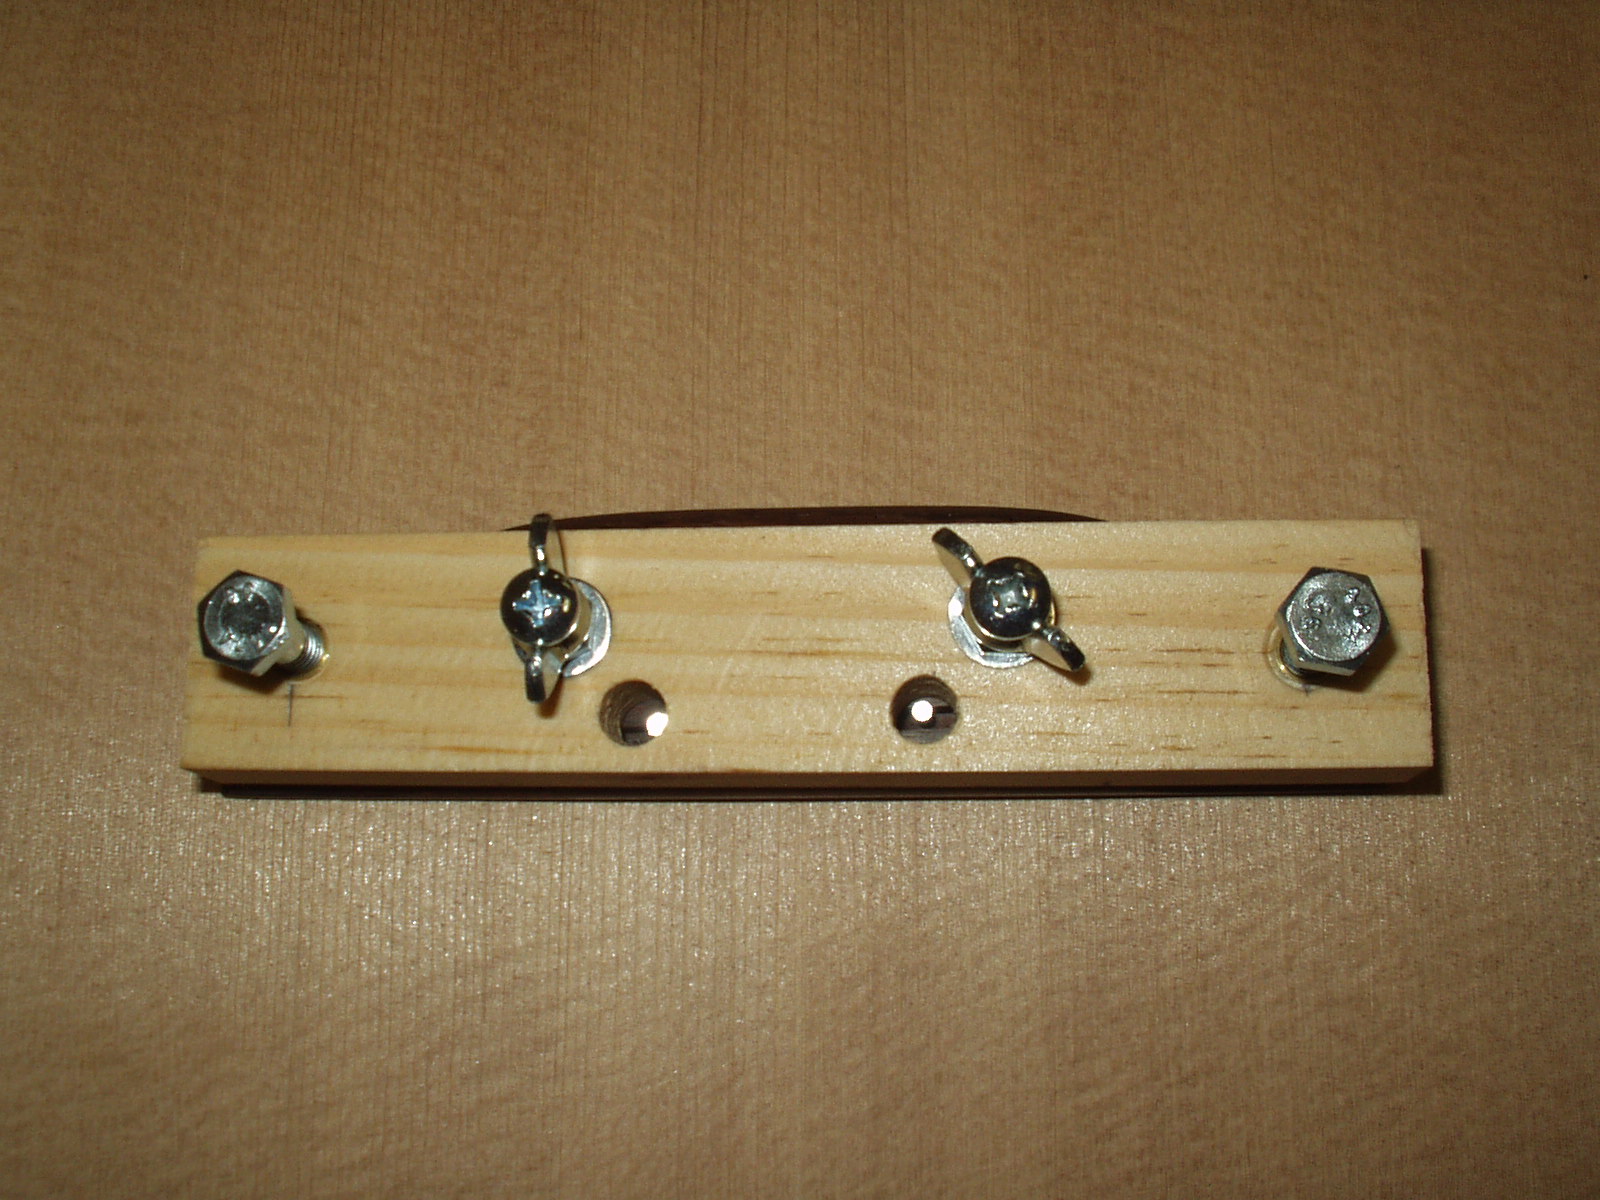
The “SS Bridge Clamp”© is truly “Super Simple” to use. The clamp applies pressure
by being secured to the top using two wing nut bolts and two wing nuts fastened
through the outside bridge pin holes. Once the bridge has been properly located the
two BP holes need to be drilled using a 3/16 “ bit. We highly recommend using our
“Bridge Setter”© tool for this operation.
by being secured to the top using two wing nut bolts and two wing nuts fastened
through the outside bridge pin holes. Once the bridge has been properly located the
two BP holes need to be drilled using a 3/16 “ bit. We highly recommend using our
“Bridge Setter”© tool for this operation.

We drill two pilots through the saddle
in addition to the outside bridge pin
holes.
in addition to the outside bridge pin
holes.
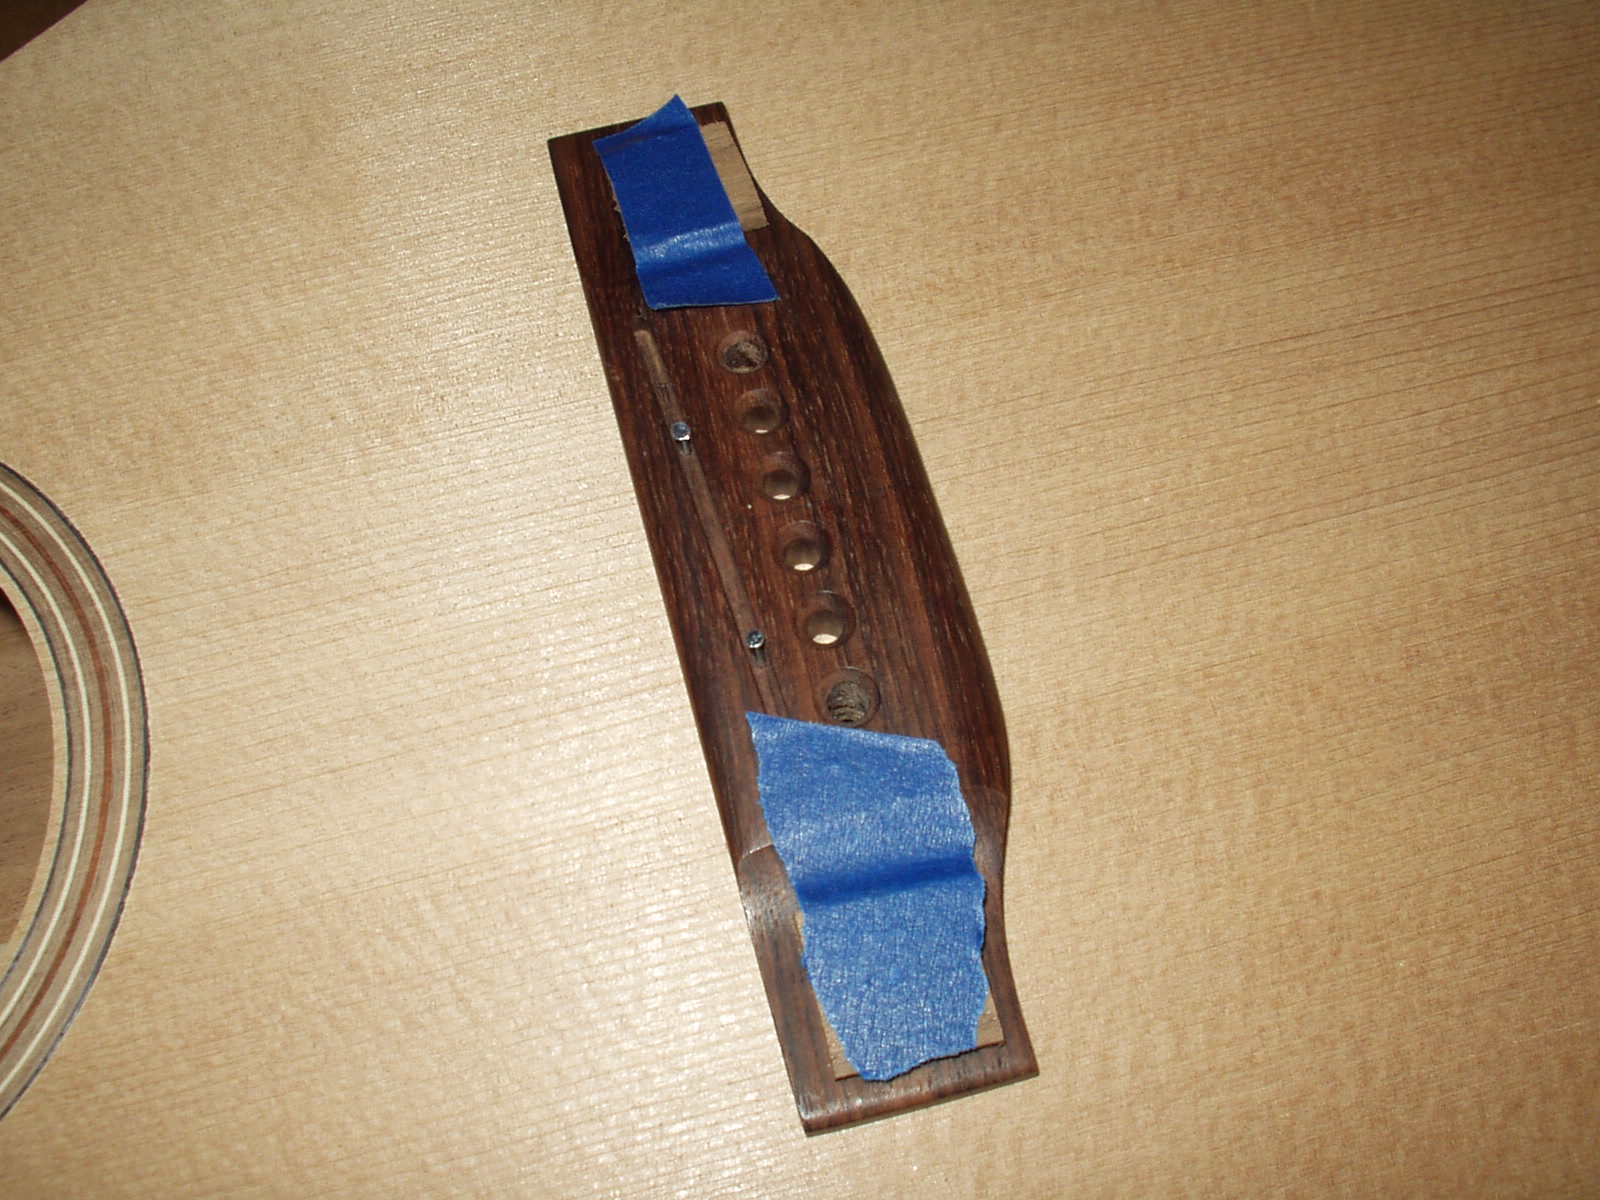
Two pieces of thin scrap material are
taped to the end of the bridge to
prevent the clamp from scratching the
surface.
taped to the end of the bridge to
prevent the clamp from scratching the
surface.
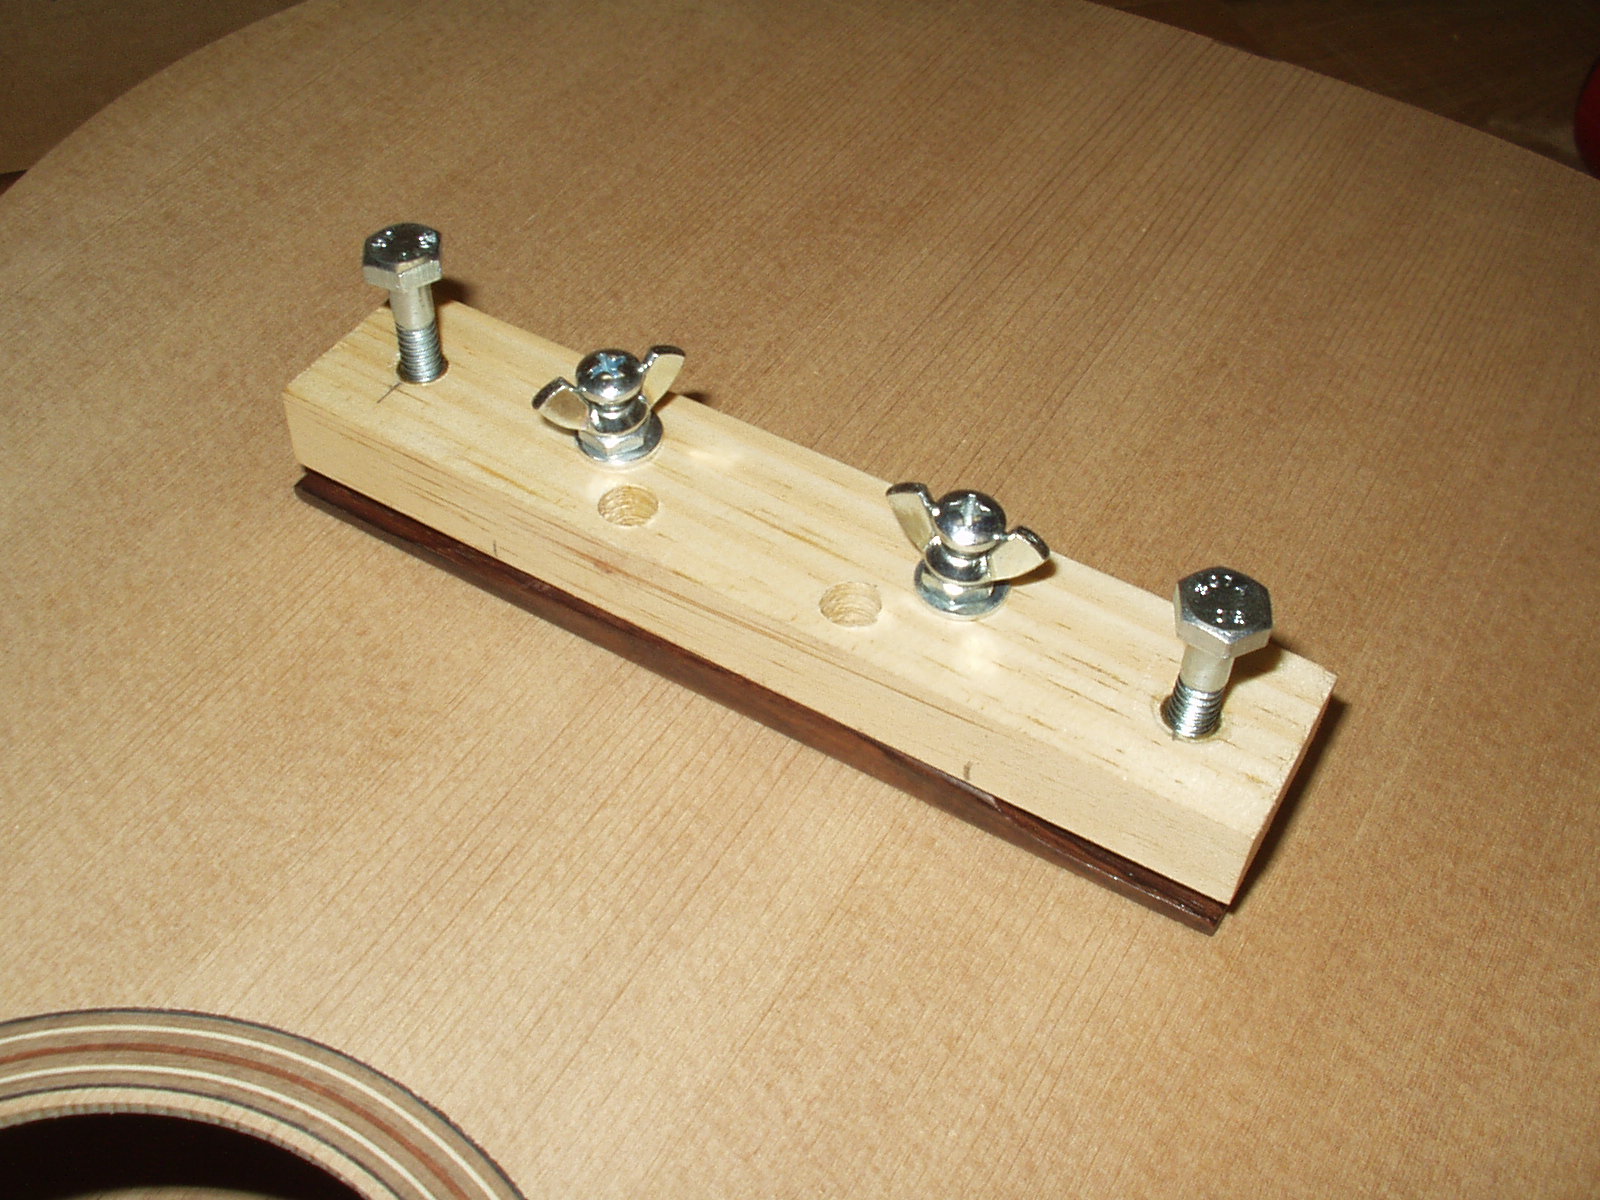
Coat the threads of the wing bolts
with bar soap or candle wax to
prevent gluing them to the guitar.
Place the “SS Bridge Clamp”© on the
bridge, locate the clamp and the
bridge, through the top using the wing
bolts. Notice the clearance holes for
the saddle position locating pins.
with bar soap or candle wax to
prevent gluing them to the guitar.
Place the “SS Bridge Clamp”© on the
bridge, locate the clamp and the
bridge, through the top using the wing
bolts. Notice the clearance holes for
the saddle position locating pins.

Two wing nuts are positioned through
the sound hole and the wing bolts
tightened from above.
the sound hole and the wing bolts
tightened from above.
Once the middle bolts are secure the
two out side bolts are gently screwed
down. Glue squeeze-out should appear
all the way around the bridge. Now is
the part where the “SS Bridge Clamp”©
really shines --- the glue squeeze-out
can be completely cleaned up since
there are no obstructions like other
clamping methods
two out side bolts are gently screwed
down. Glue squeeze-out should appear
all the way around the bridge. Now is
the part where the “SS Bridge Clamp”©
really shines --- the glue squeeze-out
can be completely cleaned up since
there are no obstructions like other
clamping methods
Follow the adhesive manufacturer’s recommendation for drying time before removing
the clamp.
the clamp.