Kenneth Michael Guitars est.1978
| Fret Dressing using "Essential tools" that don't break the bank |
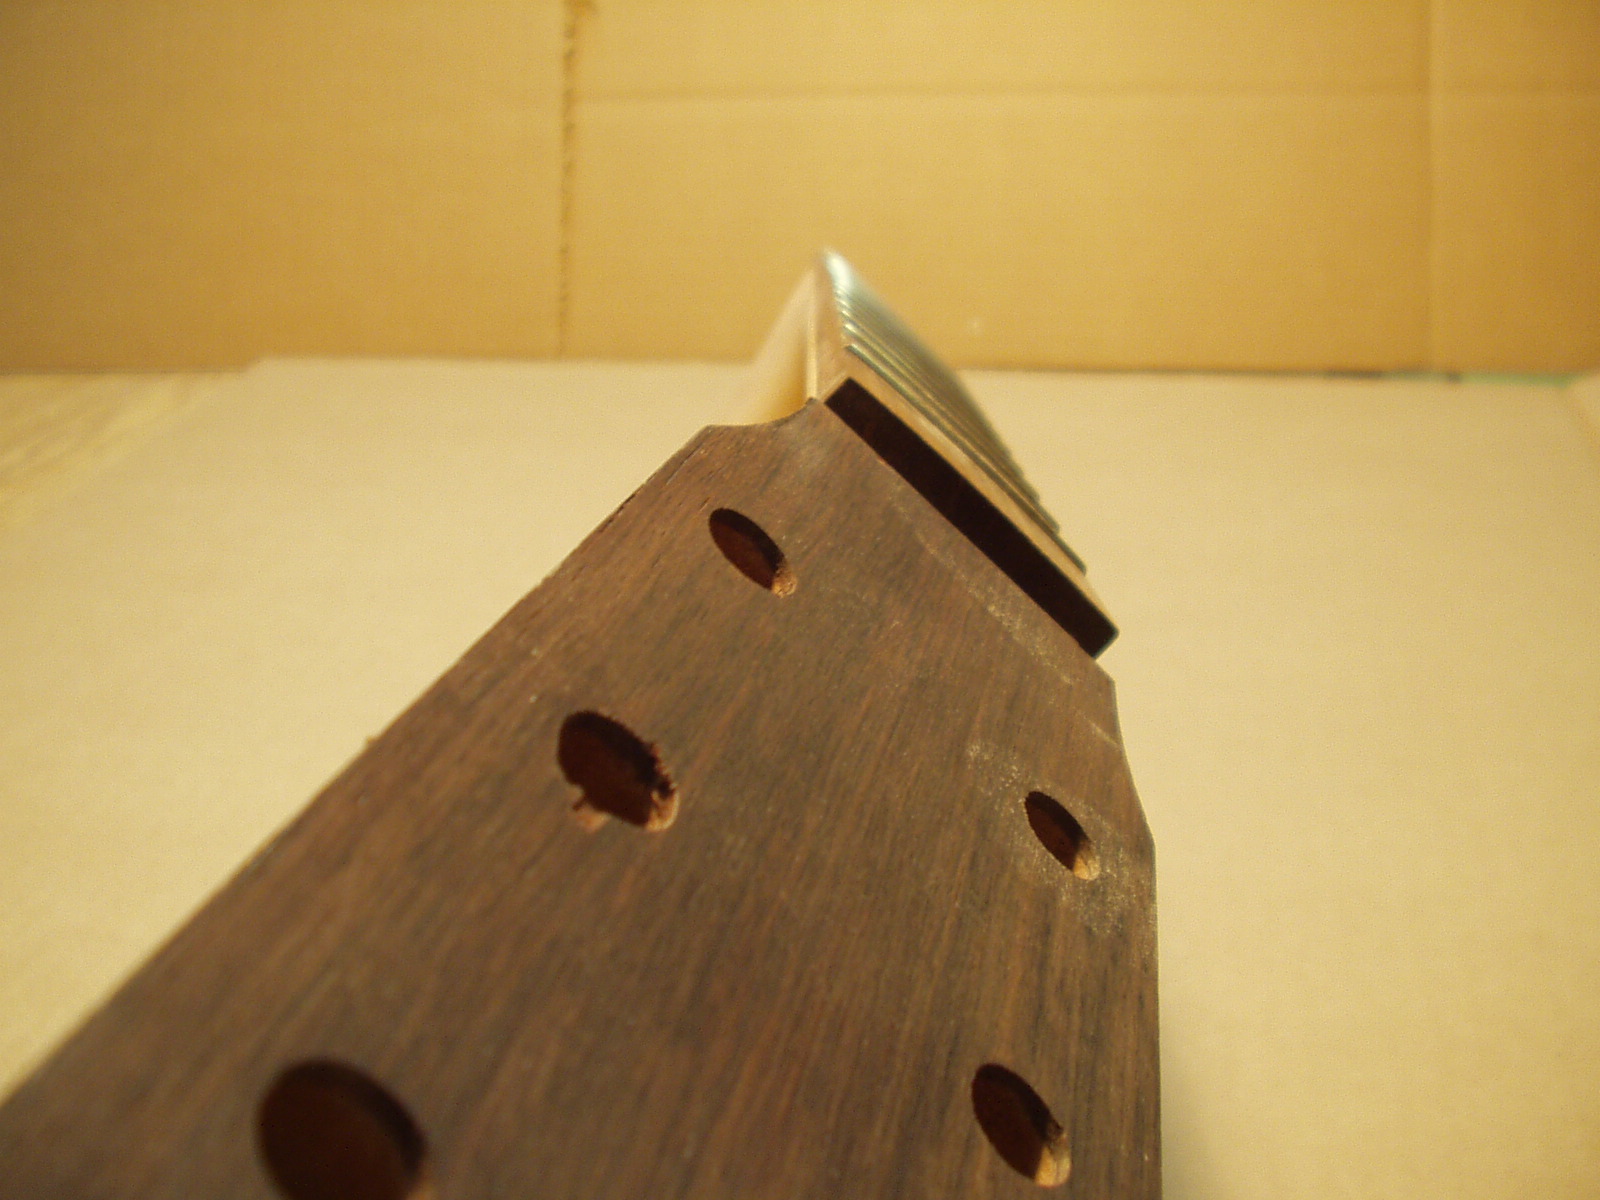
Fret dressing is a little easier if it can
be preformed before the neck is
assembled to the body. It is important
the truss rod is adjusted so the neck is
perfectly flat --- check that by looking
down the edge of the fingerboard.
be preformed before the neck is
assembled to the body. It is important
the truss rod is adjusted so the neck is
perfectly flat --- check that by looking
down the edge of the fingerboard.
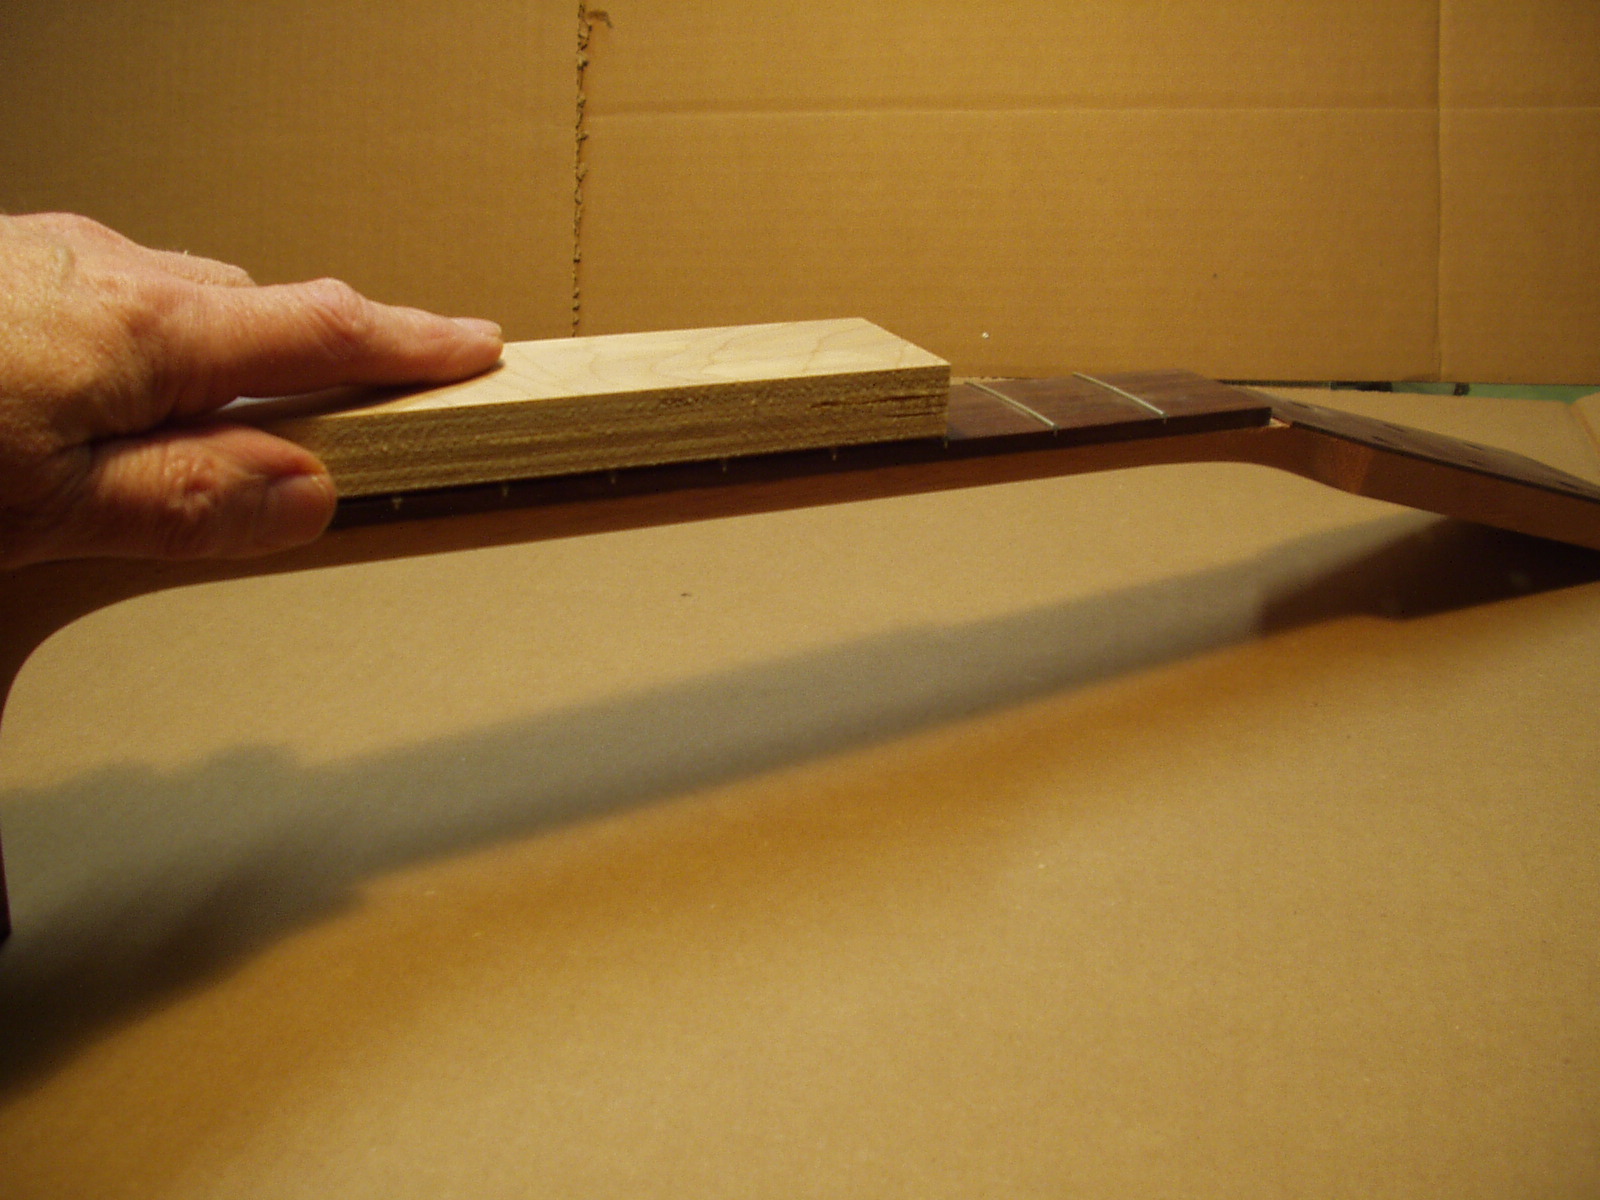
Gently glide 12” long sanding block
(220 grit) along the tops of the frets
one or two times, at this point we are
checking for high frets. If a fret is high
it is easy to spot because it will now
have a flat spot on the top edge.
Double check to make sure that the
high frets found are properly seated by
tapping them down with your fretting
hammer.
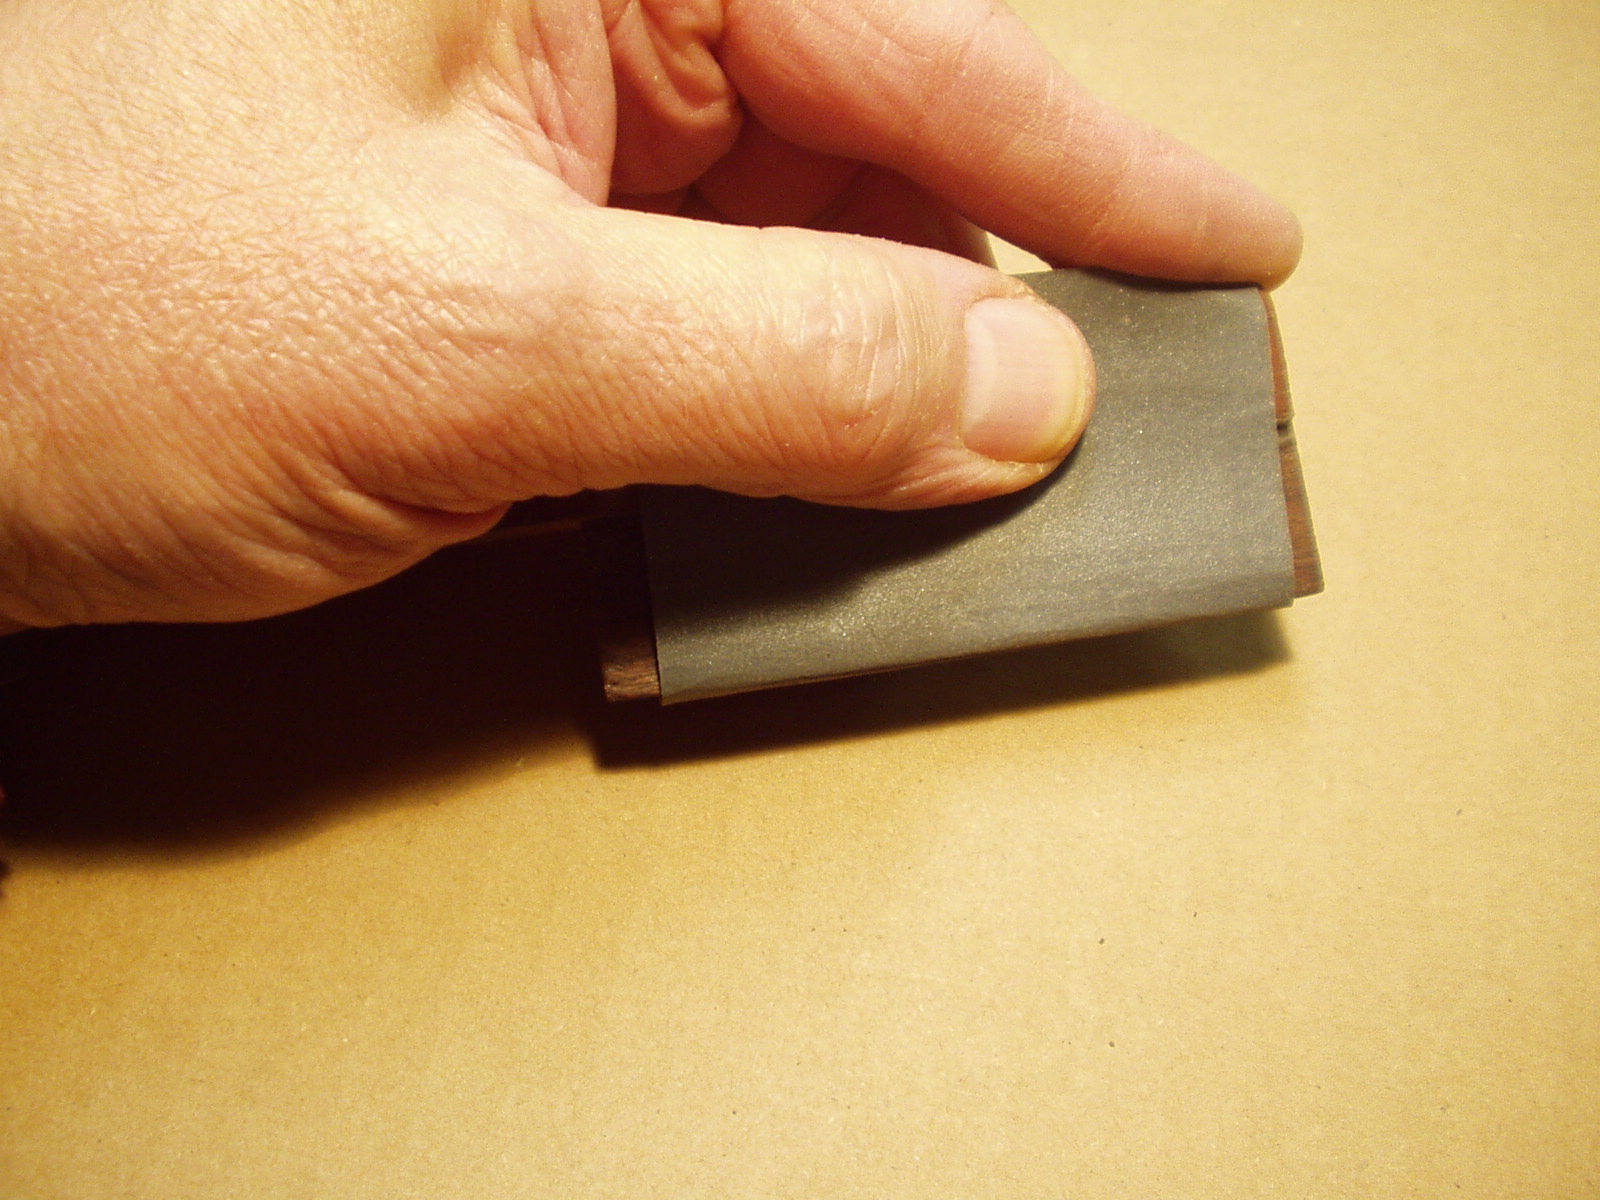
Using the 30-degree file block dress
off the end of the frets on each side of
the fingerboard. This process leaves a
razor sharp edge on both sides of
every fret.
off the end of the frets on each side of
the fingerboard. This process leaves a
razor sharp edge on both sides of
every fret.
Again, gently glide the 12” sanding
block across the tops of the frets, this
time use several passes. The object is
to make sure each fret is the same
height and level with its neighbor.
There will be a trace of silver dust on
each side of every fret and a narrow
flat spot along the full length of each
fret.
block across the tops of the frets, this
time use several passes. The object is
to make sure each fret is the same
height and level with its neighbor.
There will be a trace of silver dust on
each side of every fret and a narrow
flat spot along the full length of each
fret.
Use the crowning tool with high quality
220 grit “wet or dry” sand paper to
reshape the tops of each fret. Take
care to stay on the fret prevent
scratching the surface of the
fingerboard.
220 grit “wet or dry” sand paper to
reshape the tops of each fret. Take
care to stay on the fret prevent
scratching the surface of the
fingerboard.
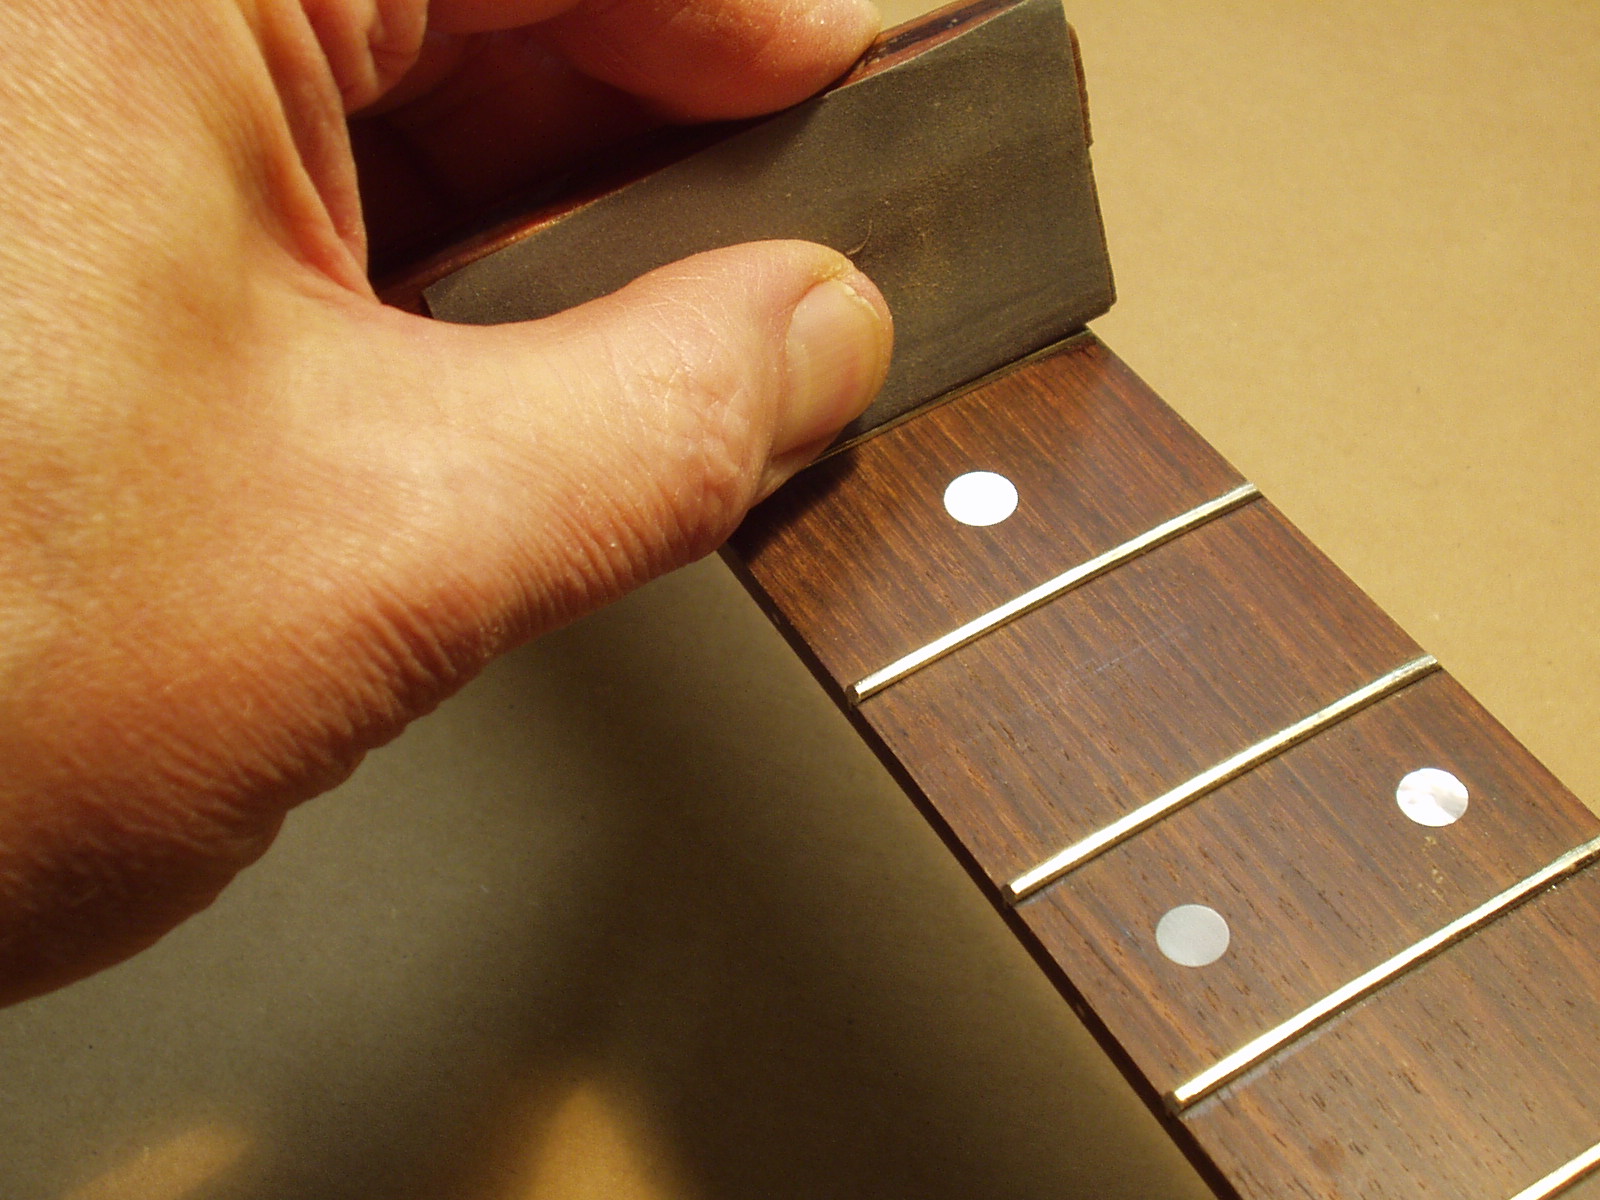
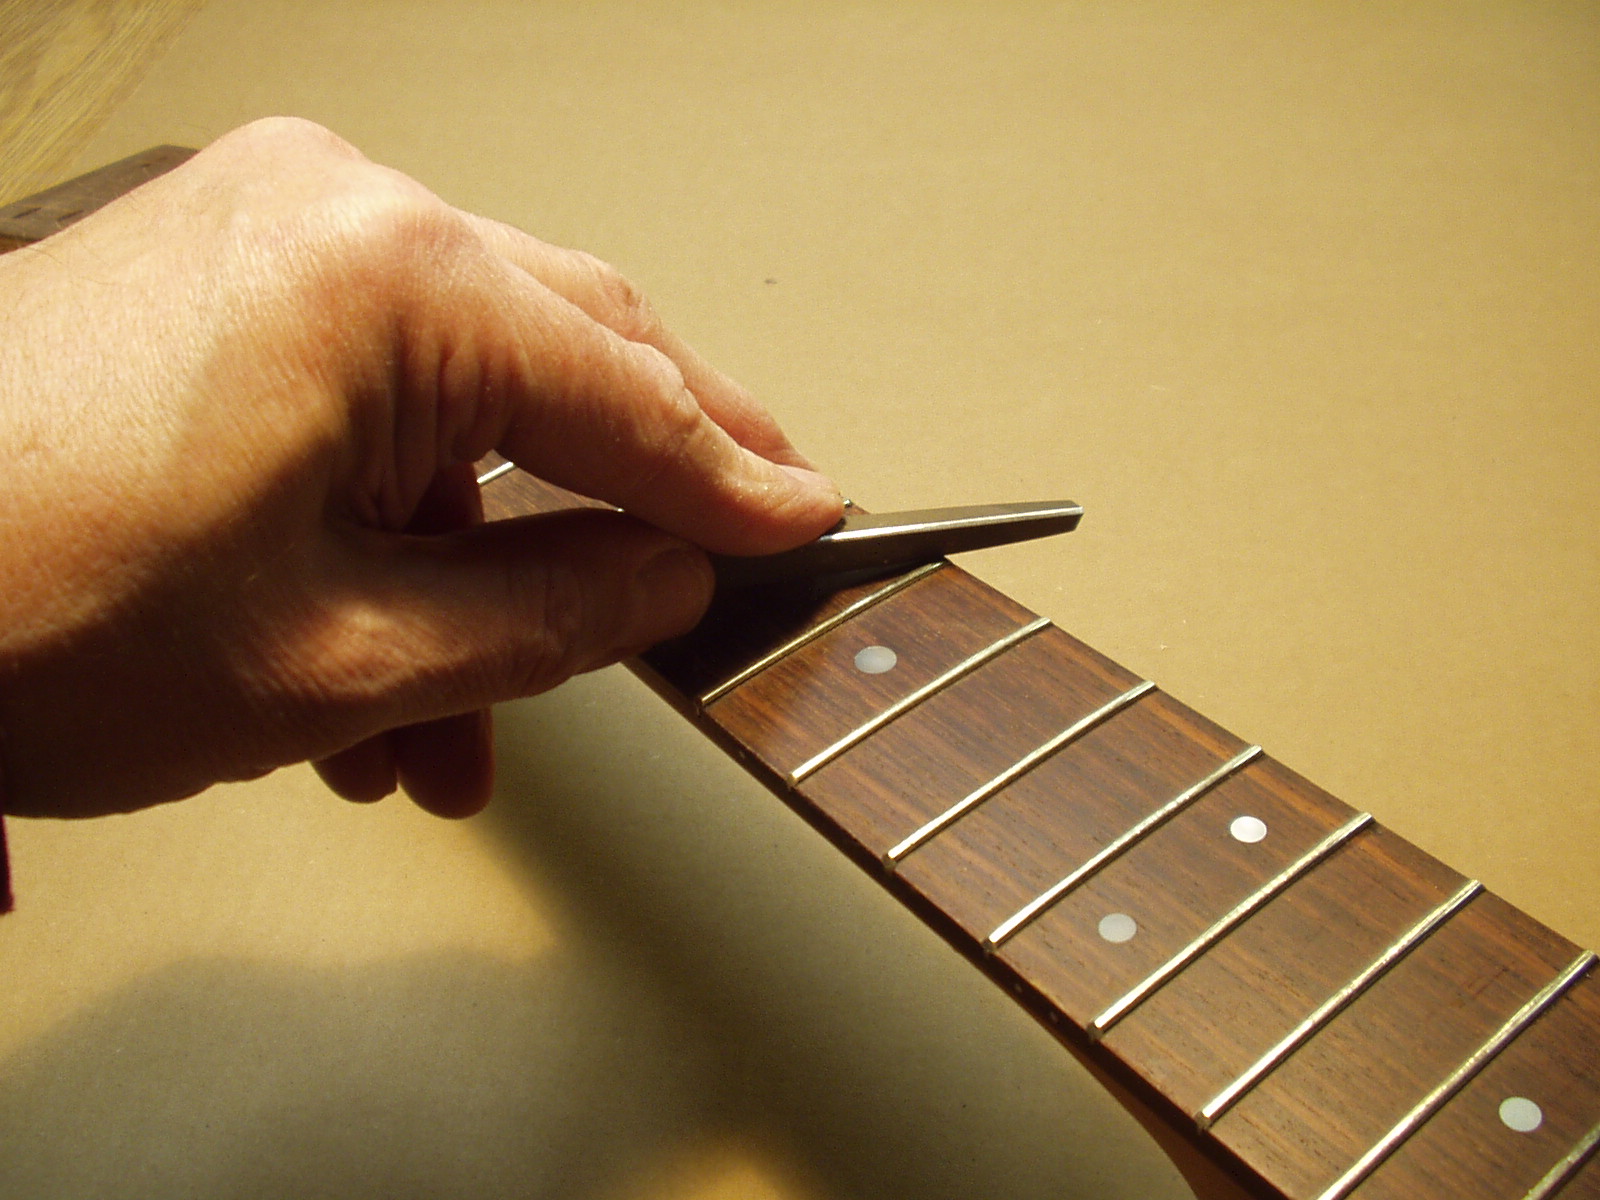
The sharp edges of the fret ends are
removed using the reworked triangular
file. Place the file at a slight angle up
against the fret, with the smooth corner
on the fingerboard. Knock off the
pointed edge with a push and roll
motion that slightly rounds over the fret
ends. Repeat the process on both
sides of all the frets. Carefully, test the
fret end with your fingertip.
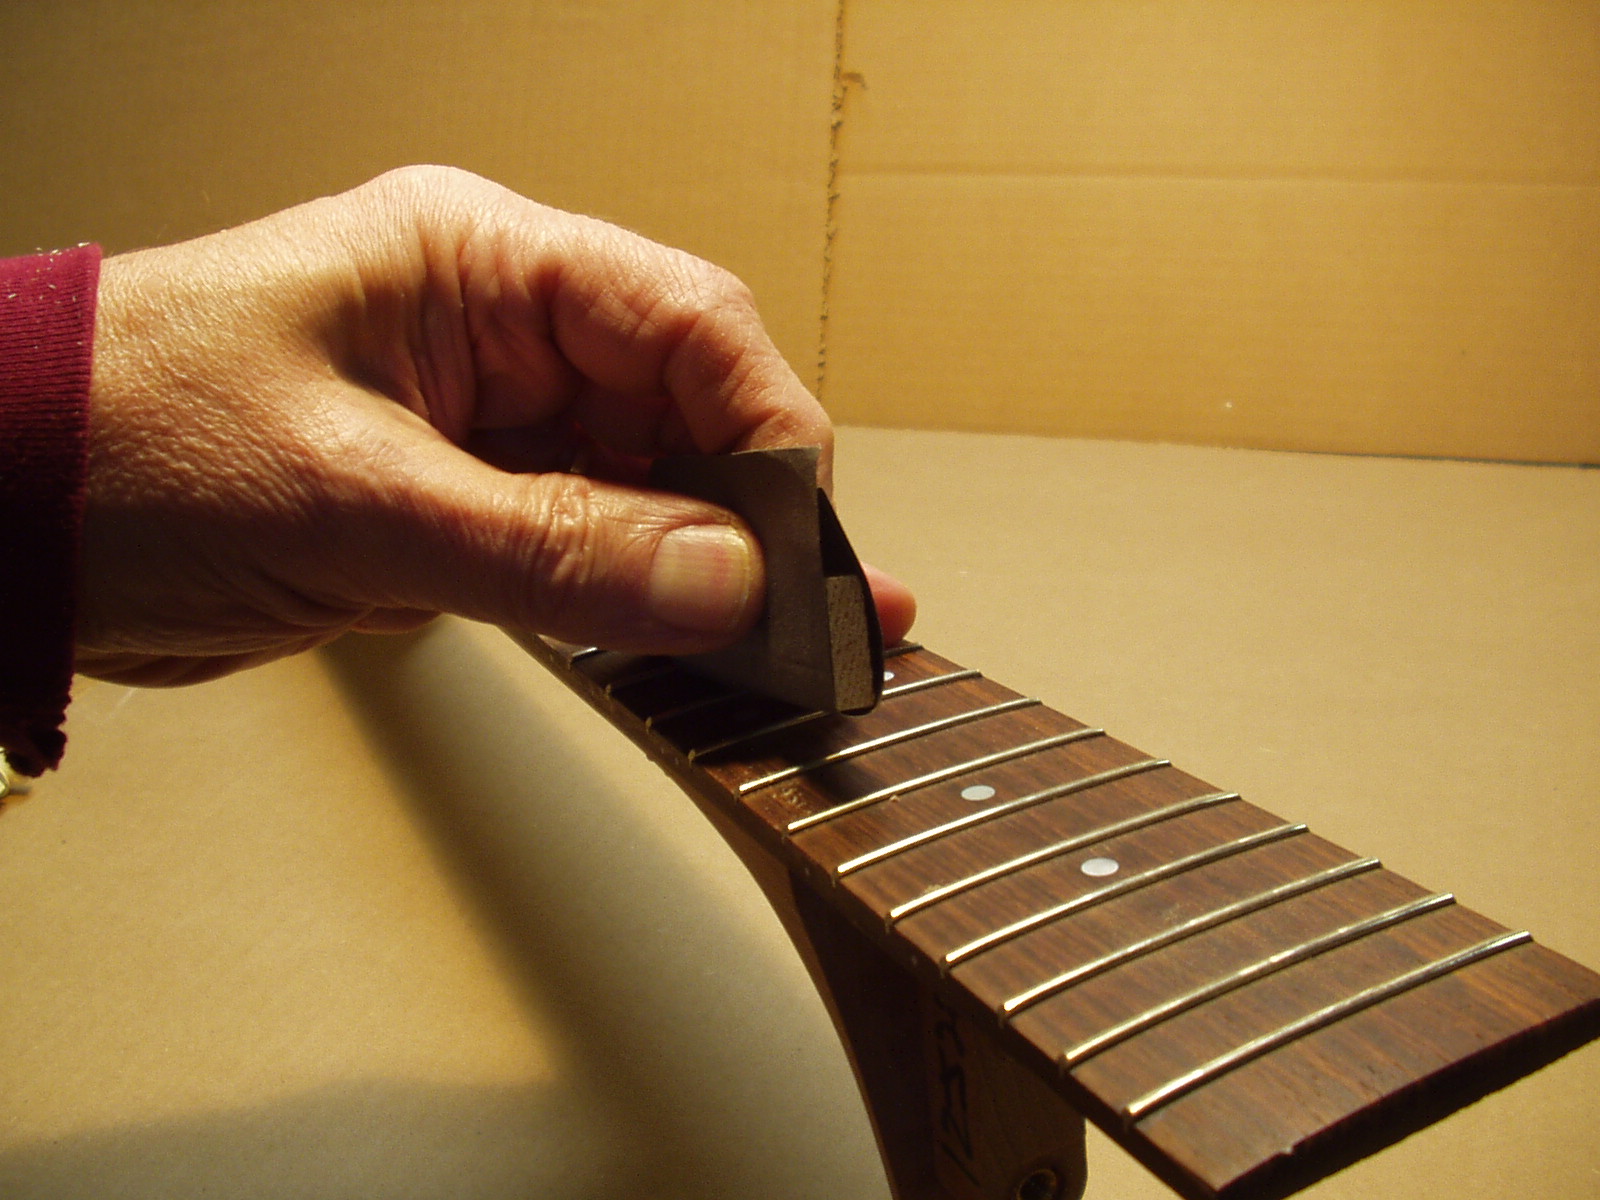
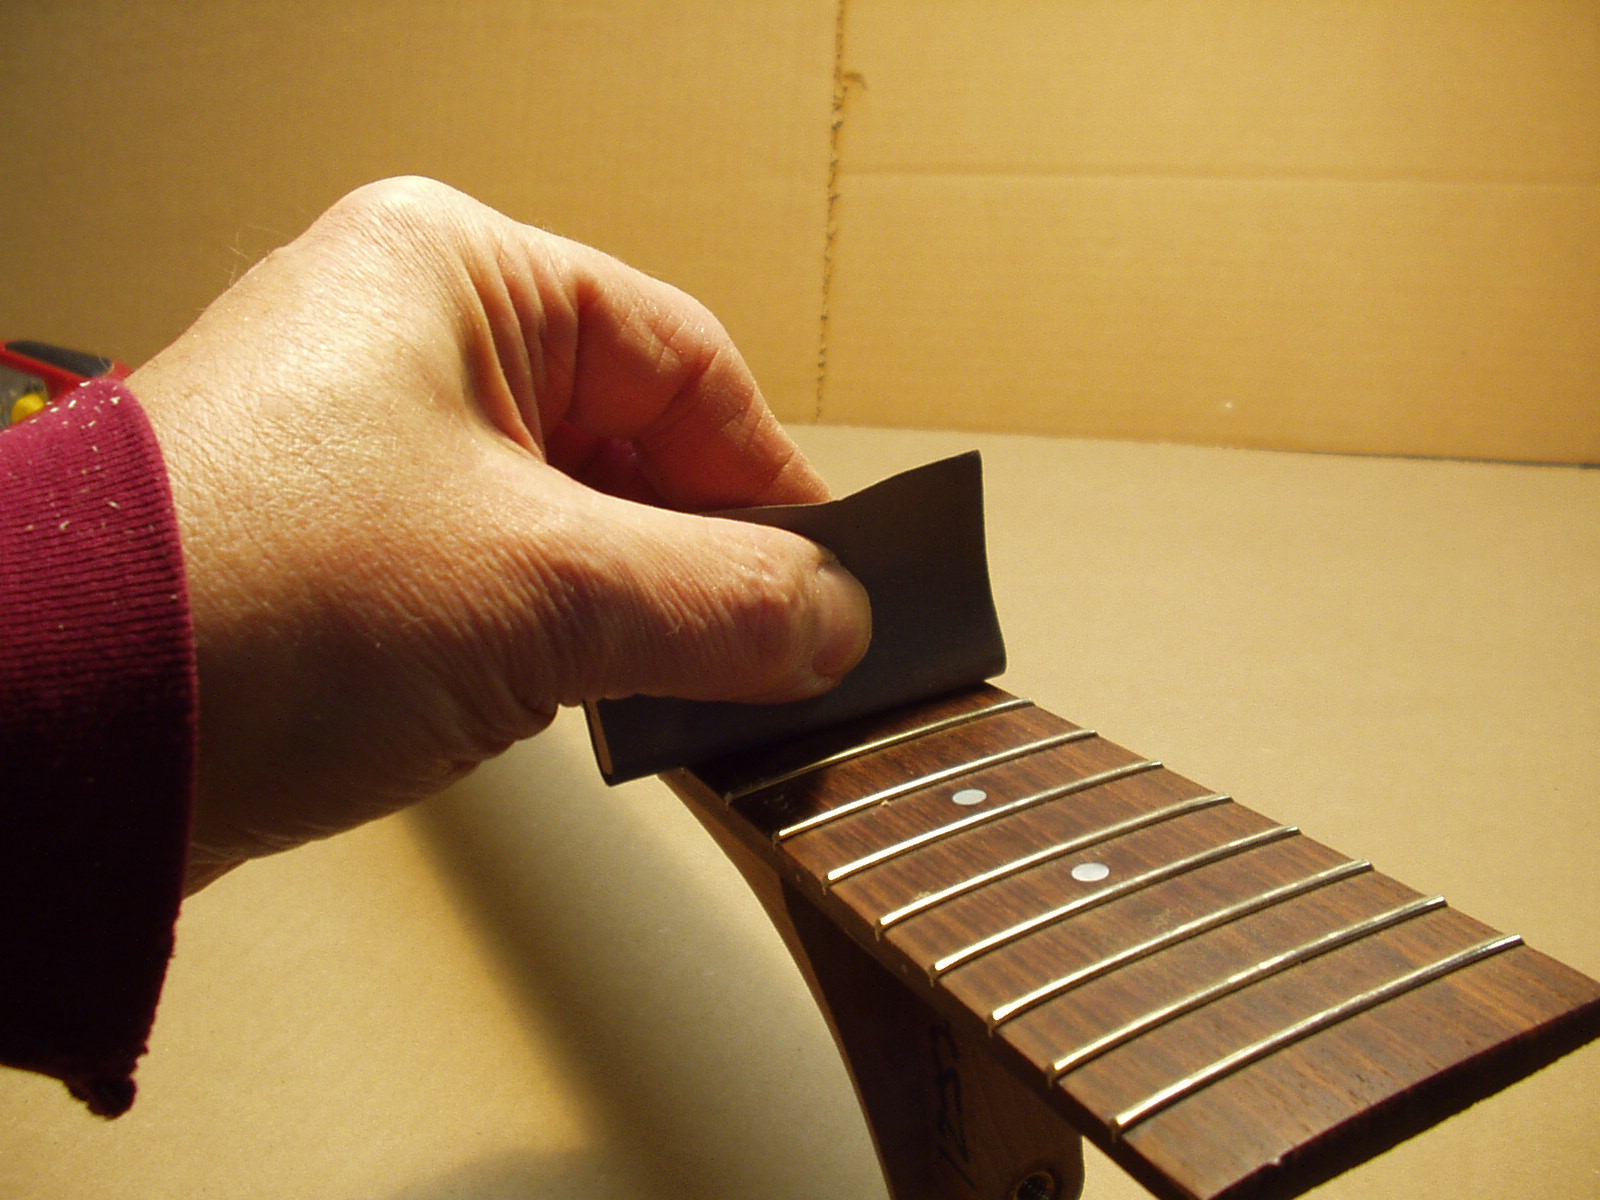
Burnish each fret progressing through
320 – 400 grit “wet or dry” sand paper.
320 – 400 grit “wet or dry” sand paper.
Major scratches are removed from the
fingerboard using a single edge razor
blade as scraper blade. Move the
blade back and forth between the frets
in a perpendicular motion taking care
not to dig into the surface – a smooth
gentle action will produce very fine
even shavings. The procedure is much
easier than it sounds.
fingerboard using a single edge razor
blade as scraper blade. Move the
blade back and forth between the frets
in a perpendicular motion taking care
not to dig into the surface – a smooth
gentle action will produce very fine
even shavings. The procedure is much
easier than it sounds.
Use a very small block and sand between each fret in a perpendicular motion working
progressively through 220 – 320 – 400 – 600 “wet or dry” sandpaper. Take care not
to scratch the frets.
progressively through 220 – 320 – 400 – 600 “wet or dry” sandpaper. Take care not
to scratch the frets.
Burnish each fret with 600 grit “wet or
dry” sand paper.
dry” sand paper.
Rub down the entire fingerboard with 0000 steel wool, apply a coat of paste wax, and
let it dry. Very carefully burnish each fret with 600 grit paper and finally, buff out the
coat of wax. The fingerboard will be smooth as glass and the frets will sparkle.
let it dry. Very carefully burnish each fret with 600 grit paper and finally, buff out the
coat of wax. The fingerboard will be smooth as glass and the frets will sparkle.
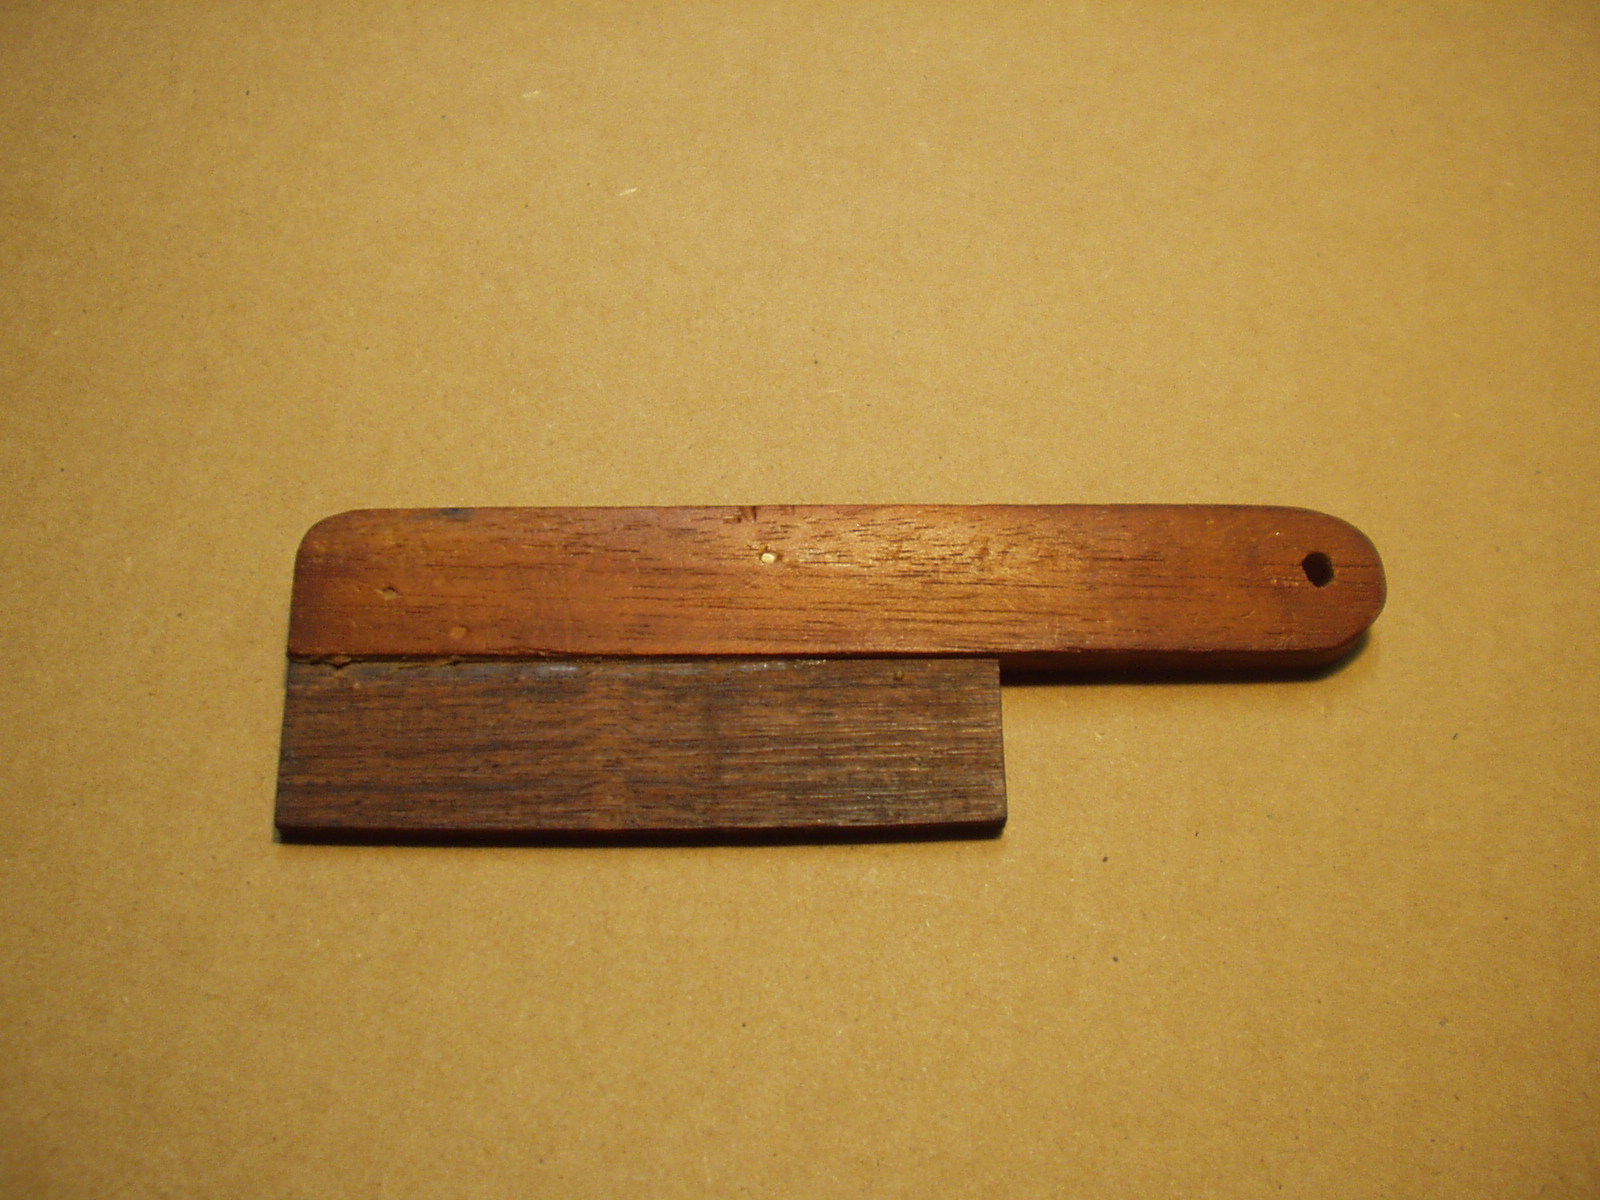
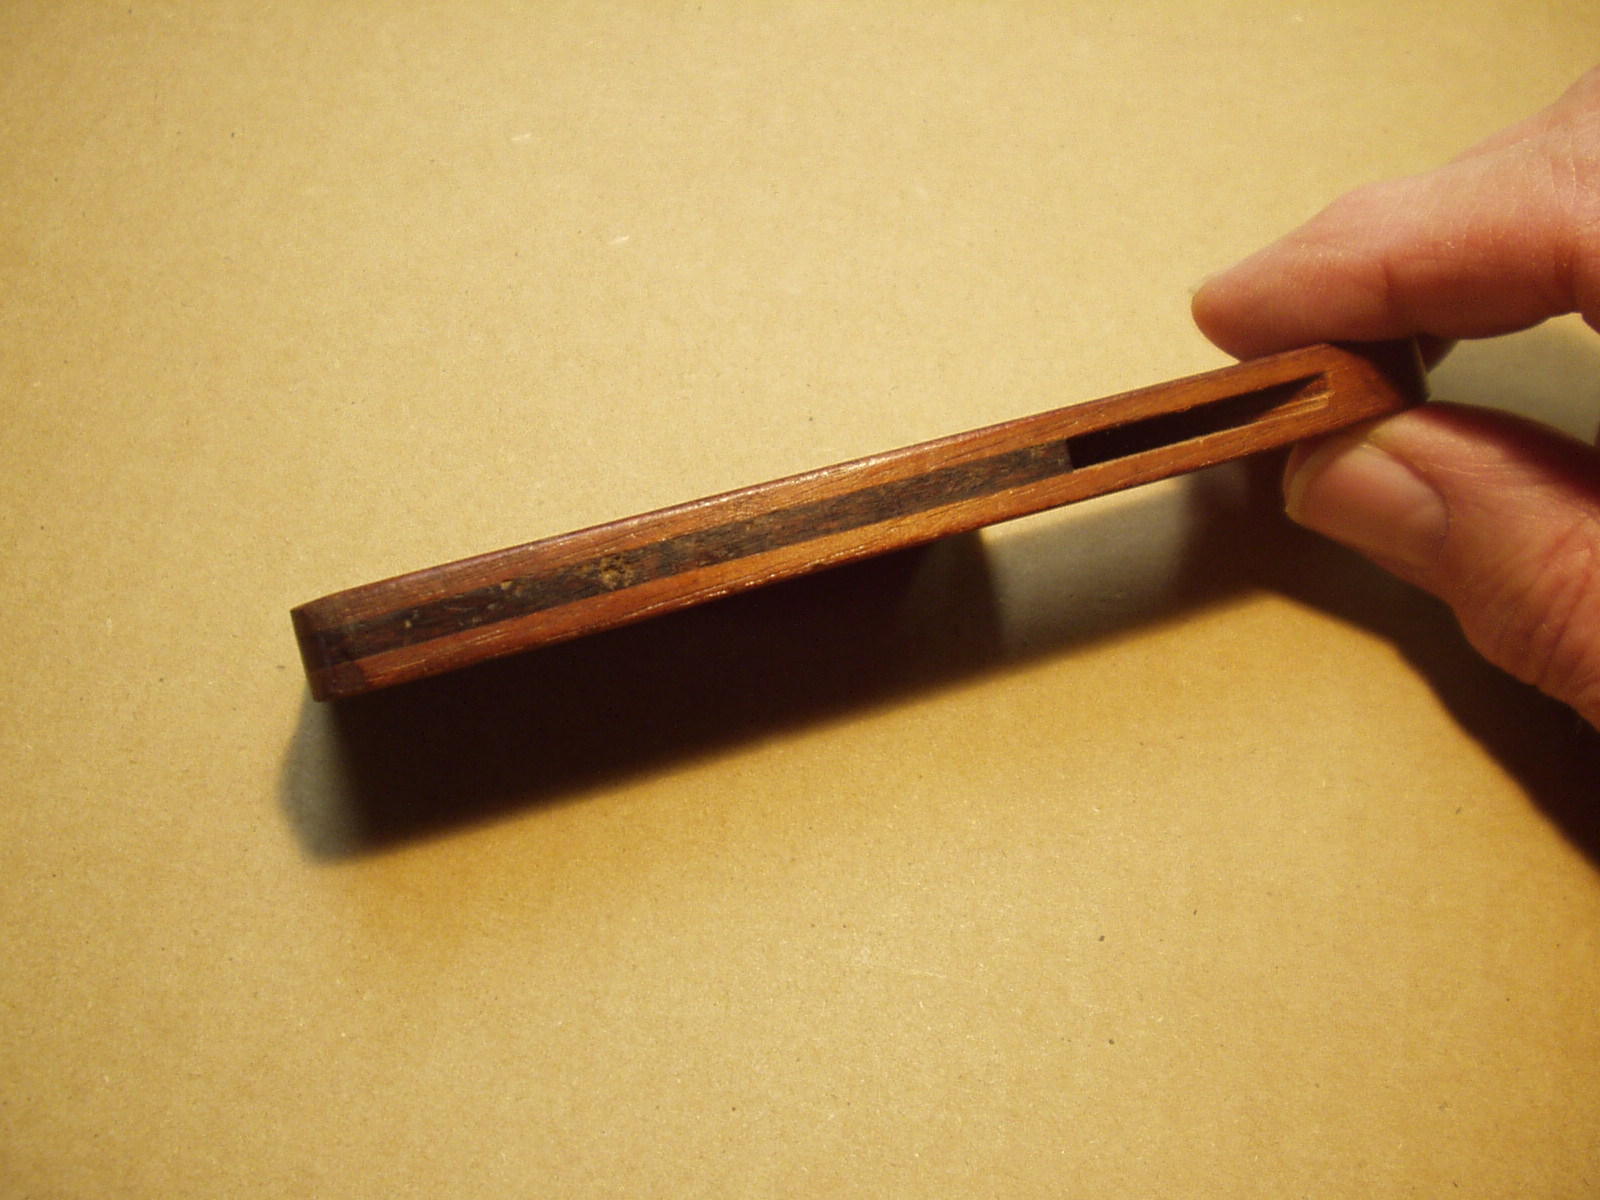
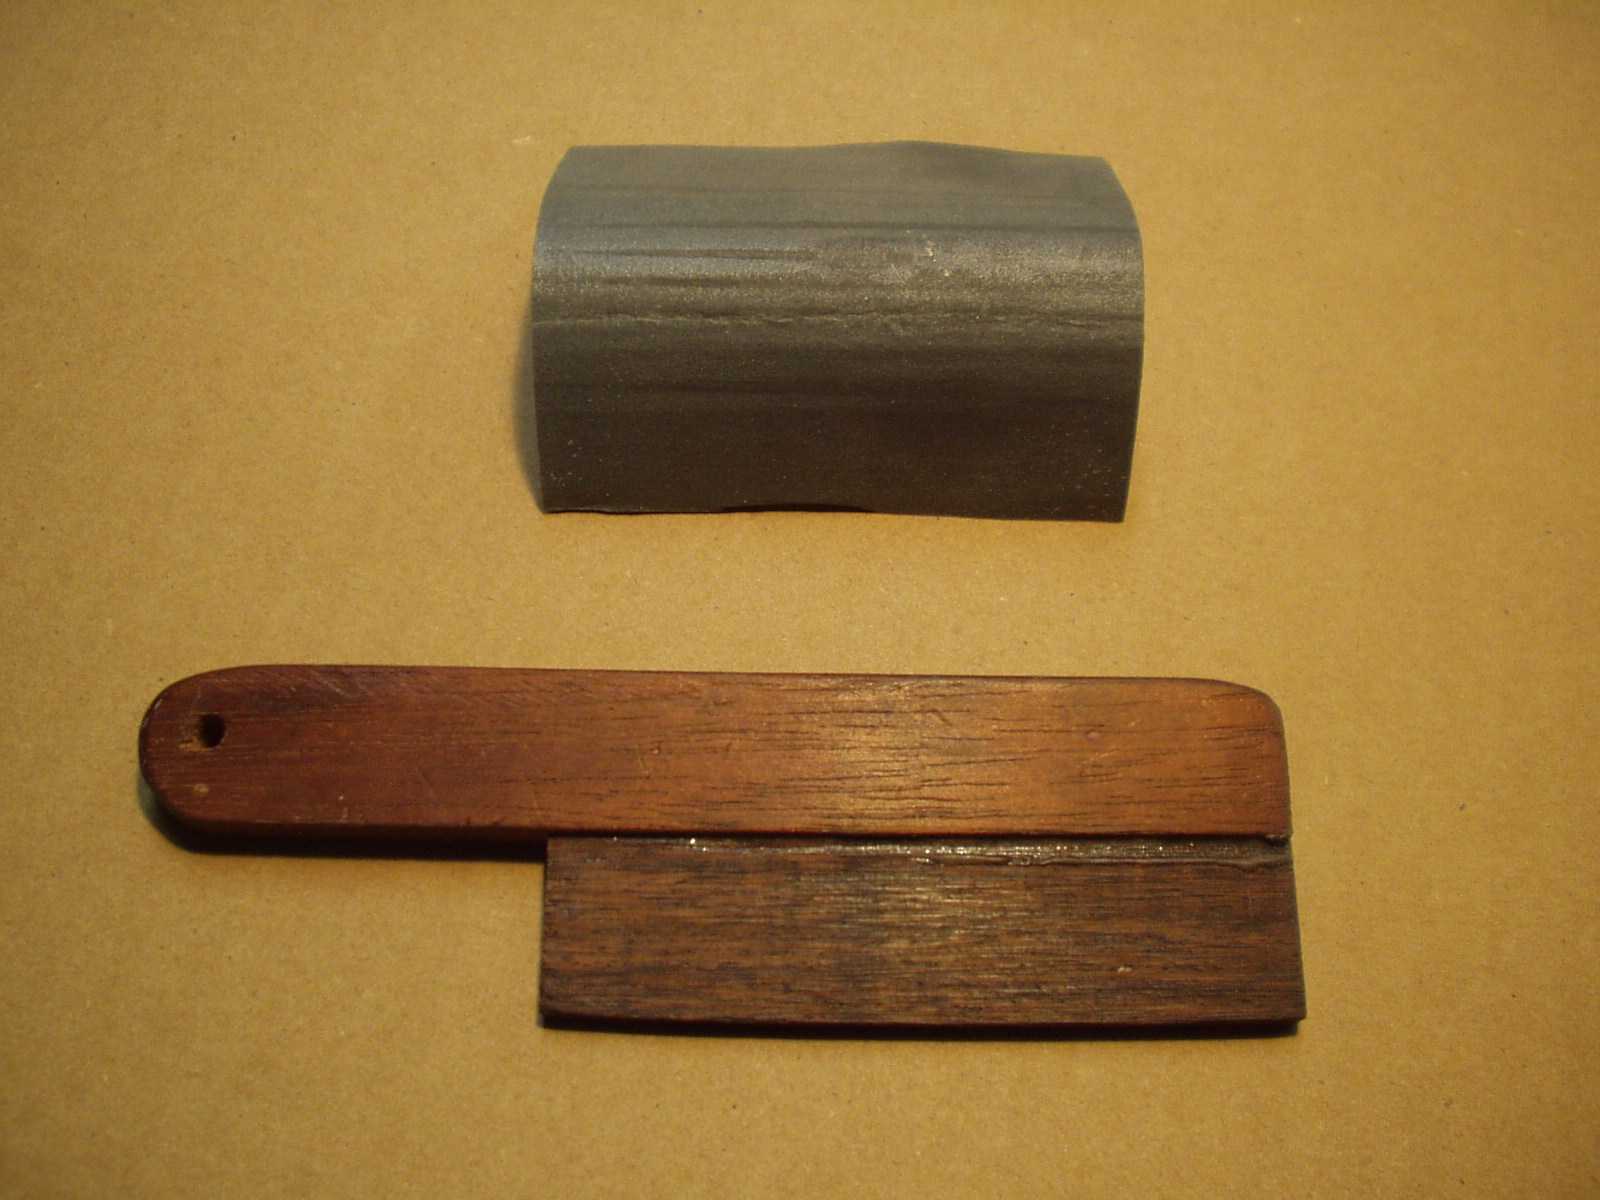
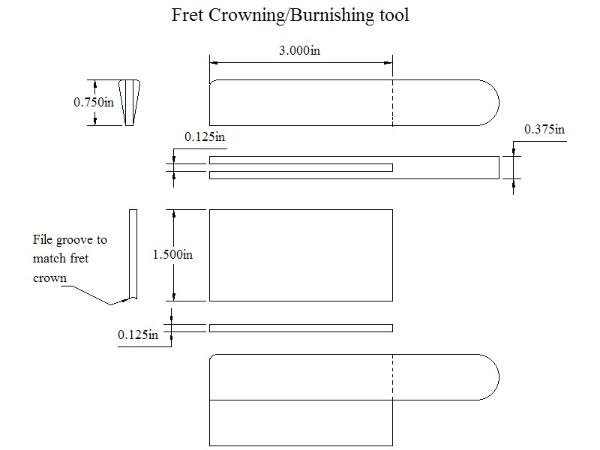
This is a version of the “Don Teeter” Burnishing tool. It is made using scraps of
hardwood. Cut the two components with the grain going lengthwise. Cut the slot in
the handle on a table saw. An alternate method of assembly would be a three-
piece sandwich. The fret crowning groove is made with a small round file. A ball
end bit mounted in a Dremel with a router base will also work well. Test the groove
against the fret wire that is used.
It is important that high quality “wet or
dry” sandpaper is used.
220,320,400,600 grits cut into 3” strips
dry” sandpaper is used.
220,320,400,600 grits cut into 3” strips
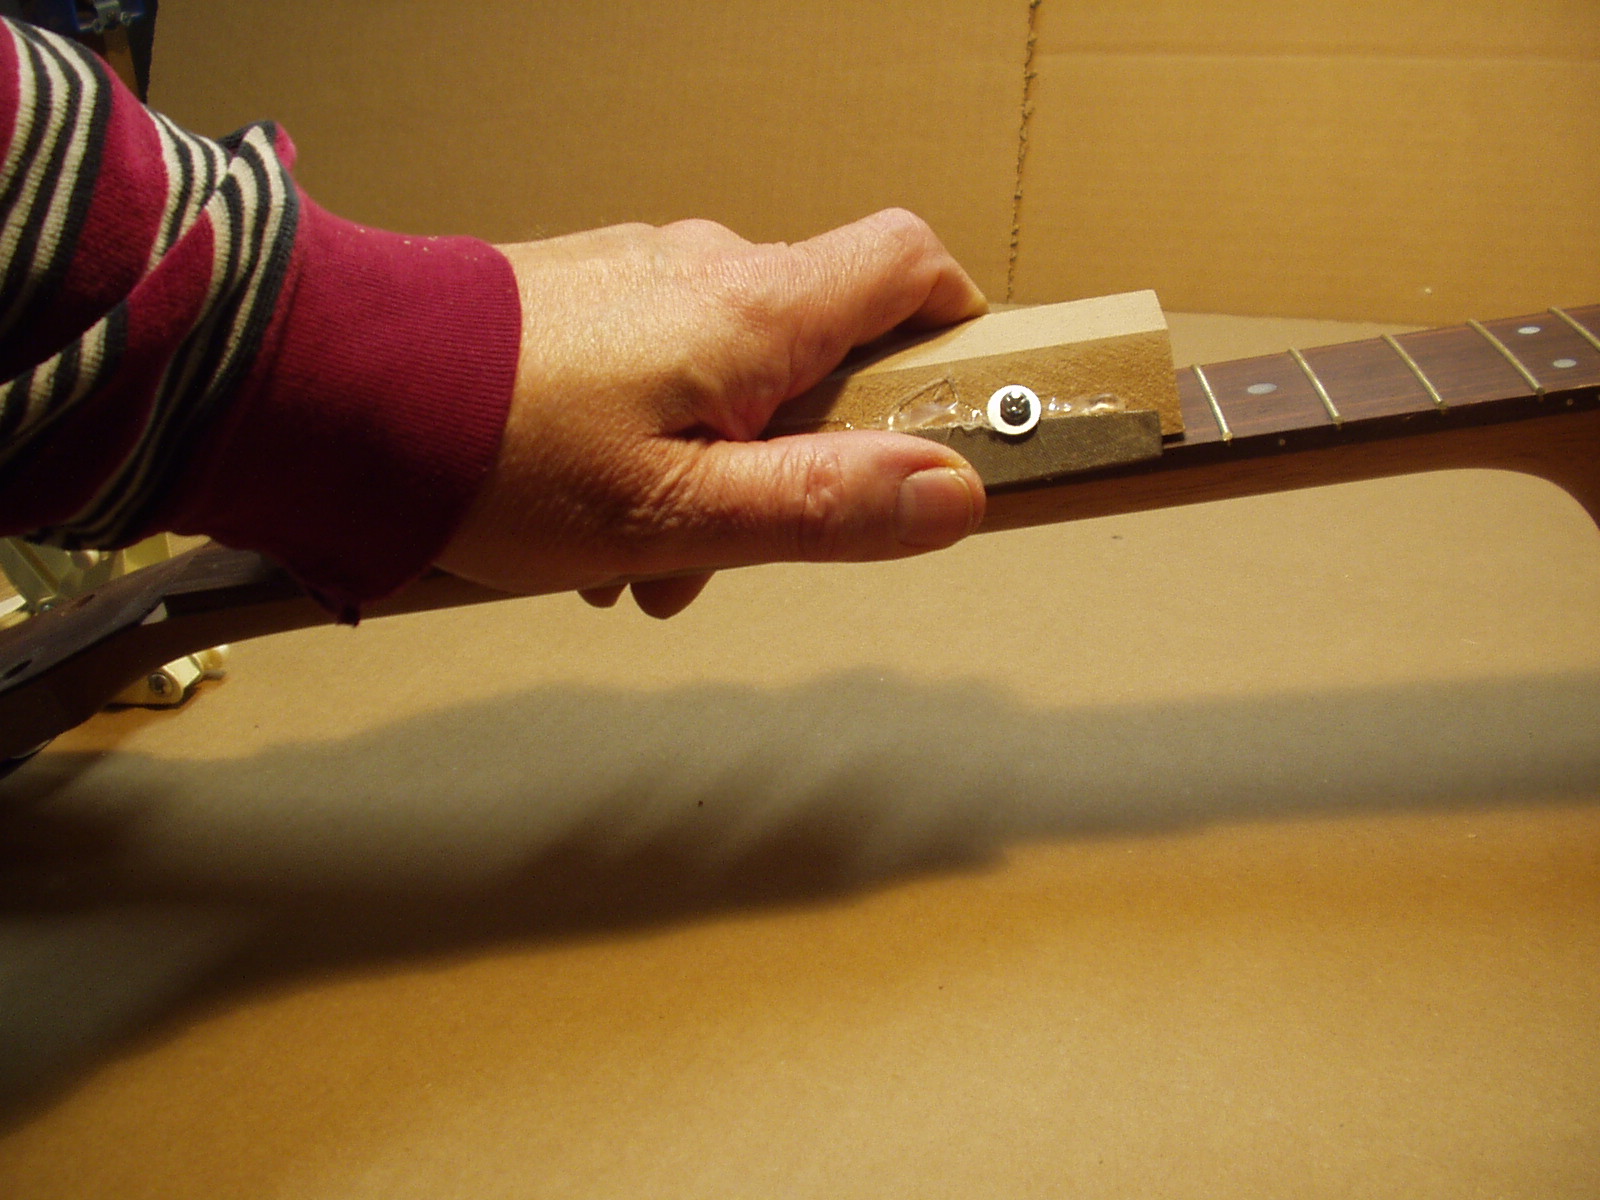
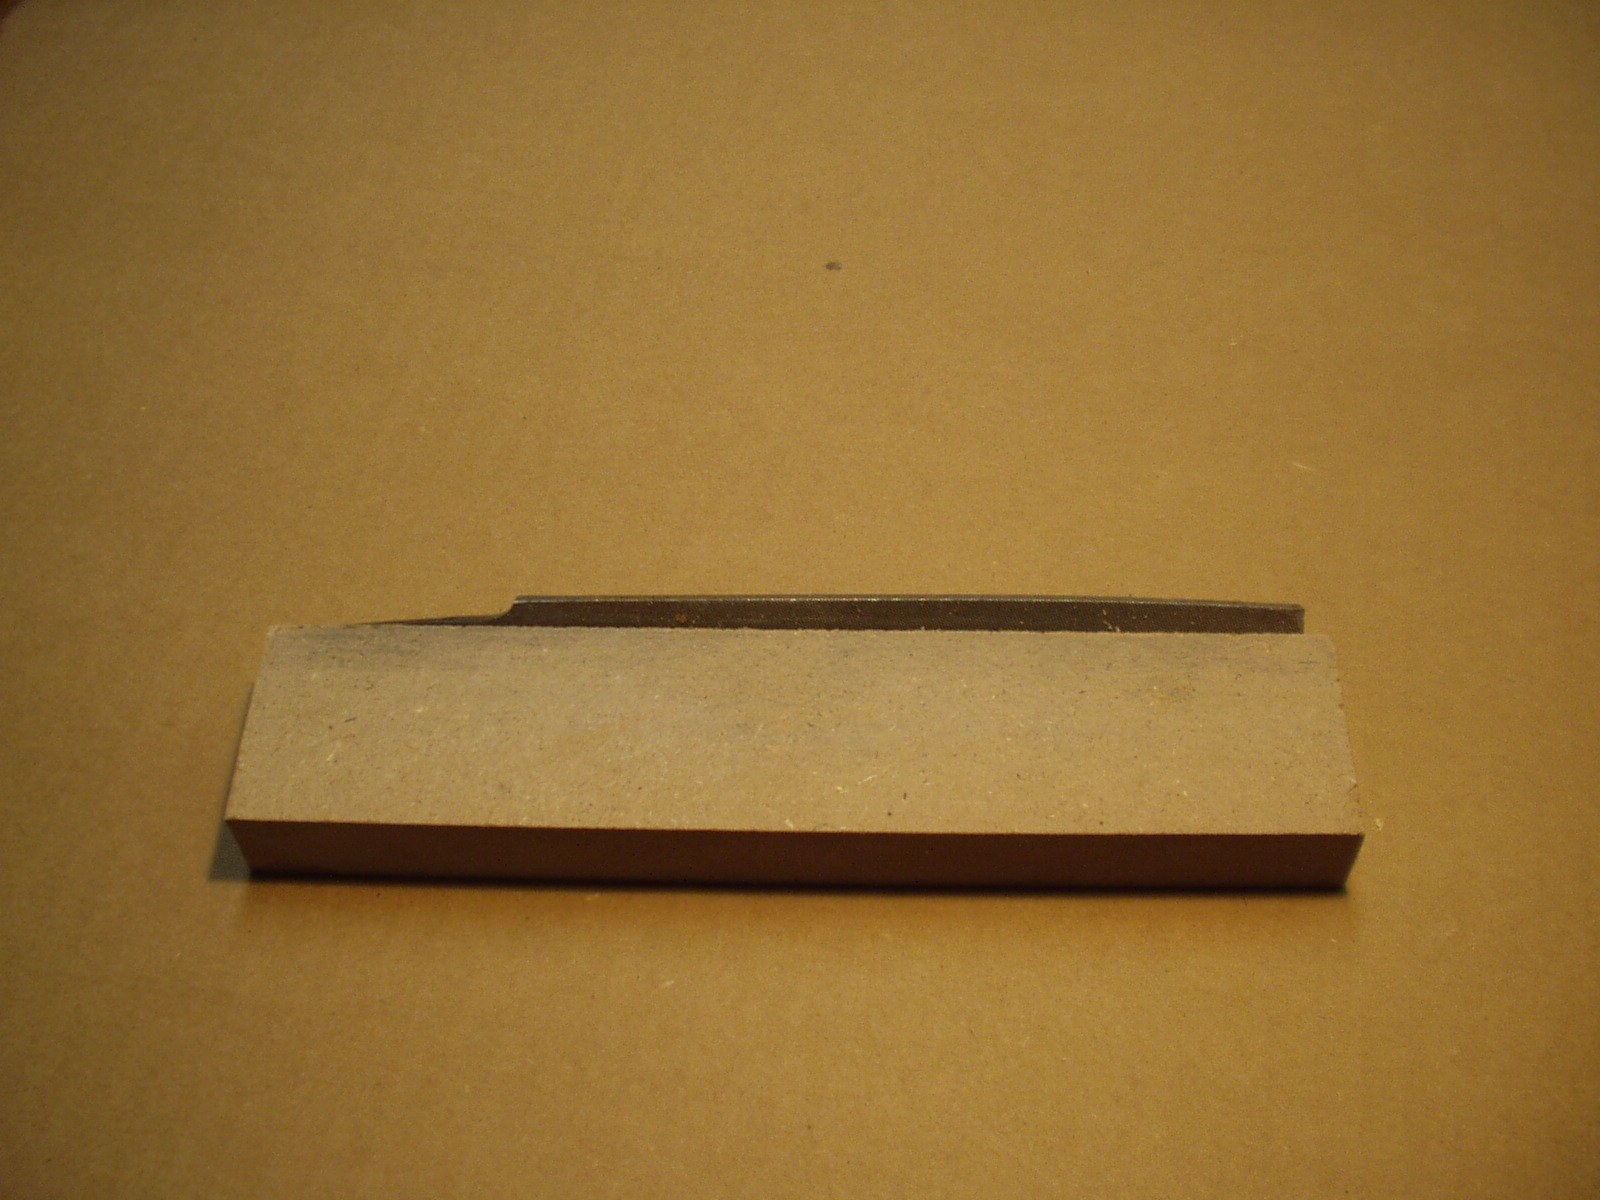
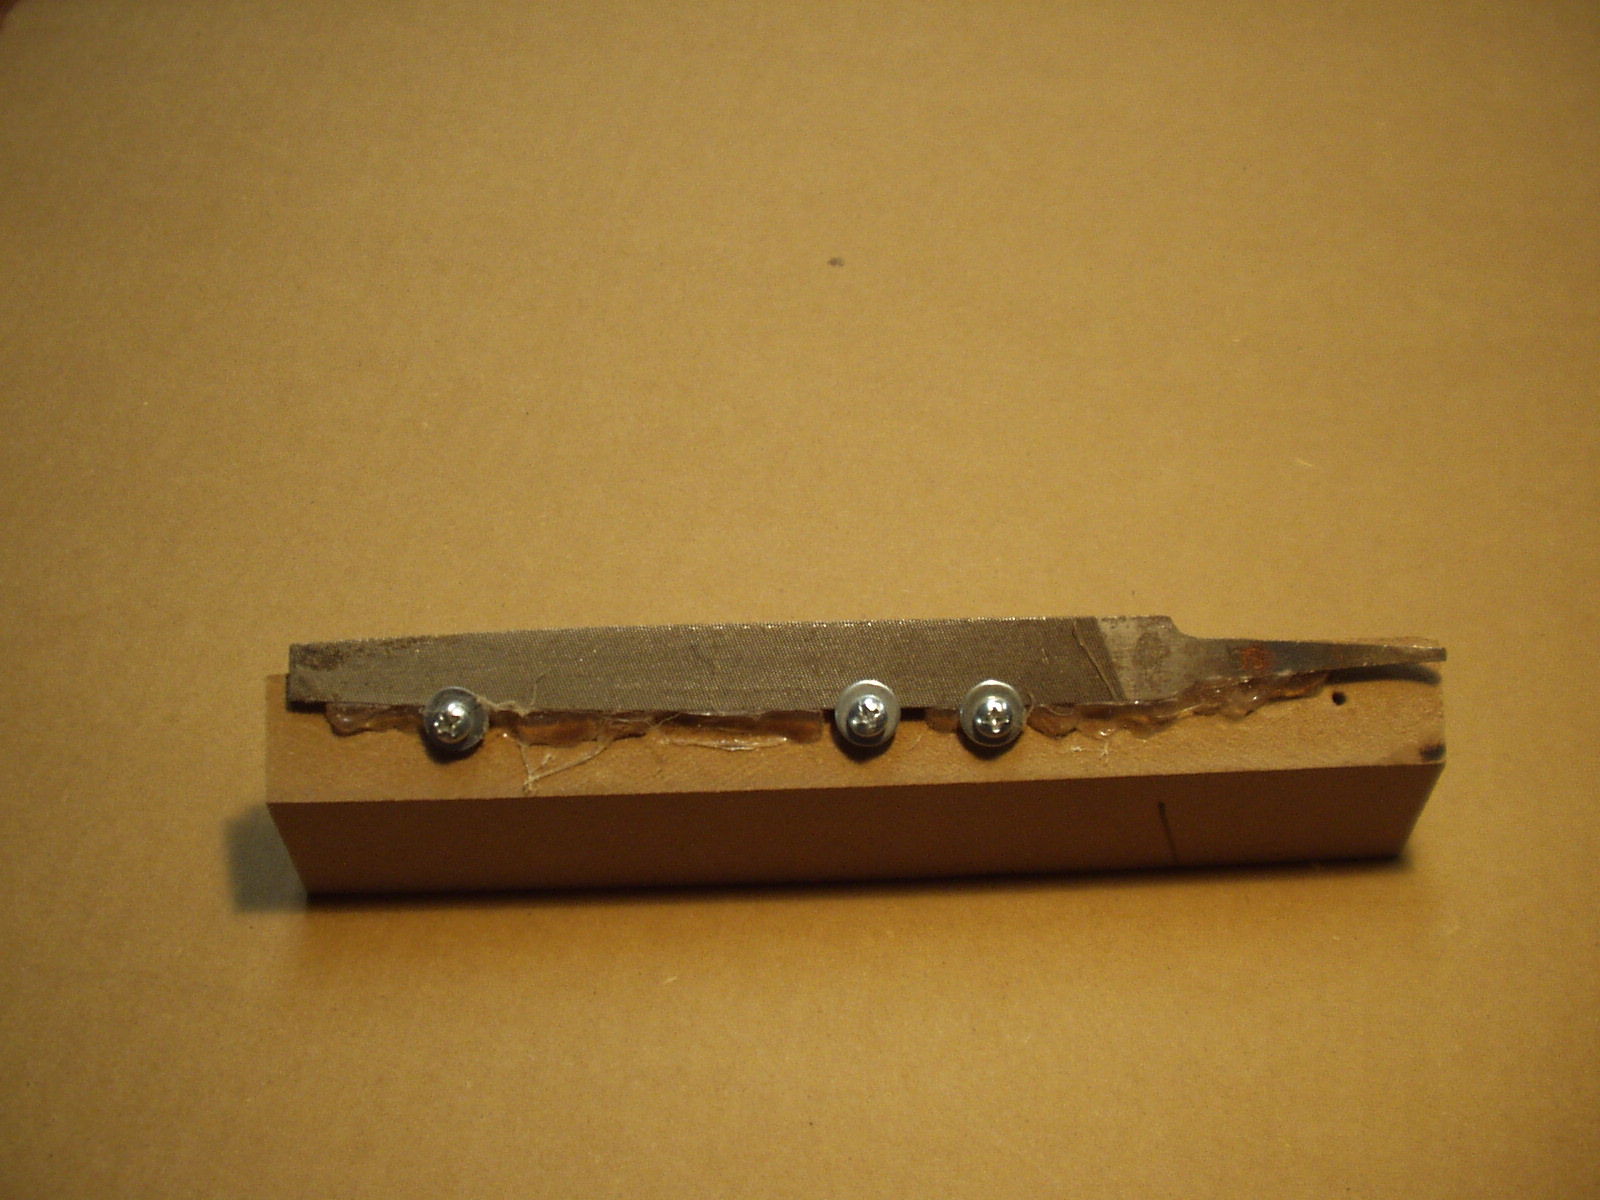
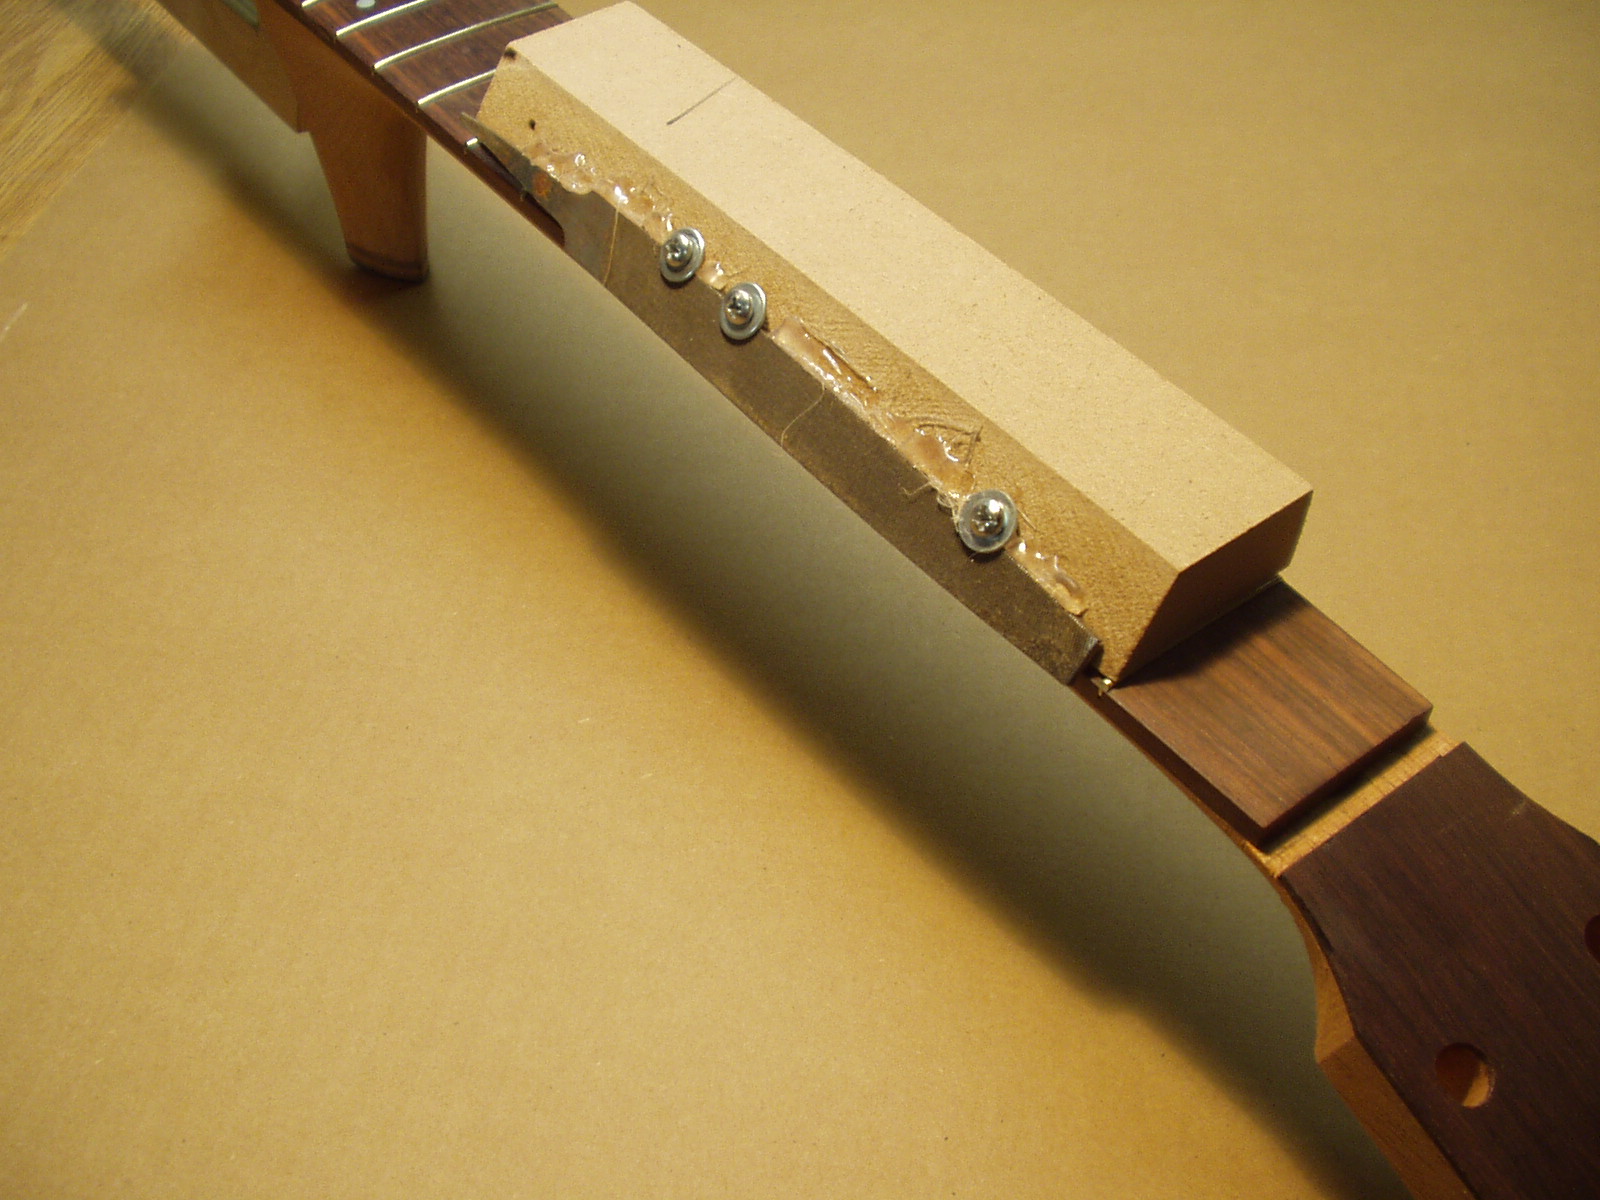
A “Fret End” file block can be
fashioned from a 2”x 6” piece of MDF,
hardwood or softwood. One edge is
cut at a 30-degree angle. Three wood
screws with washers are used to fasten
a small smooth file to the angled edge
of the block. For a little extra stability
hot melt glue was added along the
length of the file.
fashioned from a 2”x 6” piece of MDF,
hardwood or softwood. One edge is
cut at a 30-degree angle. Three wood
screws with washers are used to fasten
a small smooth file to the angled edge
of the block. For a little extra stability
hot melt glue was added along the
length of the file.
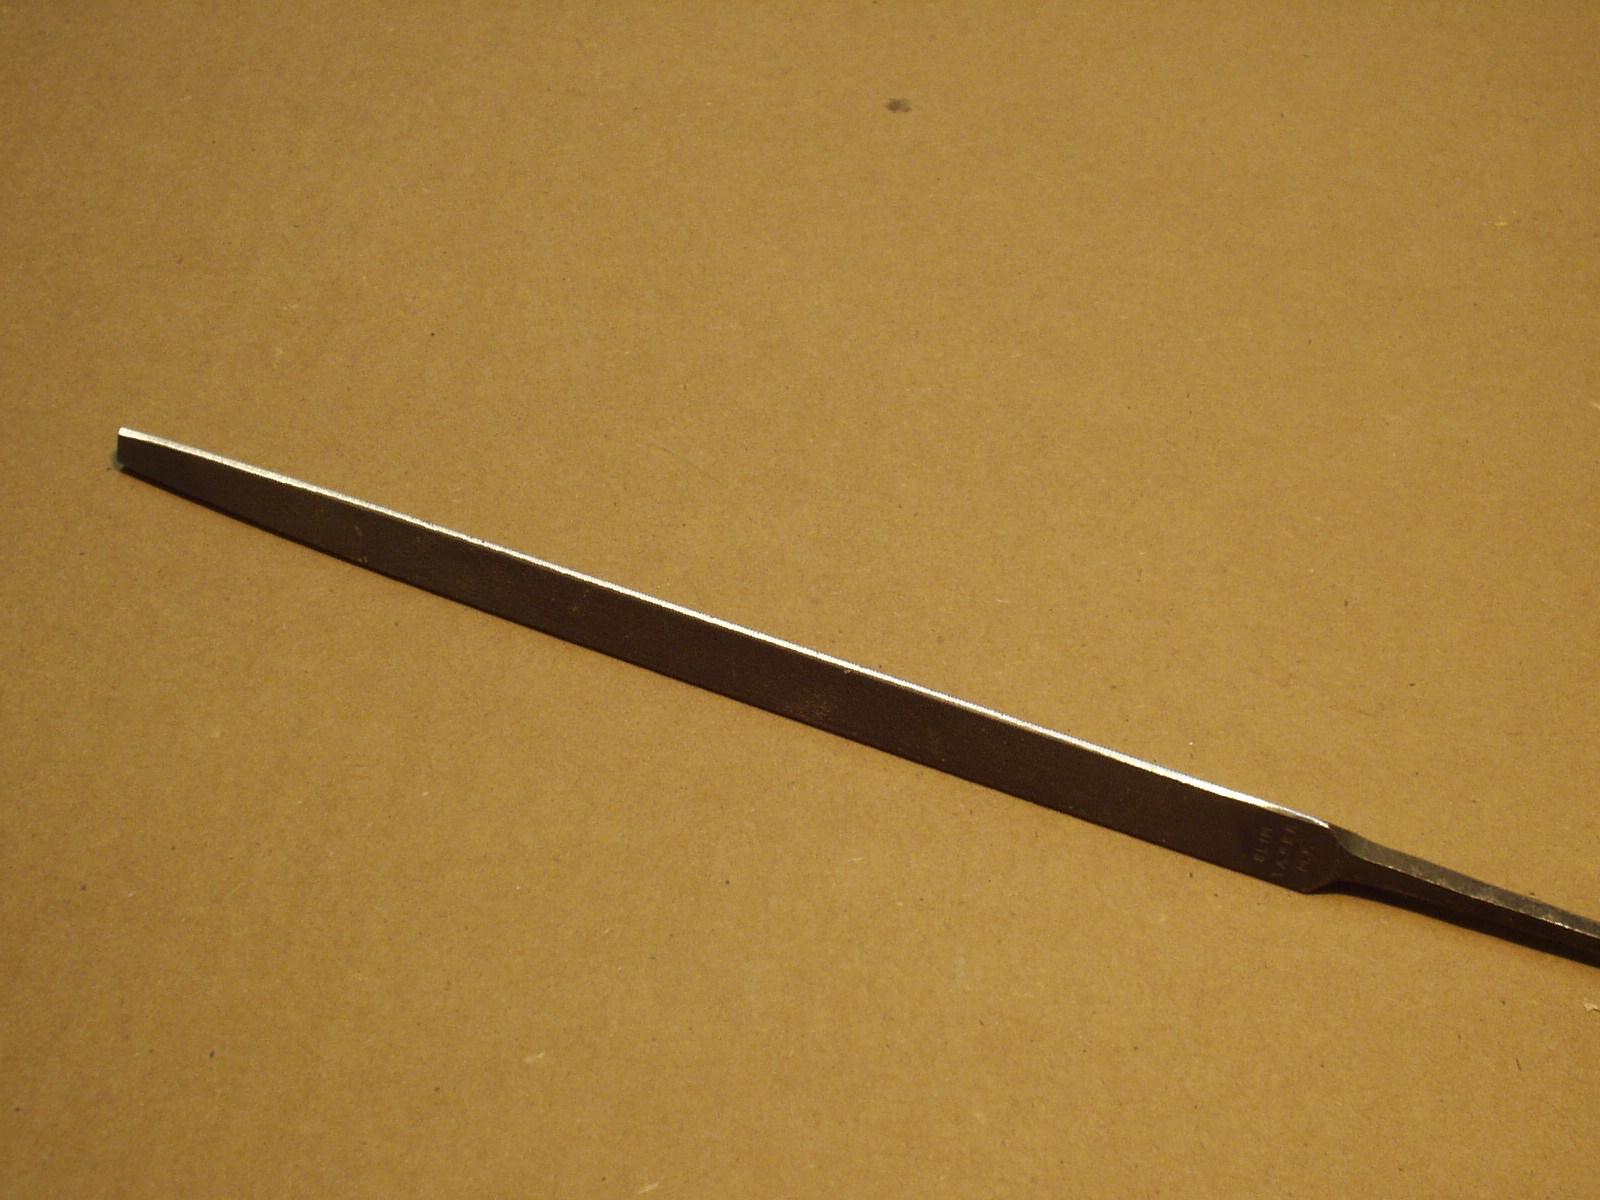
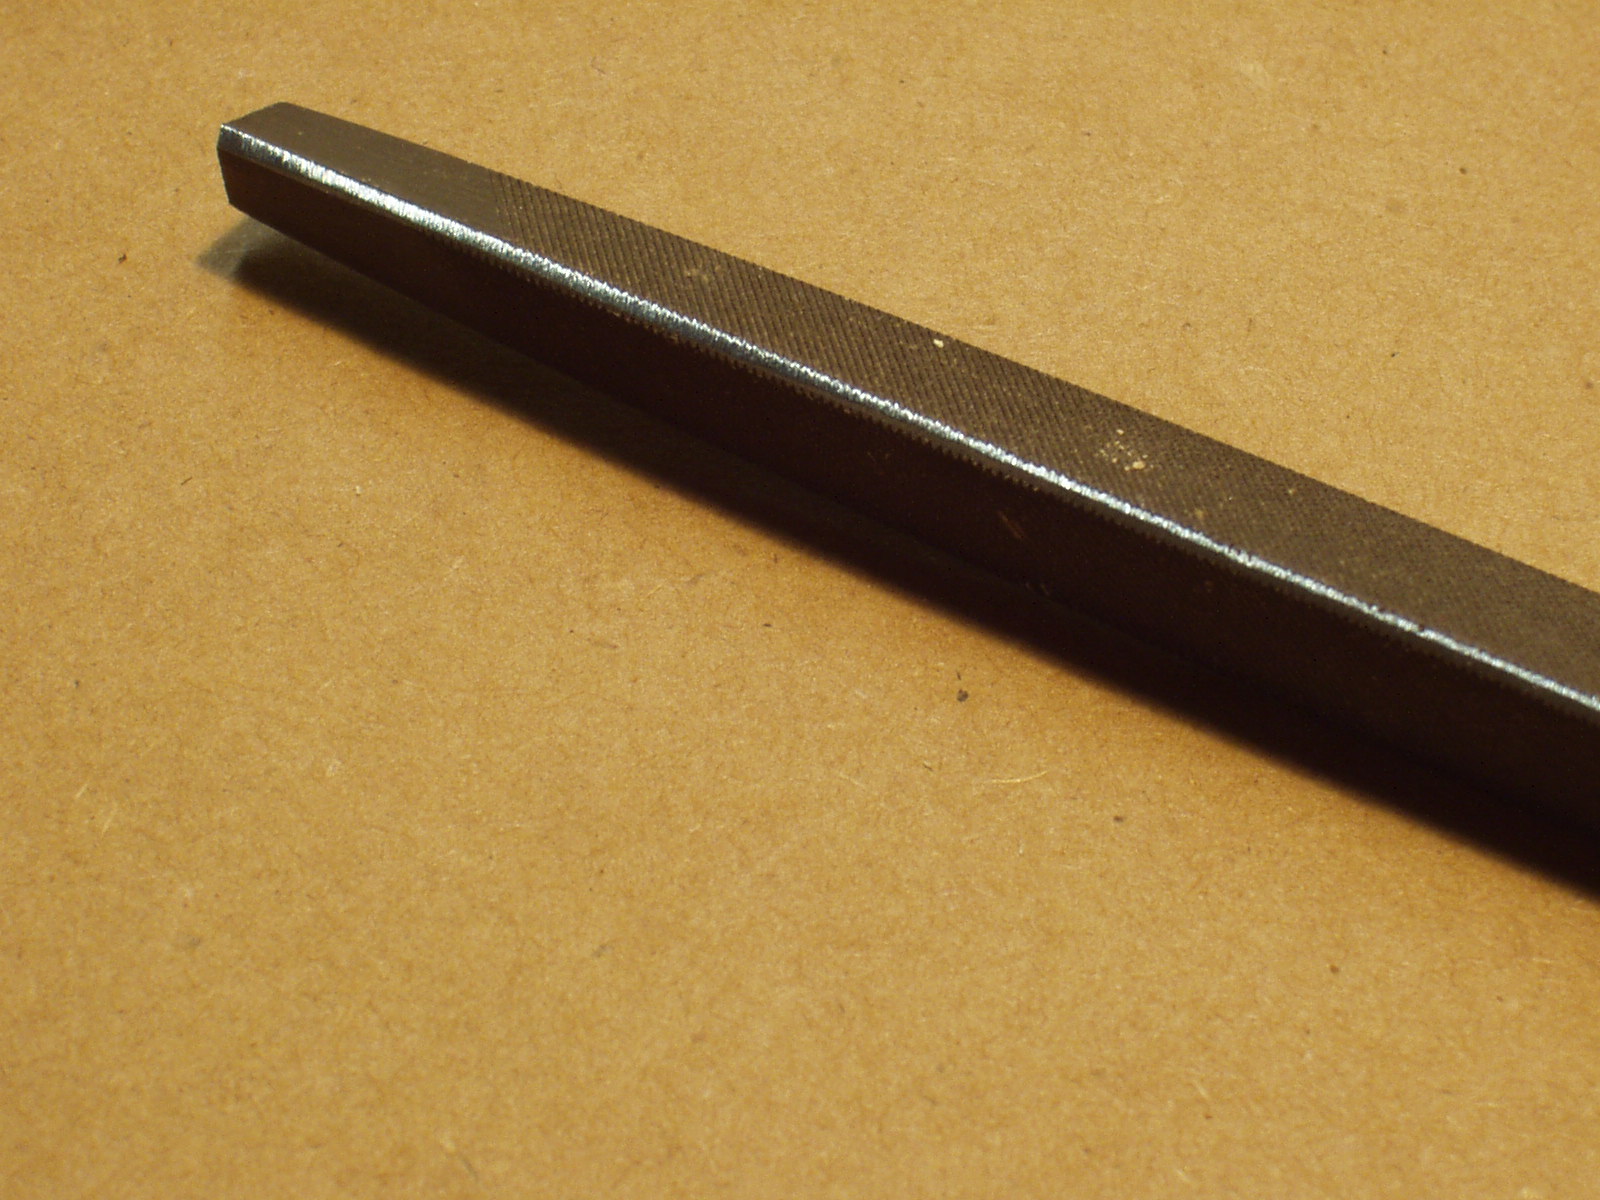
A special file is needed to refine the
shape of the frets without damaging
the fingerboard in the process. Not
surprisingly, such a tool can be seen
at the Martin factory. It is simply a fine
6” triangular file with the three corners
ground to a small flat. This
configuration allows the file to move
along the fingerboard surface while the
cutting edges contact the frets.