Kenneth Michael Guitars, LLC
"Masterwork Guitar Mold System"™
The unique design of this mold incorporates a top and back clamping method
that rivals those used in full-scale production shops.
that rivals those used in full-scale production shops.

The KIT includes all the mold components and the flexible top/back recessed
clamping caul. All parts are precision machined on our CNC equipment.
clamping caul. All parts are precision machined on our CNC equipment.
READ THE INSTRUCTIONS BEFORE STARTING ASSEMBLY – WORK
METHODICALLY AND YOU WILL BE REWARDED WITH A PRECISION ASSEMBLY
MOLD.
METHODICALLY AND YOU WILL BE REWARDED WITH A PRECISION ASSEMBLY
MOLD.
The mold is assembled using 1 ½ “ finish
nails and plenty of TiteBond glue. Begin
by placing several of the mold slats in one
of the profile forms DO NOT GLUE at this
time.
nails and plenty of TiteBond glue. Begin
by placing several of the mold slats in one
of the profile forms DO NOT GLUE at this
time.

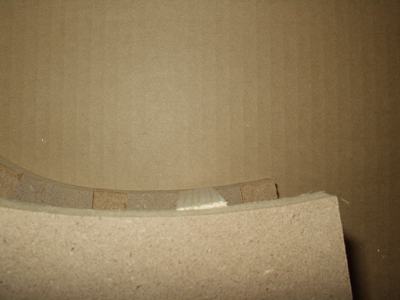
Apply glue to the tops of the slats ---
apply glue to the corresponding slots
in the matching profile form. Position
the profile form to the slats. The slats
must be even or slightly proud of the
profile forms (SEE PICTURE BELOW)
any overhang will be trimmed later in
the assembly process.
apply glue to the corresponding slots
in the matching profile form. Position
the profile form to the slats. The slats
must be even or slightly proud of the
profile forms (SEE PICTURE BELOW)
any overhang will be trimmed later in
the assembly process.

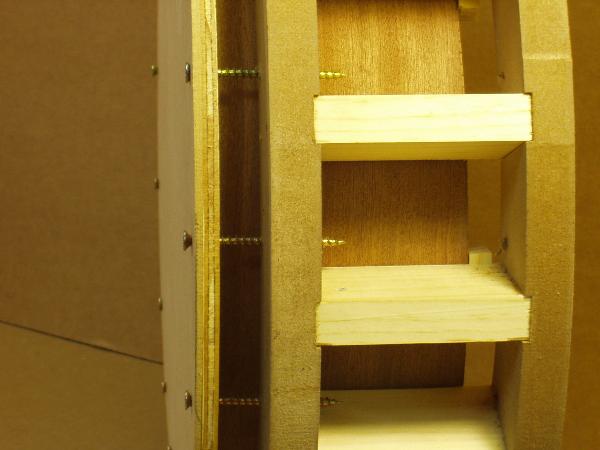
As you progress frequently check to make
sure the assembly is square to the bench
top and that the top and bottom profile forms
are aligned. Use two 1 1/2" finish nails in
each slat. Drive one nail straight and angle
the second nail to create a slight wedge
effect.
sure the assembly is square to the bench
top and that the top and bottom profile forms
are aligned. Use two 1 1/2" finish nails in
each slat. Drive one nail straight and angle
the second nail to create a slight wedge
effect.
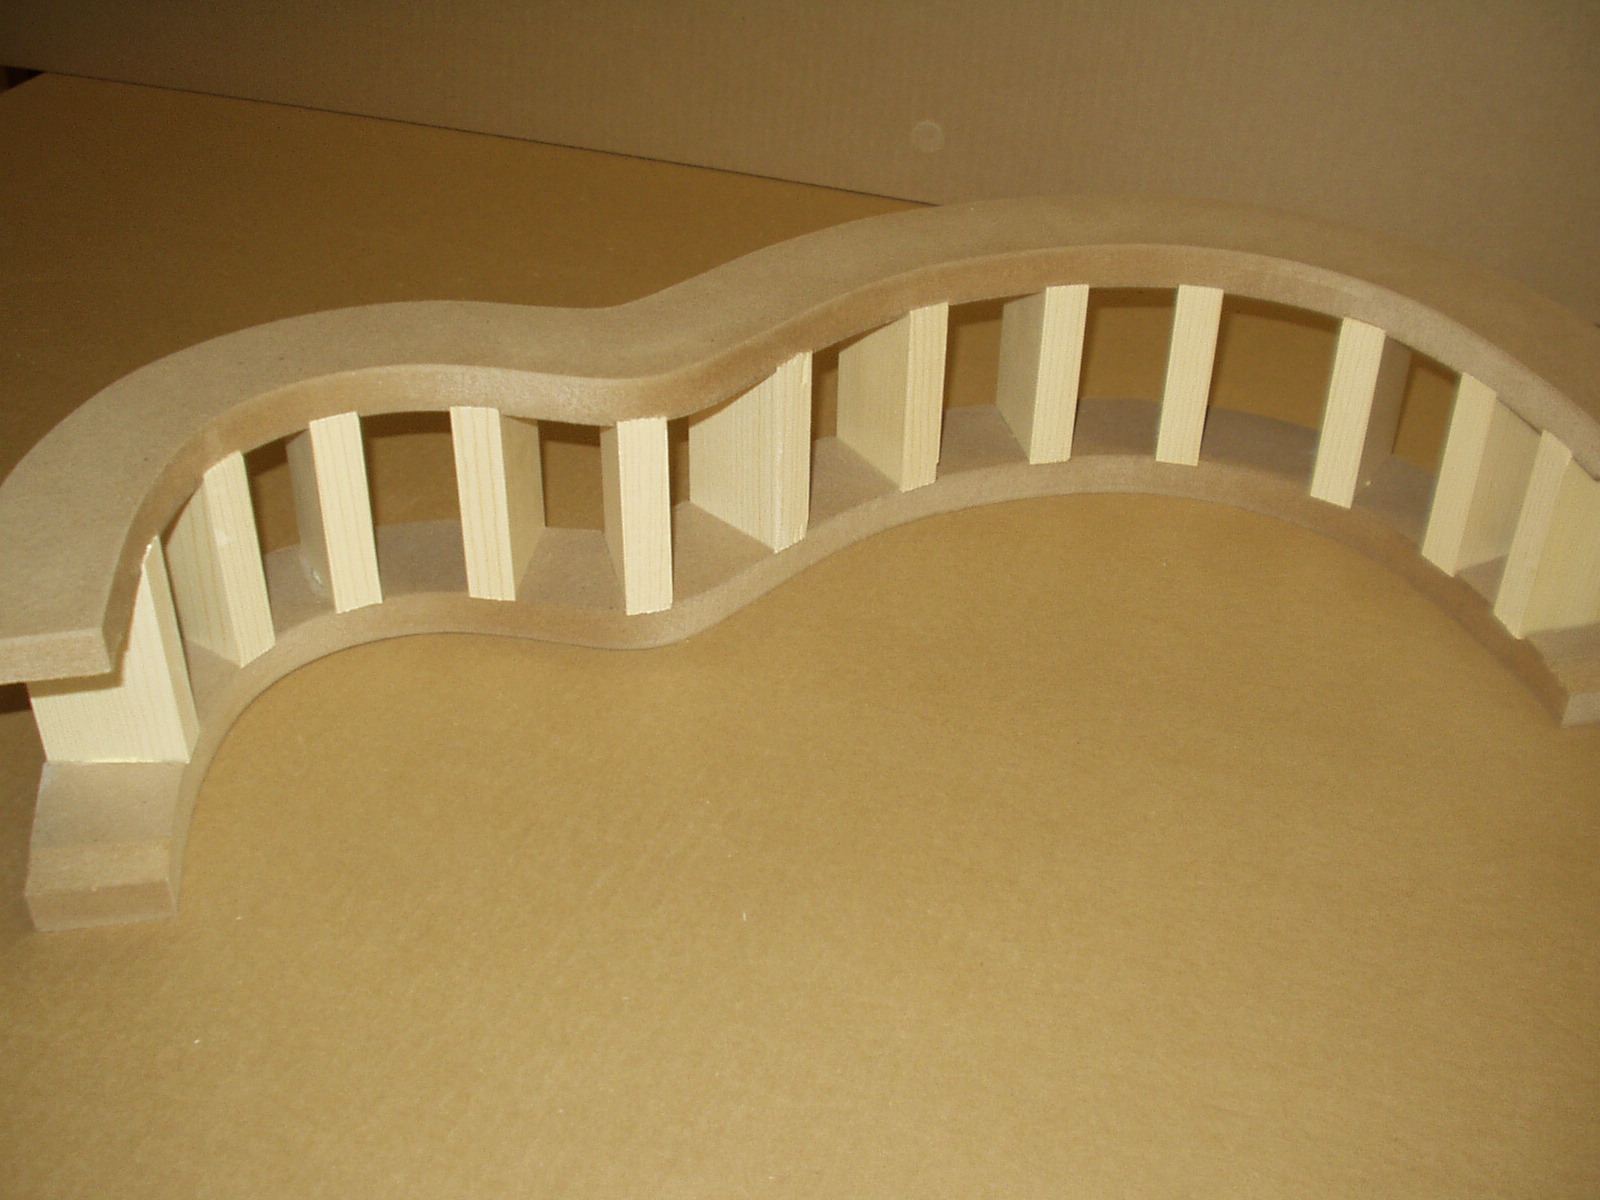
Continued the process adding slats by locating them in the lower profile form
and nailing the top form. Note that the end slats for some style molds will have to
be trimmed because the ends of the profile pieces are narrowed slightly. Slats
are doubled up at the ends of the mold sections.
and nailing the top form. Note that the end slats for some style molds will have to
be trimmed because the ends of the profile pieces are narrowed slightly. Slats
are doubled up at the ends of the mold sections.


Take care and make sure the end
slats are flush and DO NOT GO
BEYOND THE ENDS OF THE
PROFILE FORMS doing so would
change the size of the mold inside
dimensions.
slats are flush and DO NOT GO
BEYOND THE ENDS OF THE
PROFILE FORMS doing so would
change the size of the mold inside
dimensions.

The slat over hang must be uniform and
matching top and bottom profile form.
matching top and bottom profile form.
Flip the assembly over apply glue to the slats and slots – nail in place as
before – check alignment and square frequently. Repeat the above
process for the other half of the mold
before – check alignment and square frequently. Repeat the above
process for the other half of the mold
Allow the two halves to dry for at least 30 minutes before continuing. The next step
is to mate the two mold sections using the provided splice plates. Use clamps and
bar clamps to align the two halves. The centerlines of the plates will match the
centerlines of the mold. PRE-DRILL all the holes than secure the plates with the 2”
screws.
is to mate the two mold sections using the provided splice plates. Use clamps and
bar clamps to align the two halves. The centerlines of the plates will match the
centerlines of the mold. PRE-DRILL all the holes than secure the plates with the 2”
screws.

The slat contours must now be refined.
Using a ¼” wood chisel and sanding drum,
shave the slats even with the profile form.
Start at the outer edge; take shallow cuts,
work toward the center. Work from the top
and bottom of the mold. Keep the chisel at a
slight angle to the slat; this will keep the
chisel from digging into the wood. For the
final cuts place the chisel directly on the
profile form and slide it across the slat –
again from the top and bottom side of the
mold. ITS BEST TO LEAVE THE END
SLATS UNTIL LAST.

An excellent finish sanding tool can be
fabricated from a 6” piece of 2" dia.PVC
pipe. Using 3M Super 77 adhesive, glue
a 3 ½” piece of 80 grit sandpaper to the
center of the pipe. Wrap both end of the
pipe with duct tape along side the sand
paper NOT ON TOP OF THE PAPER use
enough layers so the tape is even with
the grit on the sand paper. The tape will
act as a bearing surface guided by the
profile form – the high spots on the slats
will be sanded flush

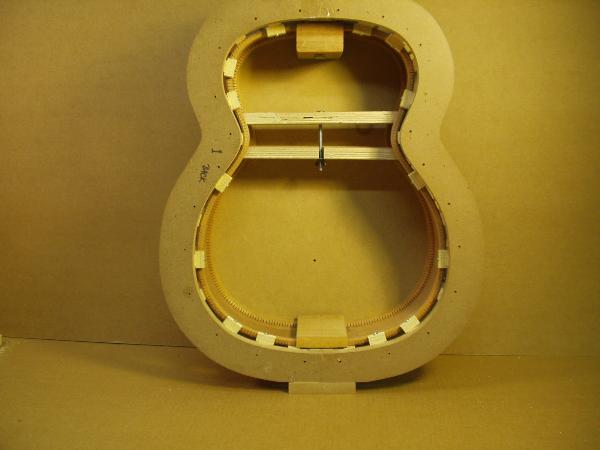
During the rim assembly process the top
and bottom of the mold should have been
defined, the rim should always be placed
in the mold in the same orientation.
and bottom of the mold should have been
defined, the rim should always be placed
in the mold in the same orientation.
Re-drill the rim leveling blocks to enlarge the holes to -------- than cut the blocks into
individual pieces.
individual pieces.


The leveling blocks will have two different
positions one for gluing the top plate and a
different location when gluing the back. Start
with back plate gluing position.
positions one for gluing the top plate and a
different location when gluing the back. Start
with back plate gluing position.
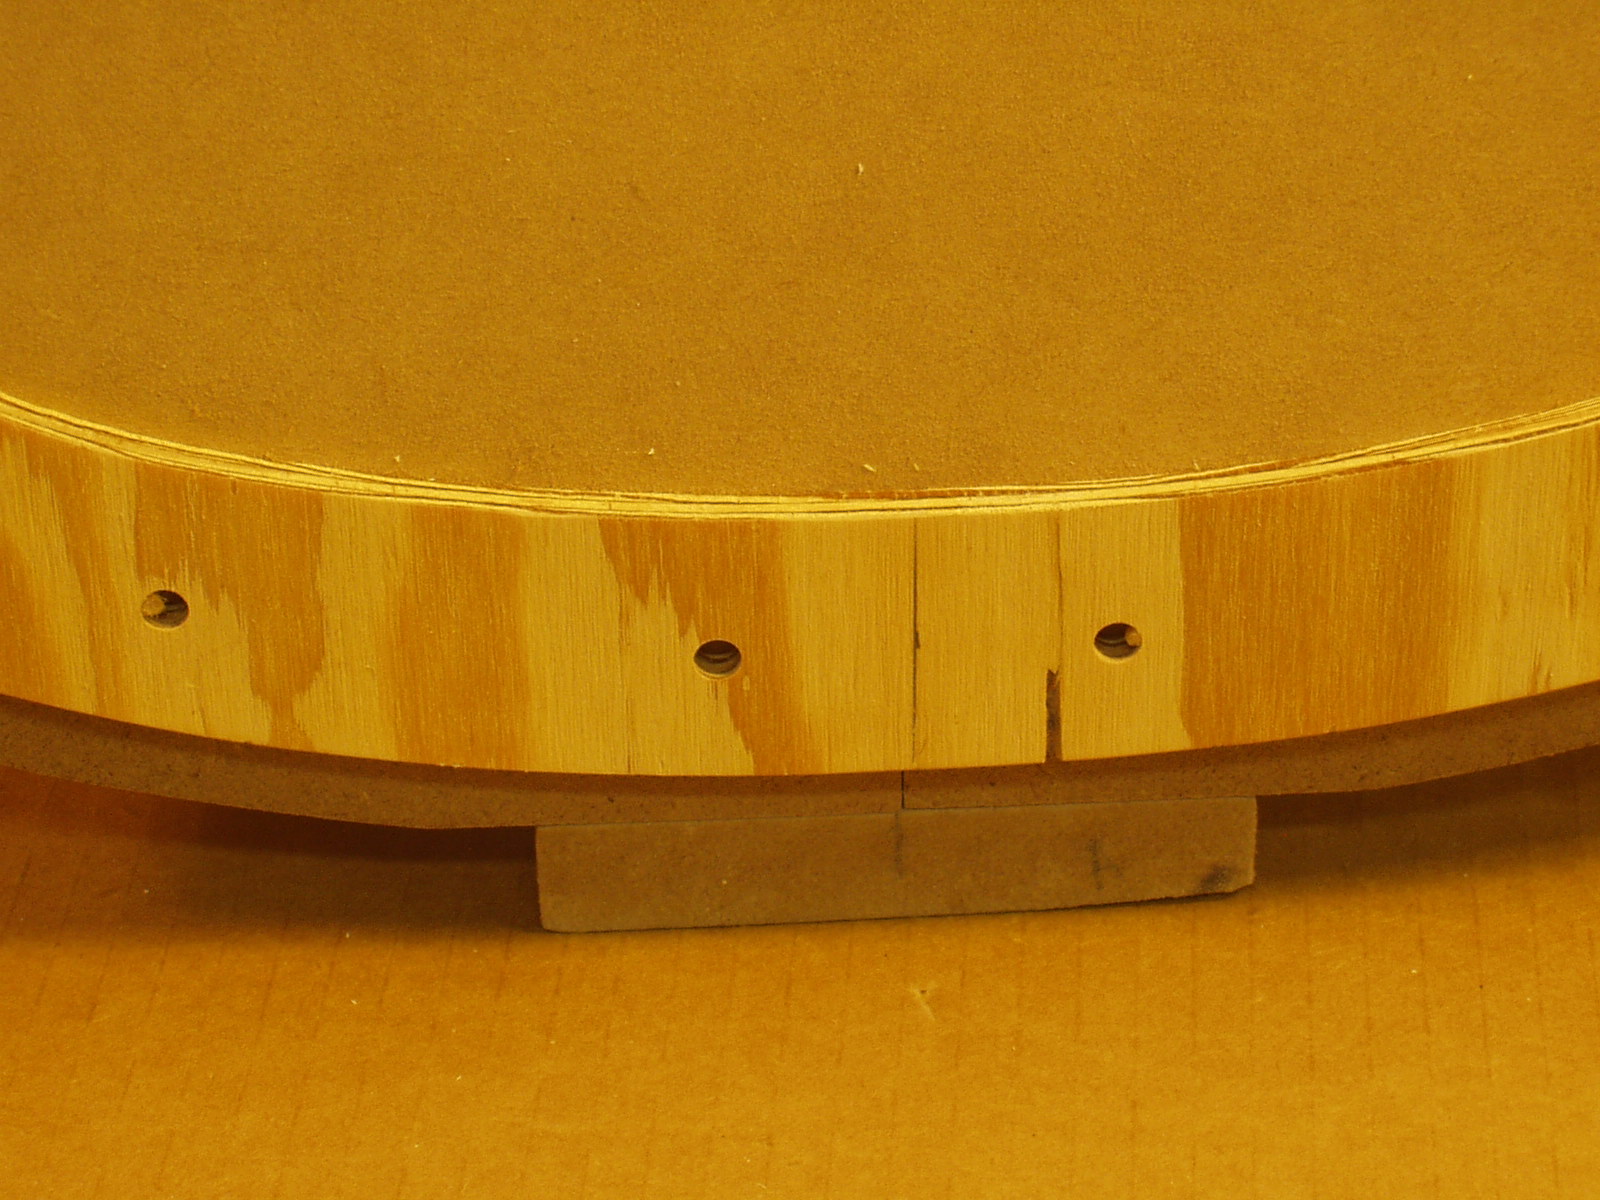
Since the plane of the top edge of the rim
is almost flat, set the rim in the mold 1 ½”
from the profile form surface around the
entire perimeter.
is almost flat, set the rim in the mold 1 ½”
from the profile form surface around the
entire perimeter.

When the rim is positioned properly
secure in place with the waist
clamp RE-CHECK
ALIGNMENT!!
secure in place with the waist
clamp RE-CHECK
ALIGNMENT!!
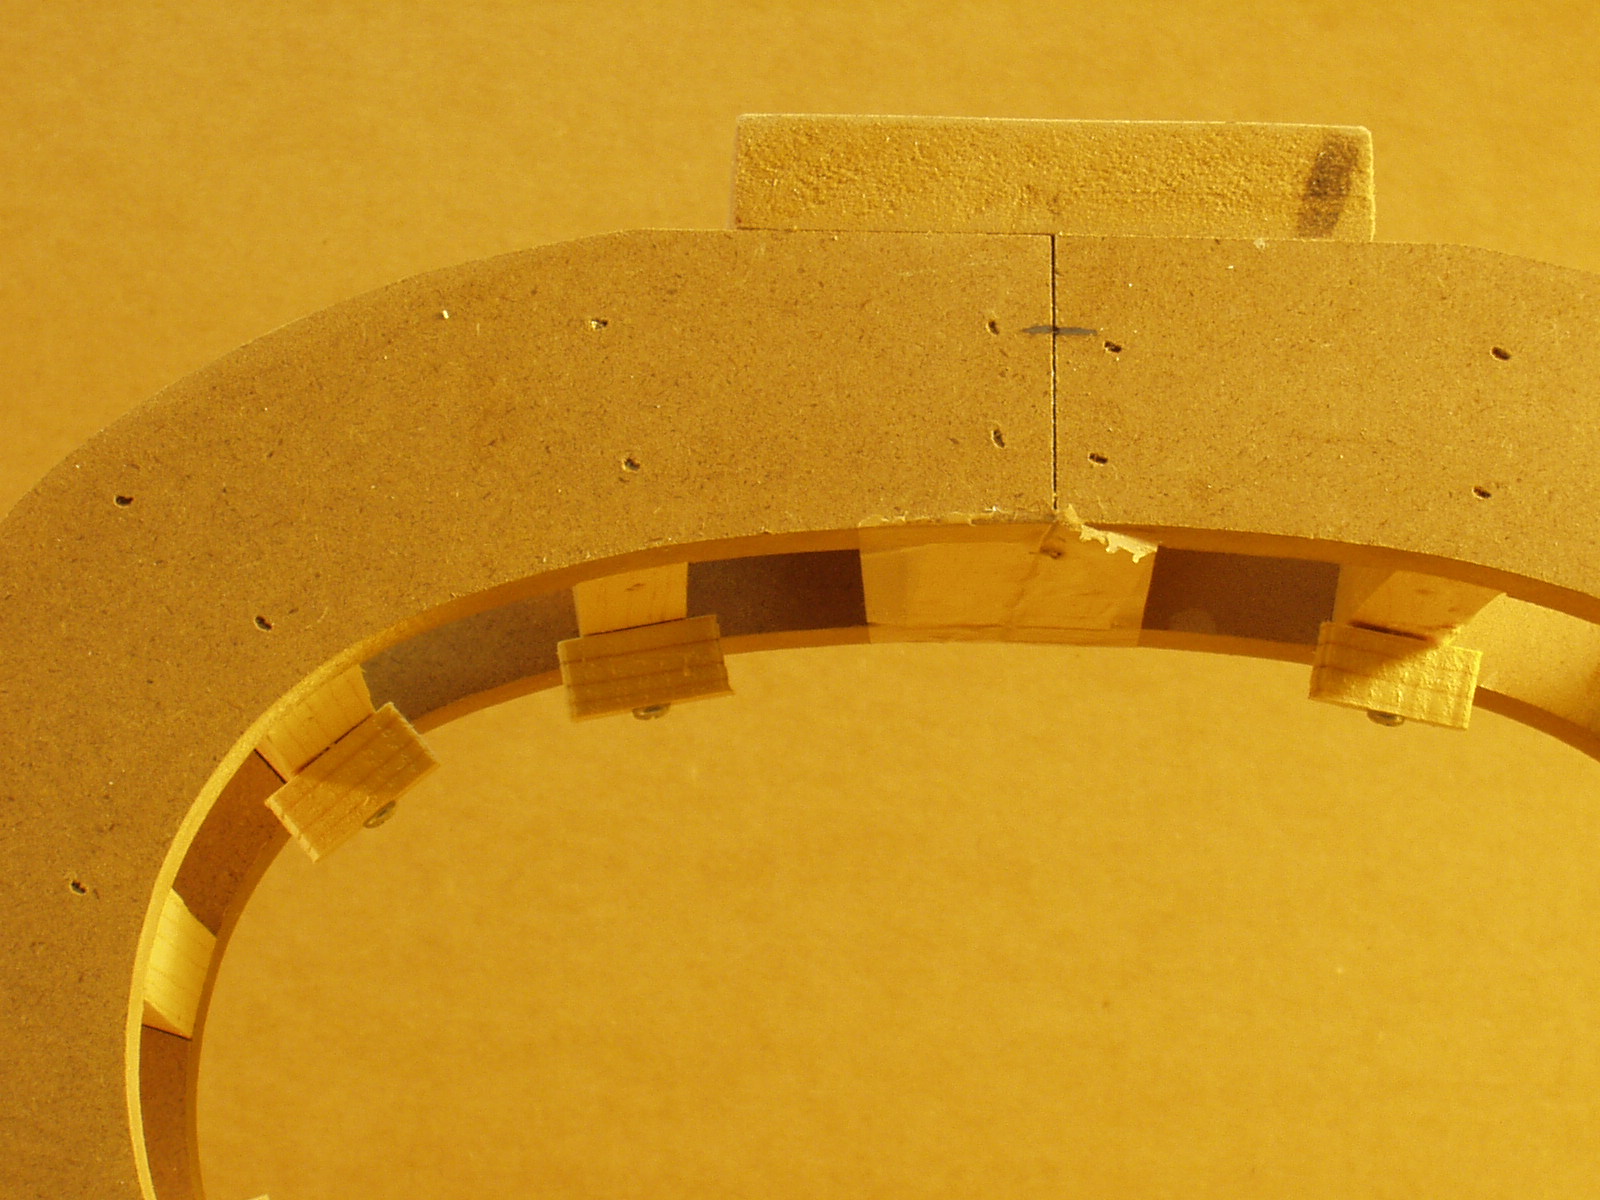
Place a leveling block along the rim
edge --- center the hole on the slat
and drill an 1/8” pilot hole.
edge --- center the hole on the slat
and drill an 1/8” pilot hole.

Fasten the leveling block to the slat
with a #6 x 1” pan head screw.
with a #6 x 1” pan head screw.
Repeat this process along the rim edge, 5 slats per side, Its best not to place a
leveler on the inner most waist slat.
leveler on the inner most waist slat.

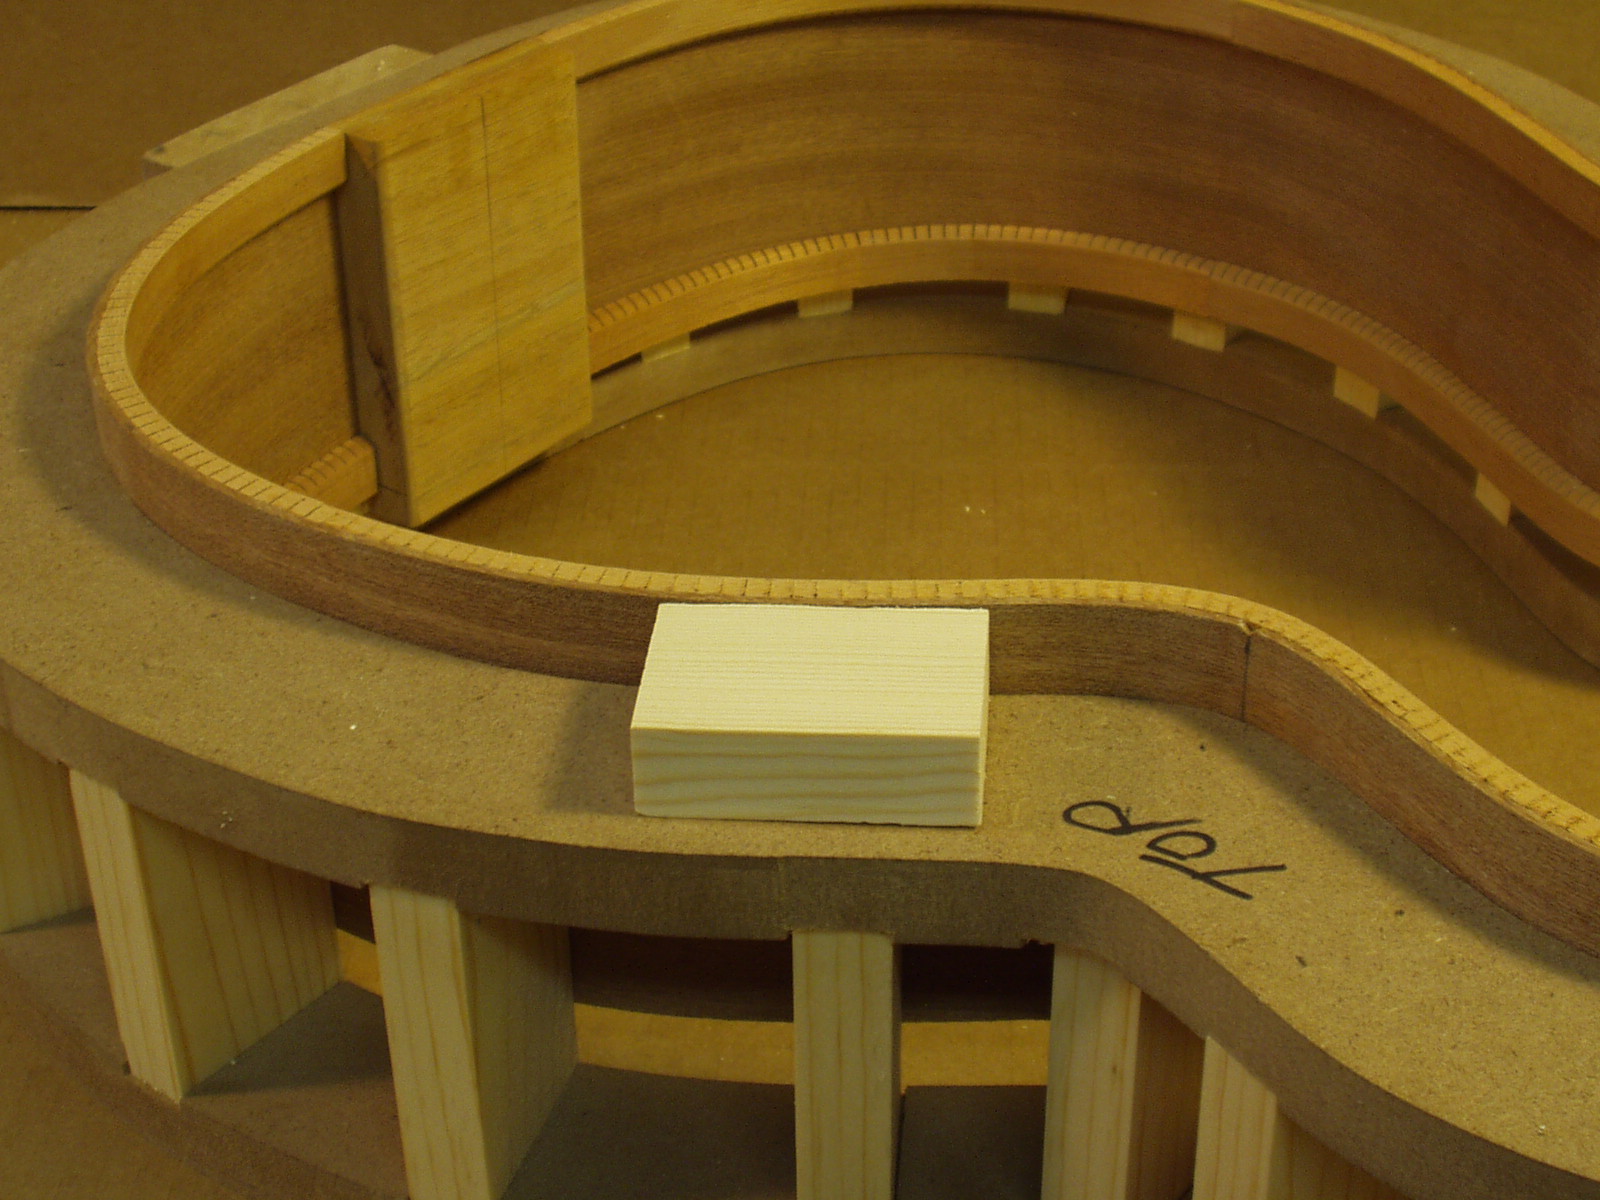
To set up the mold for gluing on the top
the same levelers are use in a different
position. Unscrew all the levelers and set
aside. Slide the top edge of the rim ¾”
above the surface of the profile form --- a
small block of wood works good as a gage.
the same levelers are use in a different
position. Unscrew all the levelers and set
aside. Slide the top edge of the rim ¾”
above the surface of the profile form --- a
small block of wood works good as a gage.
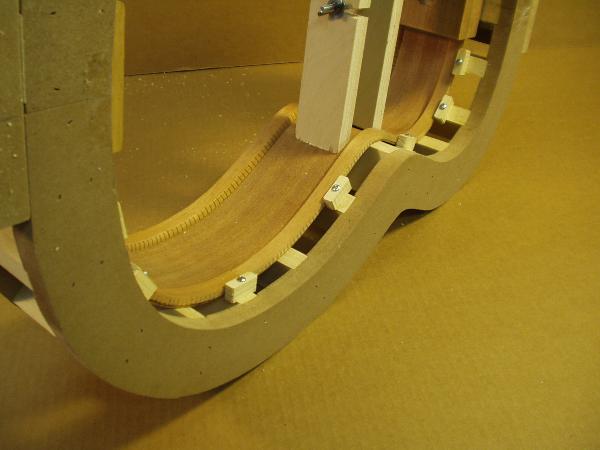
Pre-drill and screw the levelers along the back edge of the rim using the above procedure.
Note that the levelers will follow the contour of the back and thus completely support the rim
assembly when gluing on the top plate
Note that the levelers will follow the contour of the back and thus completely support the rim
assembly when gluing on the top plate
Gluing the clamping caul together is just a matter of appling liberal amounts
glue and aligning the perimeter reinforcement with edge of the 1/8” profiled
layer. The more clamps the better.
glue and aligning the perimeter reinforcement with edge of the 1/8” profiled
layer. The more clamps the better.

Make a mark on the mold upper bout
centerline 1 ¼” from the inside.
centerline 1 ¼” from the inside.
Mark the centerlines on both ends of the clamping caul using the END MOST
pilots as reference. Position the caul to the mold using the mark at the upper
bout and the centerlines to locate --- clamp in place
pilots as reference. Position the caul to the mold using the mark at the upper
bout and the centerlines to locate --- clamp in place

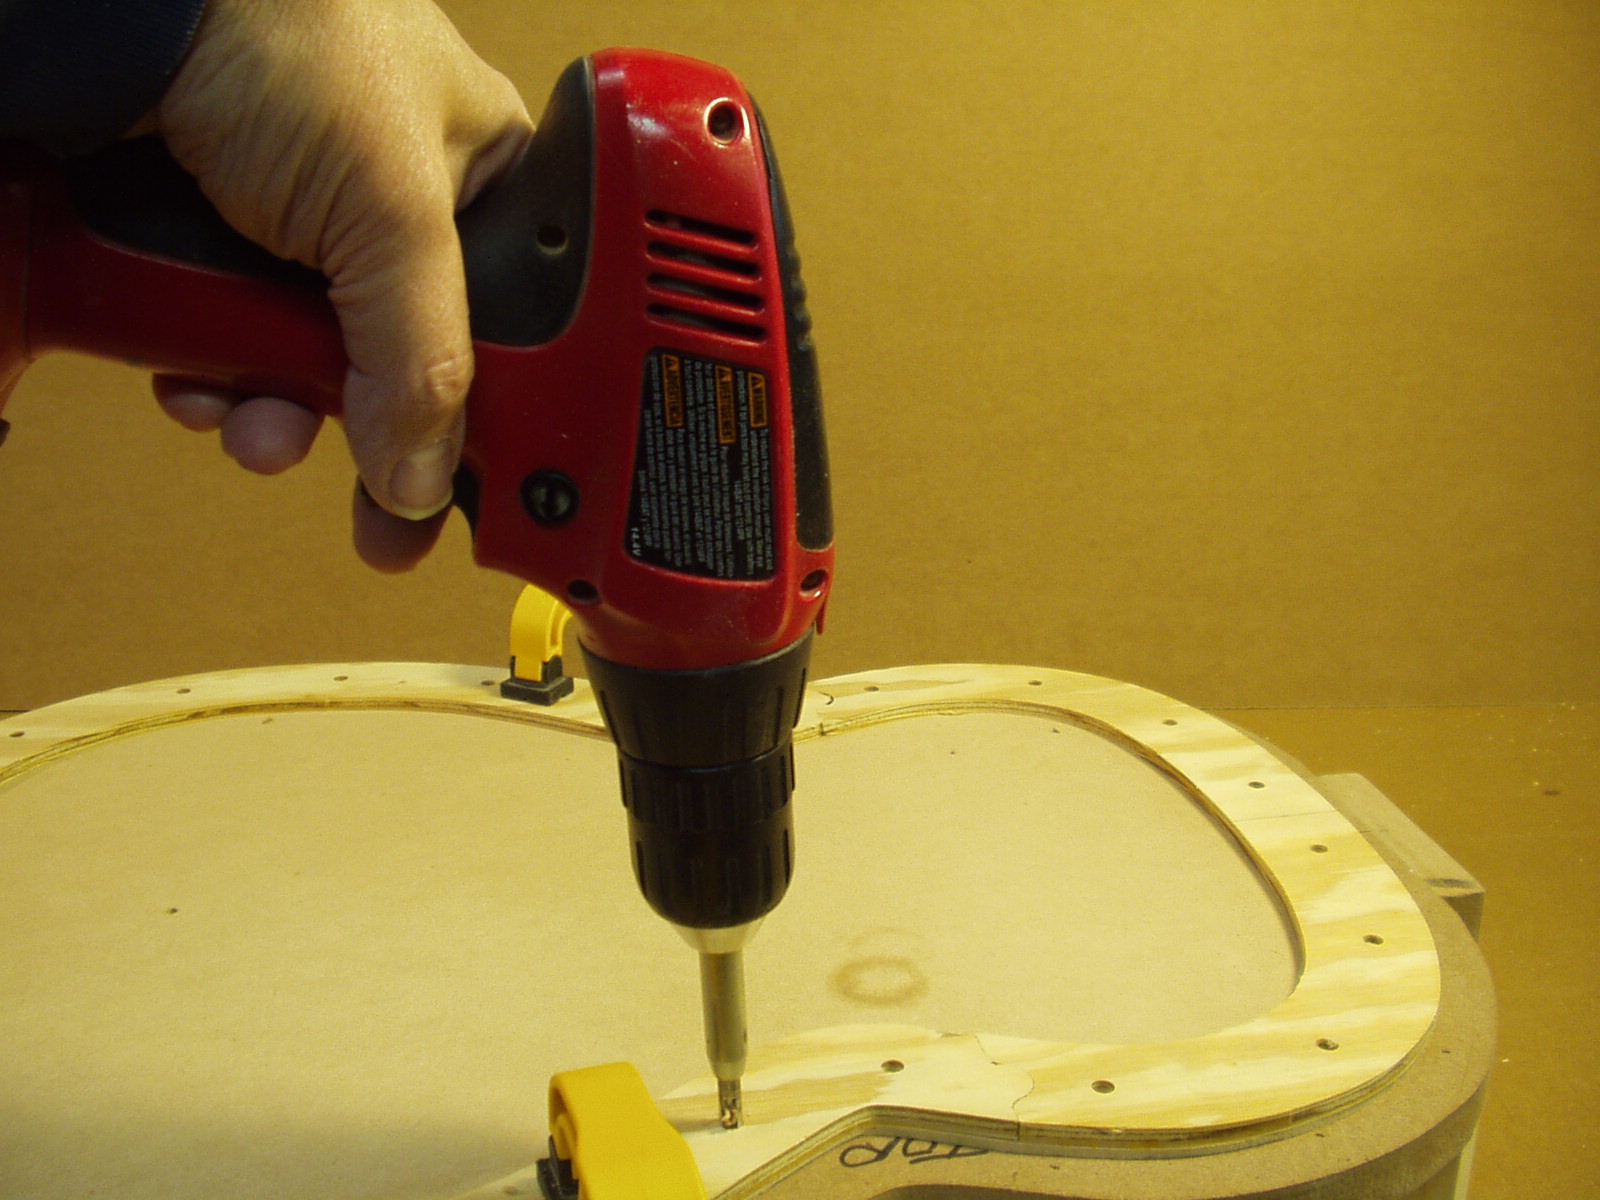
Drill 1/8” pilot holes through the caul and
into the mold – use the holes in the caul
as guides all the way around.
into the mold – use the holes in the caul
as guides all the way around.

The above procedure is repeated on
the opposite side of the mold. After
that is completed the holes in the
clamping caul must be drilled slightly over
size using a 3/16” drill bit. This will allow
for minor adjustments when actually
gluing the top or back to the rim
the opposite side of the mold. After
that is completed the holes in the
clamping caul must be drilled slightly over
size using a 3/16” drill bit. This will allow
for minor adjustments when actually
gluing the top or back to the rim

Using the clamping system is straight
forward – the levelers are secured in the
top or back locations that we pre-drilled
the top or back is placed on the rim,
pinned, taped or rubber banded to keep it
from moving out of position. The caul is
placed on top with the recess down to
allow for the contour of the top or back.
Fasten with 2 ½” screws. Final
tightening should be done by hand.
Viewed from inside the rim, it can be seen that the clamping caul applies
pressure directly to the perimeter of the rim and also allows clearance for the
top/back contour
pressure directly to the perimeter of the rim and also allows clearance for the
top/back contour

Careful hand tightening will result in a perfect plate to rim contact.